

Managing CRM and calendar separately for activities becomes tedious and time-consuming. You have to manually update changes in Calendar as well as CRM. If you use the default calendar that Dynamics 365 provides, you’ll need to create the activity for every individual contact separately.
What if you can get rid of this old-fashioned updating style? And what if you get free of the hassle of creating activities separately for each contact?
With the right Dynamics CRM Calendar, your activity management becomes seamless and hassle-free. It will let you create and manage customer events and activities simultaneously from a single page.
So, it is important to know how to view, create or edit customers’ activities straight from within your Dynamics Calendar extension.
Let’s see how you can do all these operations from a Dynamics Calendar extension; Calendar 365.
Create Customers’ Activities in Calendar 365
The first thing you must know is how to create a new activity in your Calendar.
Follow the steps below to create a customer’s event or activity in Calendar 365.
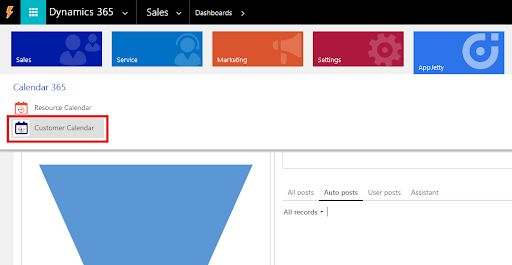
– Go to the Calendar 365 tab from the top-left corner of your Dynamics 365 CRM window. Choose the Customer Calendar from the two calendars available.
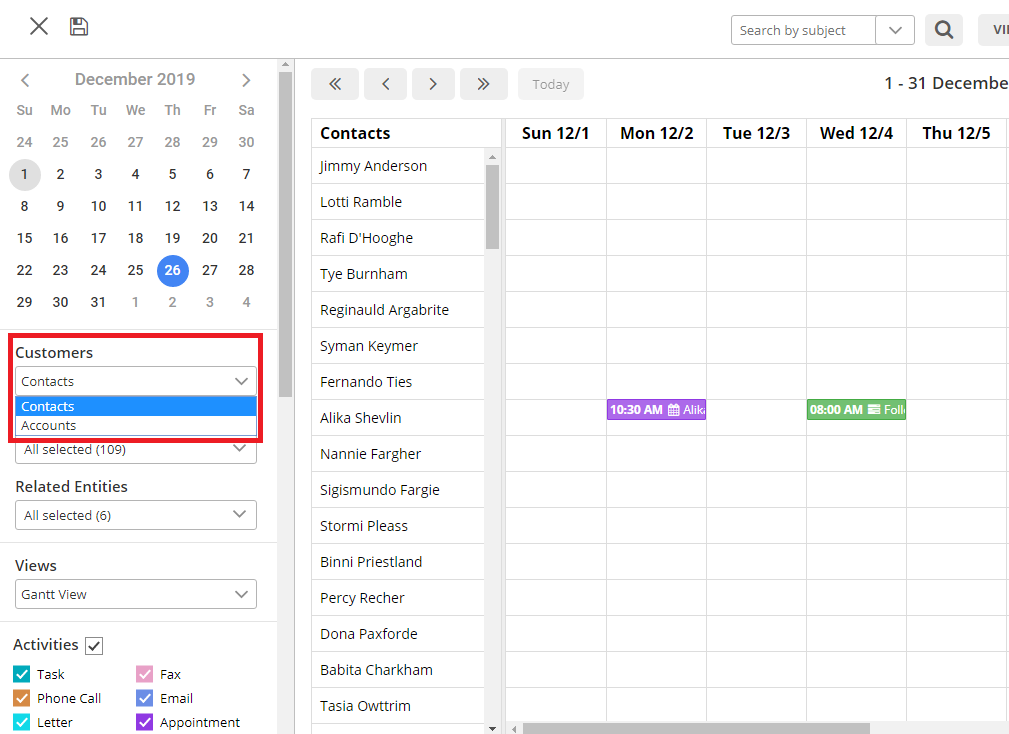
– On clicking this option, you will be directed on the calendar screen. There you will have two options in the drop-down menu under Customers tap. One is Contacts (for B2C businesses) and the other is Accounts (for B2B businesses).
– Here we are selecting ‘Contacts’ from the drop-down menu.
Create and Manage Custom Activities with Dynamics Calendar
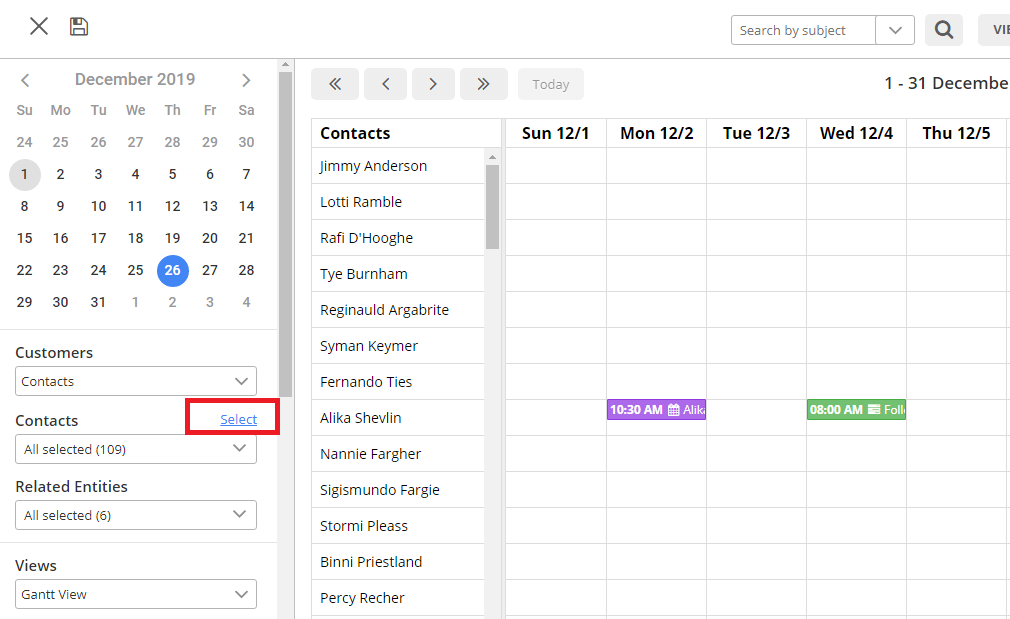
– Click on the ‘Select’ button. A lookup dialogue box will open up.
– Search for the contacts, regarding which you want to see the activities, from that list of contacts in the dialogue box. Then click on select.
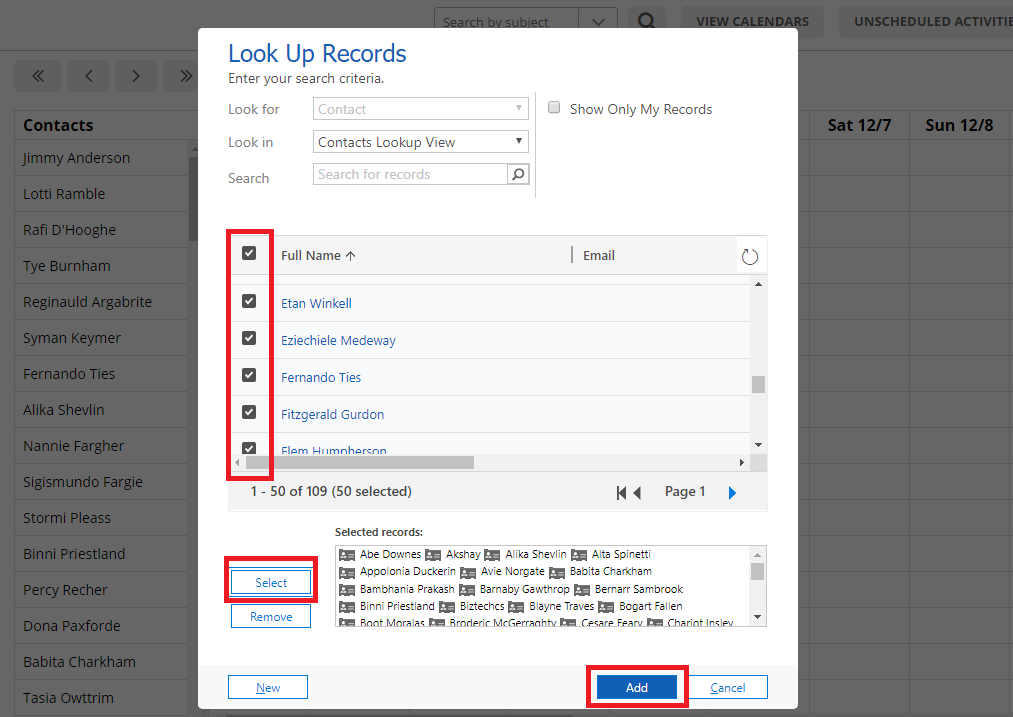
– Click on the ‘Add’ button after you select the contacts.
– Once you add contact(s), they will show up in the Contacts dropdown and calendar. Same goes for accounts too.
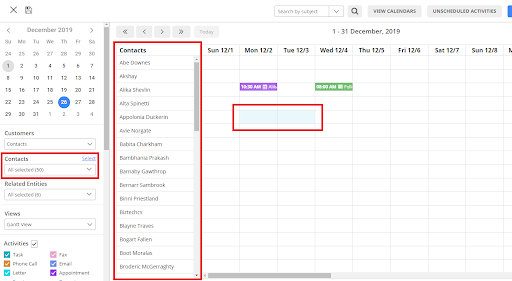
– Now to set the time for an event regarding a particular contact, click on the ‘Time Slot’ you want from Calendar.
– Clicking on ‘Time Slot’ will display a ‘Create Activity’ popup.
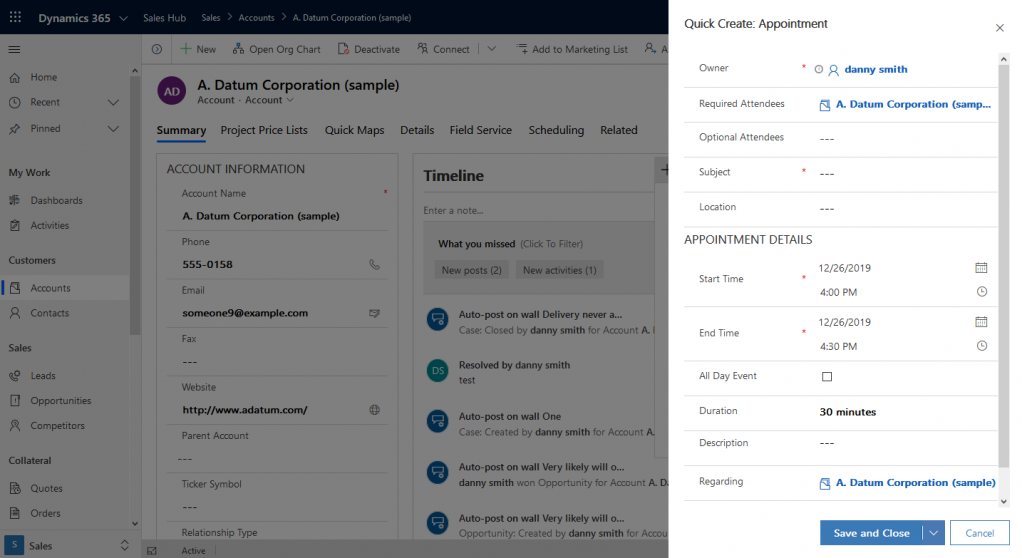
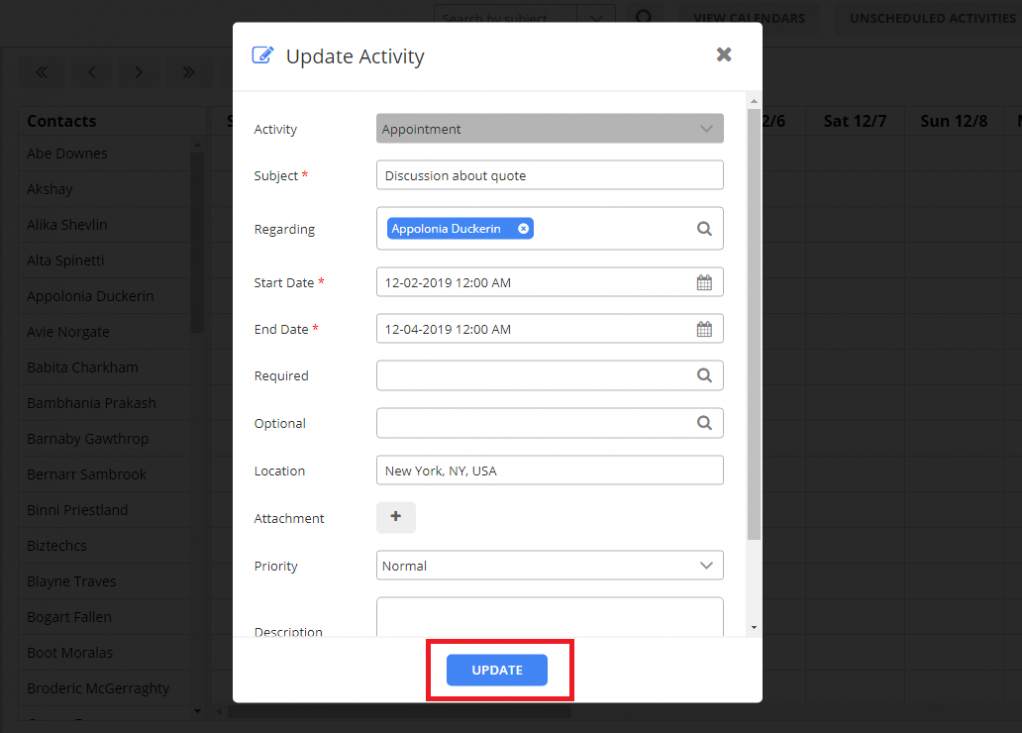
– Select the ‘Activity Type’ from the drop-down menu beside ‘Activity’.
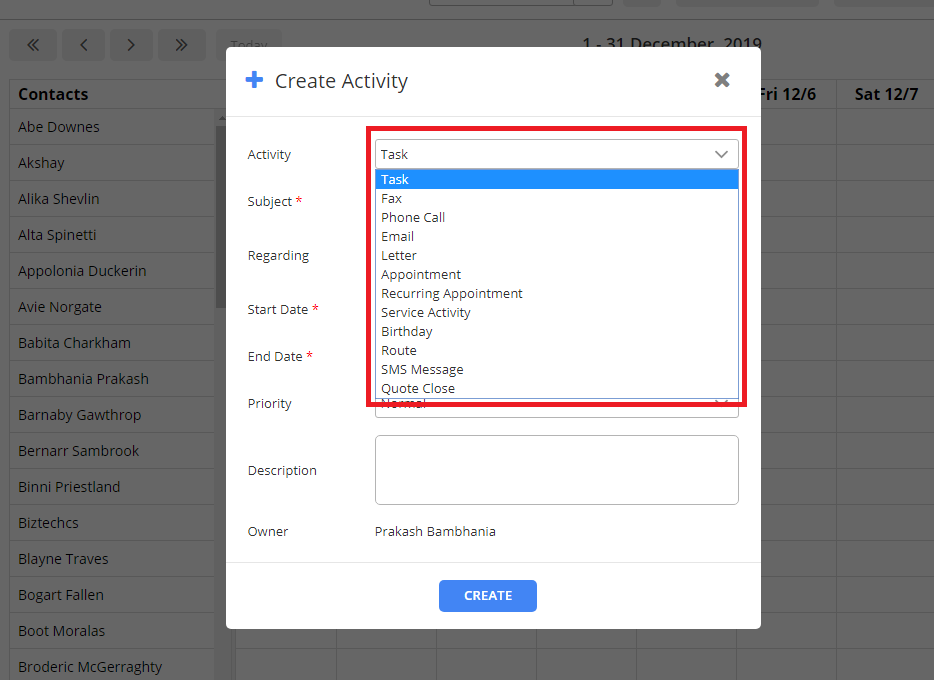
– The name of the contact(s) you selected will automatically show up in the ‘Regarding’ field.
– Fill all other fields including:
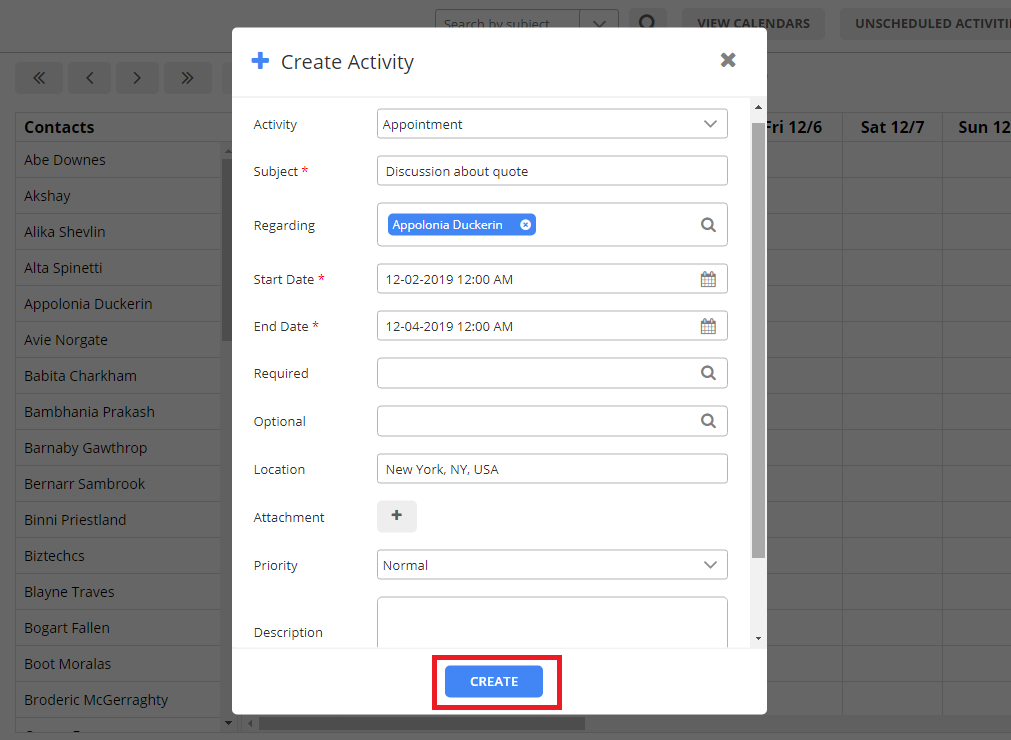
Subject – You can mention what the meeting is about in this field.
Start Date – The date when the event will start.
End Date – The date on which the event will end.
Priority – You can set the priority to ‘High’, ‘Normal’, or ‘Low’.
Owner – The person responsible for the activity (the person who has been assigned the activity)
And others depending on the type of activity you selected.
Note: It is mandatory to fill three fields viz. Subject, Start Date and End date. The rest of the fields are optional.
– After filling all fields, click ‘Create’. Clicking on this button will create your activity in the calendar.
View Customers’ Activities in Calendar
Once you create an activity in the calendar, you can view that activity in your calendar easily.
Here are the steps to follow to view all your activities in Dynamics Calendar 365.
– Go to the ‘Calendar 365’ tab from the top-left corner of your Dynamics 365 CRM window.
– Choose ‘Customer Calendar’ from the drop-down menu that redirects you to the calendar screen.
– Select ‘Contacts’ from the drop-down menu under customers tab. Select the contacts for which you want to view the activities
– As you select ‘Contacts’, you will be able to view all activities/events you have created so far related to those contacts.
– And to edit a particular event, hover over the event you want to edit. It will display Tooltip on the screen.
– Click on the event to open up the event details.
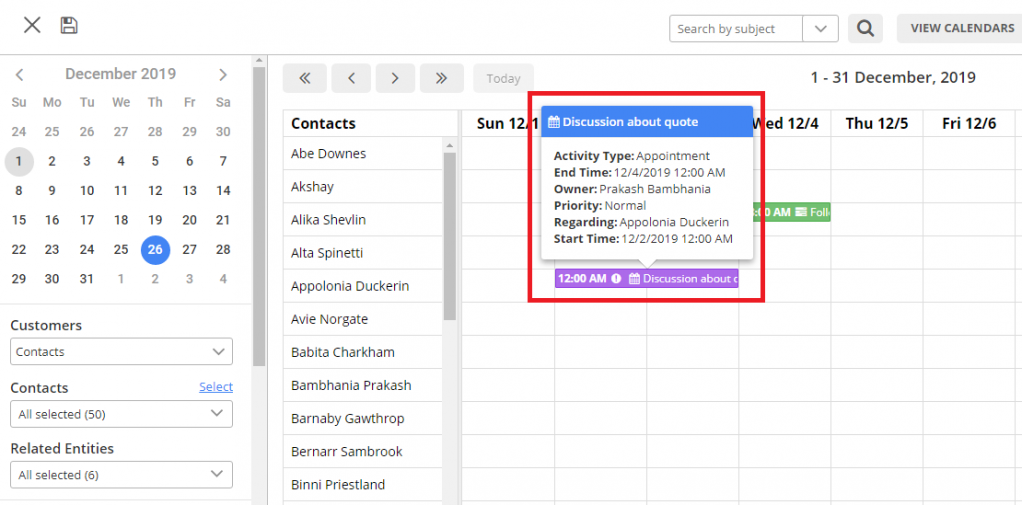
– In this ‘Event Details’ window, you can edit event details, share or delete an event.
Also, you can add the person responsible for the event.
Conclusion
Thus, you see that with Dynamics Calendar 365, you can seamlessly create and update events from a single screen without doing too much back and forth. And you don’t have to update CRM and Calendar separately every time you complete an activity.
All product and company names are trademarks™, registered® or copyright© trademarks of their respective holders. Use of them does not imply any affiliation with or endorsement by them.


