

Being a Sales Manager or Dynamics CRM administrator, you need to manage the sales reps/executives’ activities including its working timings. DynamicCRM provides a feature to manage working hours of sales reps (Dynamics users).
Suppose, a marketing campaign is ongoing for a week at some place, so being a sales manager, you need to keep the working hours of the sales executives there.
With our AppJetty Calendar 365 you can manage the working hours of the users and check on the Calendar. For that, you can enable the Resource Scheduling to display hours of default CRM records or you can create from the AppJetty Calendar365 and manage the working hours user-wise.
In Calendar 365, you will find the Resource Scheduler option to manage the working hours.
You need to follow the below steps to manage the Working hours:
- Calendar Configuration
- Enable Resource Scheduling by selecting either default CRM or AppJetty Calendar
- Check the default CRM working hours on AppJetty Calendar and add the activity
- Add the Working hours from the AppJetty Calendar itself and add the activity
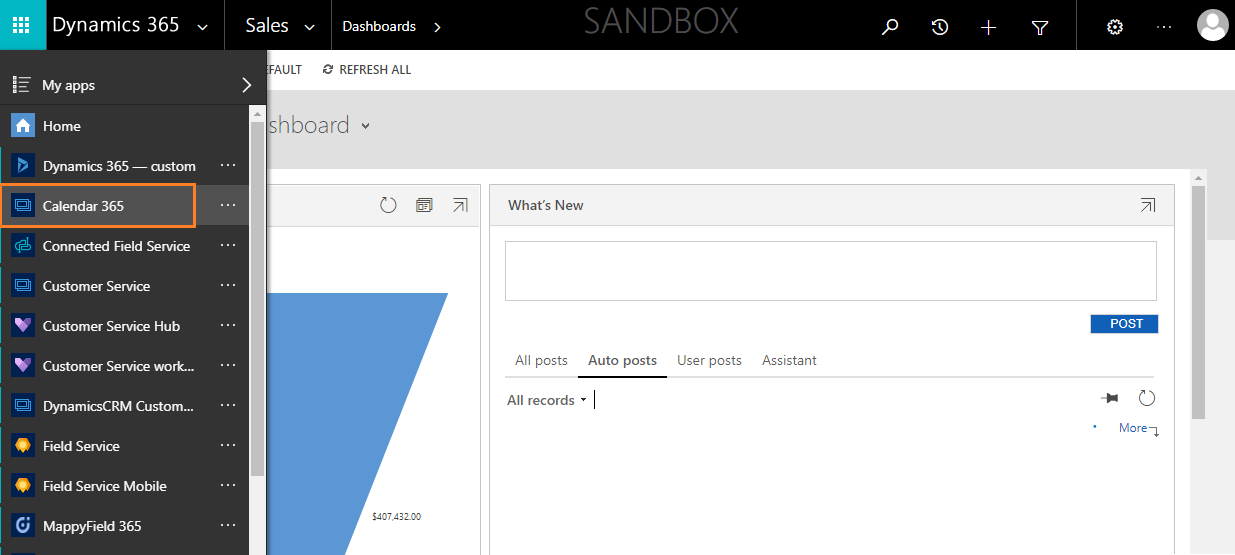
Step-1: Navigate to Calendar 365
From the Dynamics 365 apps, click on the ‘Calendar 365’.
Step-2: Enable ‘Resource Scheduling’
To enable a ‘working hours’ option in Calendar 365, click on the Settings icon available on the calendar page and navigate to the default configuration.
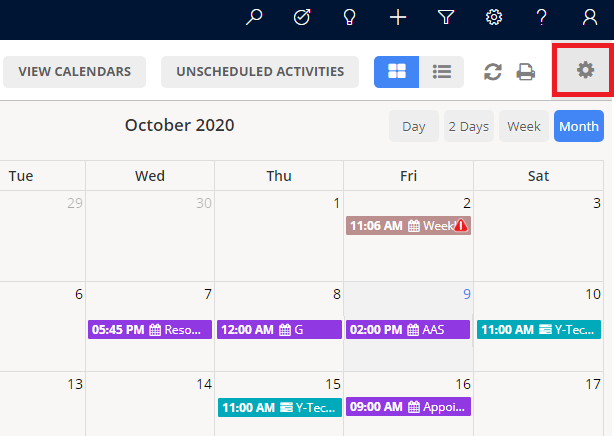
From the ‘default configuration’, you can configure the required options for Calendar 365.

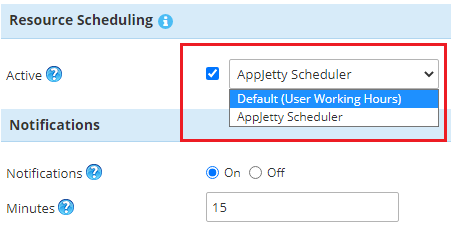
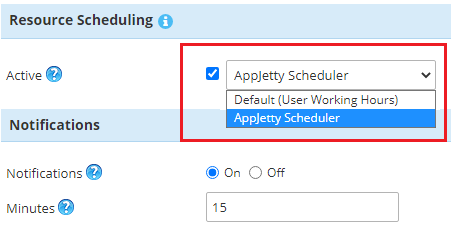
There are two options to set the working hours in Calendar 365:
- Default (User Working Hours): This will use the ‘default CRM’ calendar module to get and set the working hours of the team member (user) that will be displayed in Calendar 365.
- Appjetty Scheduler: This is a ‘custom option’ in which users can create the working hours by inserting the availability, break, and leave directly in Calendar 365.
Step-3: Enable Resource Scheduler (Working hours)
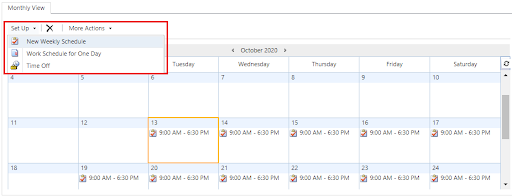
3A. Set up and display ‘Default Work Hours’ of a user in Calendar 365To set up default working hours in CRM redirect to Settings → Security → Users → Select the user for who you want to set working hours, click on ▼.
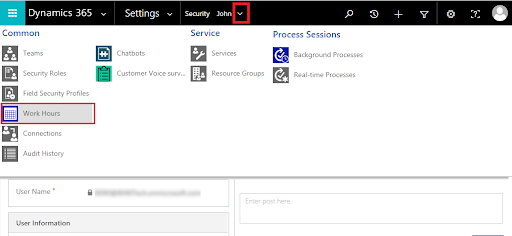
By clicking on Work Hours, the default CRM calendar will display the records of the selected user if already inserted. You can schedule the work on a weekly basis or for one day by selecting the date.
To view the default working hours of the user in Calendar 365, navigate to the Calendar 365 Model-driven application.

In the ‘Resource Calendar’, select the Resource Scheduling from the ‘Views’ selection dropdown. You can see the Work Hours of the default CRM.

You can check the availability, break, and leave that is set in the Default CRM calendar for individual users.
Using this, users can easily create appointments by seeing the availability of other users and work hours.
3B. Using AppJetty Scheduler
You can also add and manage the Work Hours from the AppJetty Calendar 365. For that, select AppJetty Scheduler in the ‘Resource Scheduling’ option.
Navigate to ‘Resource Calendar’ and select the Resource Scheduler from the ‘Views’ selection.

To create availability and manage the work hours, just click on the time from the timeline of a specific user.
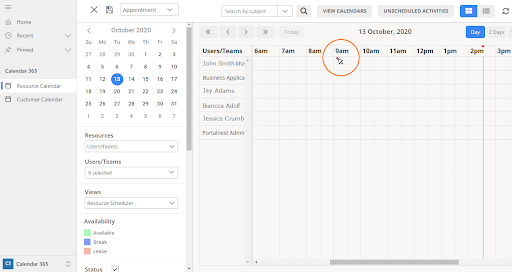
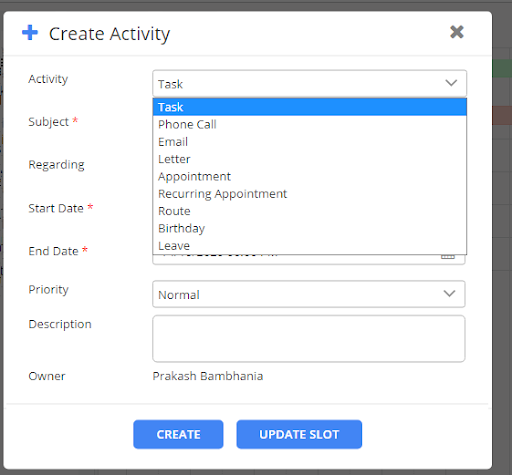
By clicking on a specific time from the timeline, a new popup will appear to create availability and manage the working hours.

Select the ‘Activity type’ as availability to set Work Hours and select Recurring type as ‘One Day’ or ‘Recurring’ to set the work daily or weekly (recurring).
By clicking on the Create button, you will get the notification and the working hours will be added to the timeline for the selected team member.

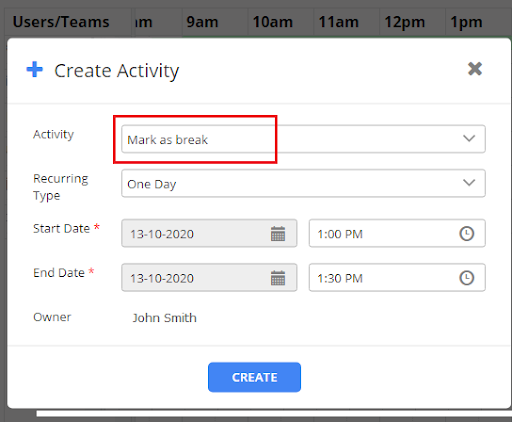
How to add a break time?
To add a break for the team member, click on the time from the timeline and it will open a popup, select Mark as break in the ‘Activity’.
You can choose a recurring type as ‘One Day’ or can create the same break for ‘Recurring Days’.
How to add a leave if the sales rep is on leave?
You can also add a leave if your team member is on leave. You need to select ‘Mark as leave’ in Activity.
You can select the Recurring in ‘Recurring Type’ if your team member is on leave for more than one day.

By clicking on the Create button, the leave will be added to the selected user (team member).
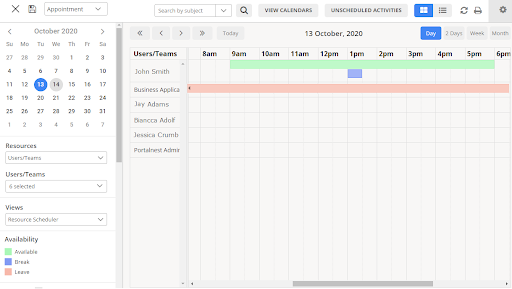
Here you can see in the specific timeline the added Working hours (in green) and break (in blue) for a team member and added leave (in red) for another team member.

Now, you can add the task, appointment, or any activity by clicking on the working hours’ timeline (green).
In this way, being a sales manager or DynamicsCRM administrator, you can manage the working hours of your team members and assign activities from the AppJetty Calendar 365.
All product and company names are trademarks™, registered® or copyright© trademarks of their respective holders. Use of them does not imply any affiliation with or endorsement by them.


