

Activities in Dynamics 365 are tasks related to customer entity like a call, setting up a meeting, appointment, sending pricing quotes or emails, etc. You can assign these activities to yourself or other team members.
Here the question arises, how can you make the most out of them?
For example, if you are in a meeting with your customers, you need to be specific with what they are looking for in your services. Did they ask for enhancements in your current package or expressed concerns for budgets? Or any highlights of the meeting. Chances are that you might forget these little details.
In such cases, you can open your Dynamics CRM in mobile and add these notes in the specific appointment created for the meeting. This can help you focus on the details leading to more clients for your organization.
So, let’s see how you can manage activities in Dynamics CRM to make the most out of it.
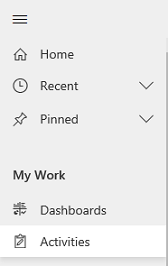
Step 1: Find your activities:
→ Click on the sitemap and select activities.
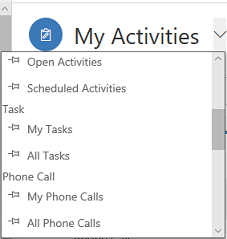
From the list, select an activity type to manage a particular activity.
You can perform the following operations on any activity with the default Dynamics calendar:
Add activity
For customer:
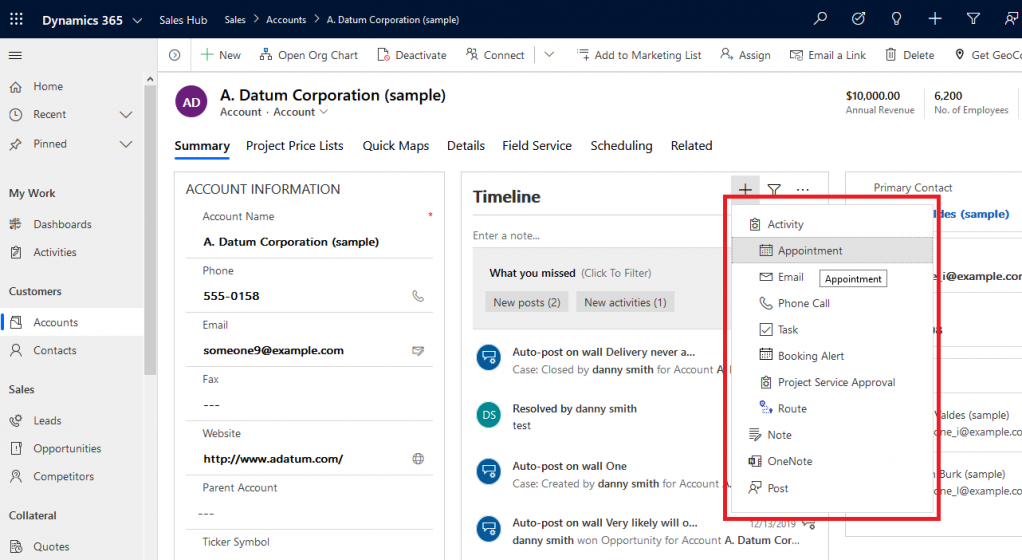
You can add activity associated with a particular customer, account, or another type of record. To do so,
– Open the record for which you want to create the activity.
– In the Timeline section, click on ‘+’, and from the drop-down list, select the type of activity you want to create.
For yourself:
– In the site map, select Activities.
– From the command bar, select an activity type.
– Once you are done filling in the details, click on save to save the particular activity.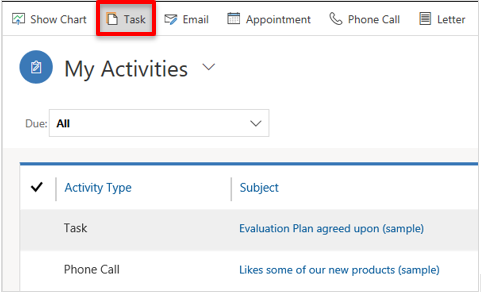 You can also add other people to the record or contact based on who’s handling that particular customer. As you work with that customer over a period of time, it can help you maintain its history and see what can be done for better outcomes.Add task or note for yourself to remember something important, add new activities and assign it to others, mark it complete, etc. to manage it further.
Challenges with default activity management:
Managing activities this way means a lot of back and forth and wasted time. Every time you will have to select the record, create an activity and then manage its related activities. To cut down this back and forth, you can look for a calendar solution or extension which provides a unified interface to conduct all the operations from a single screen.
In this blog, we’ve taken Calendar 365, a Dynamics CRM Calendar, to show how you can manage activities from a single calendar screen. If required you can view your team’s schedule via a shared calendar and assign activities to them as well.
Let’s see how you can manage activities from a shared calendar.
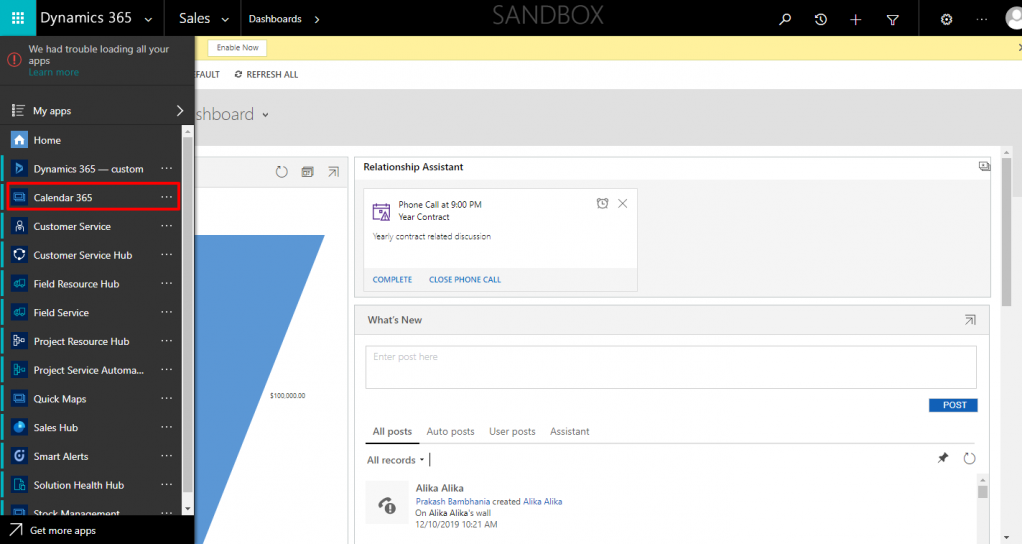
Step 1: After installing the Calendar 365, navigate to the left panel and select the Calendar 365 option.
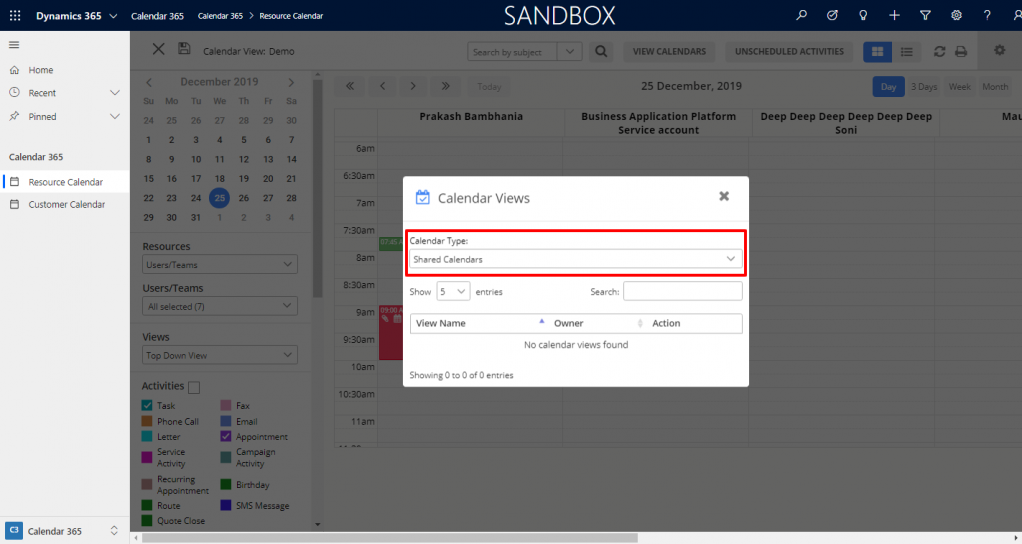
Step 2: Click on ‘View Calendar’ from the second panel and then click on the select calendar to select the view/shared calendar.
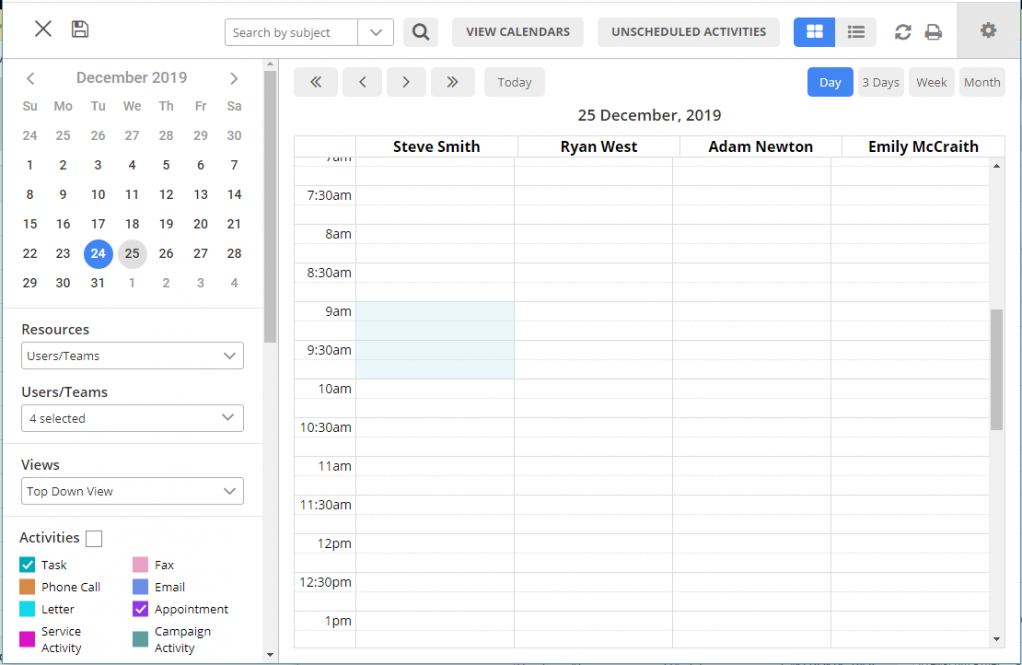
Step 3: Check the available time slot for the day to assign activities to users.
Step 4: Click on the available time slot to create activity.
Step 5: Select the activity type from the available options.
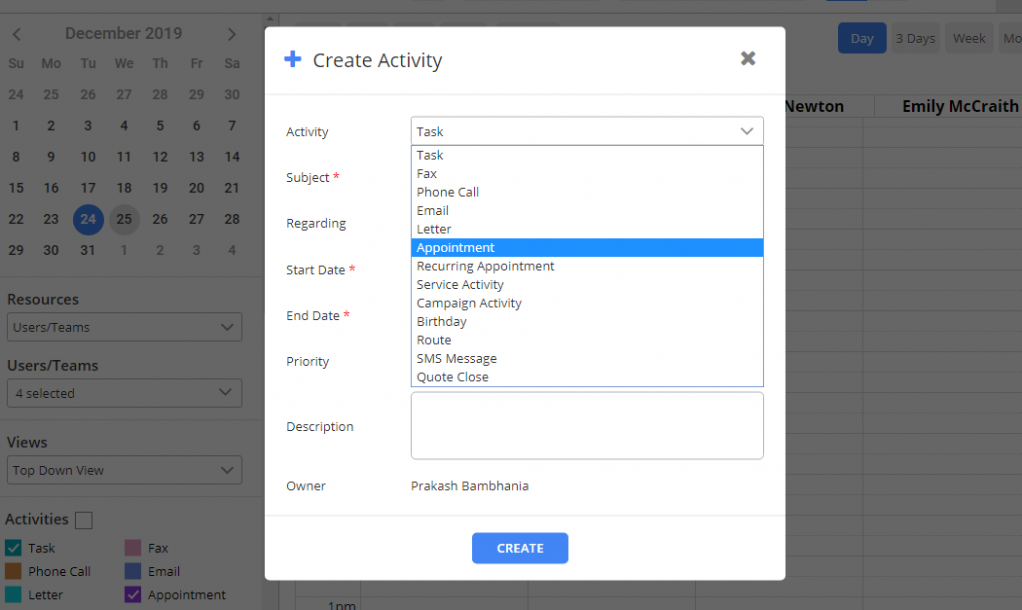
Step 6: Add details regarding, subject, priority, adding notes, etc. and click on create.
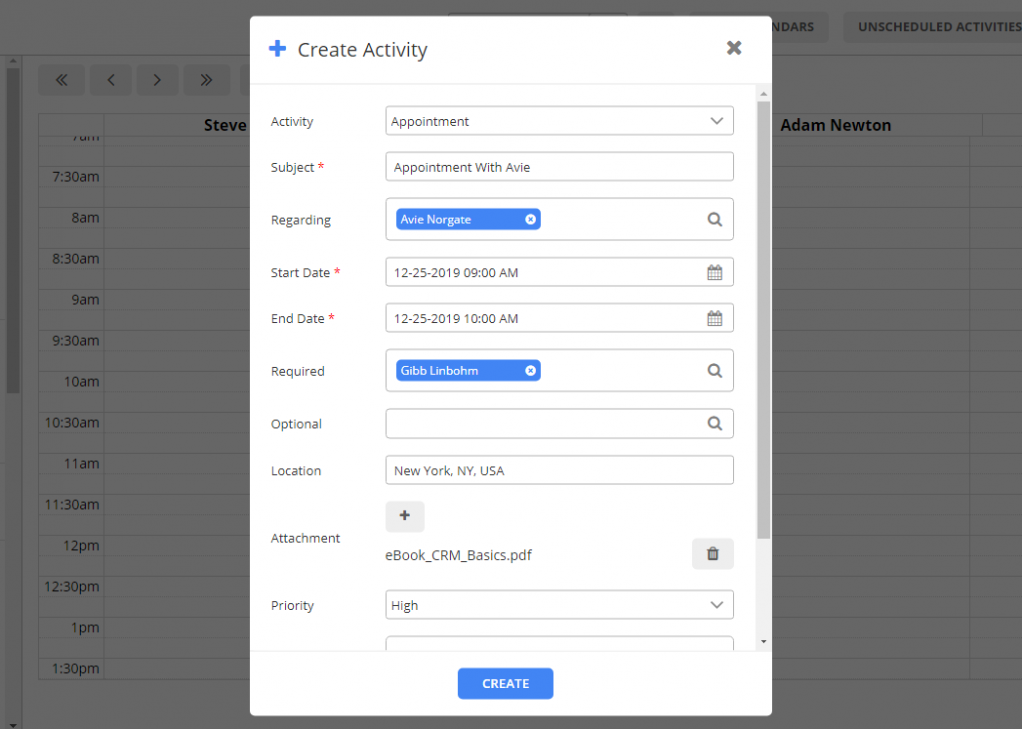
Here are the fields explained in detail:
Activity: To select the type. It can be an appointment, phone call, meeting, task, SMS, etc.
Subject: Add something to remember the activity from. It will be displayed on your calendar as well.
Regarding: Here you can select the record, regarding which you are creating this activity.
Date Range: Select a date range during which you will be working on this activity.
Priority: As there would be multiple activities in your calendar, you can set its priority to manage the overall schedule.
Description: Add notes or any other required details. It helps you remember highlights.
Apart from these options, based on your activity type, you will get other options like for Fax, Phone calls you get extra fields like To, Phone numbers, etc.
Step 7: Once you are done creating an activity, it will be displayed like below on the calendar. When you hover on it, it will display the tooltip with all the required details.
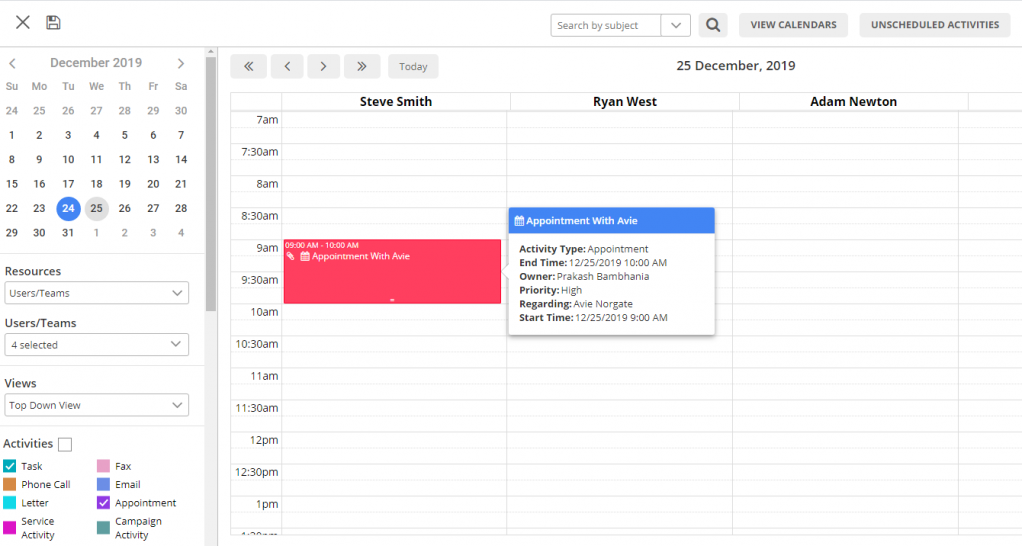
You can work further on this activity, and access it whenever needed. For example, if this activity is an appointment, you can mark it completed once your meeting is completed with that person. And later, you can edit the details from the calendar.
To edit this activity, click on the activity from the calendar and this popup will be displayed.
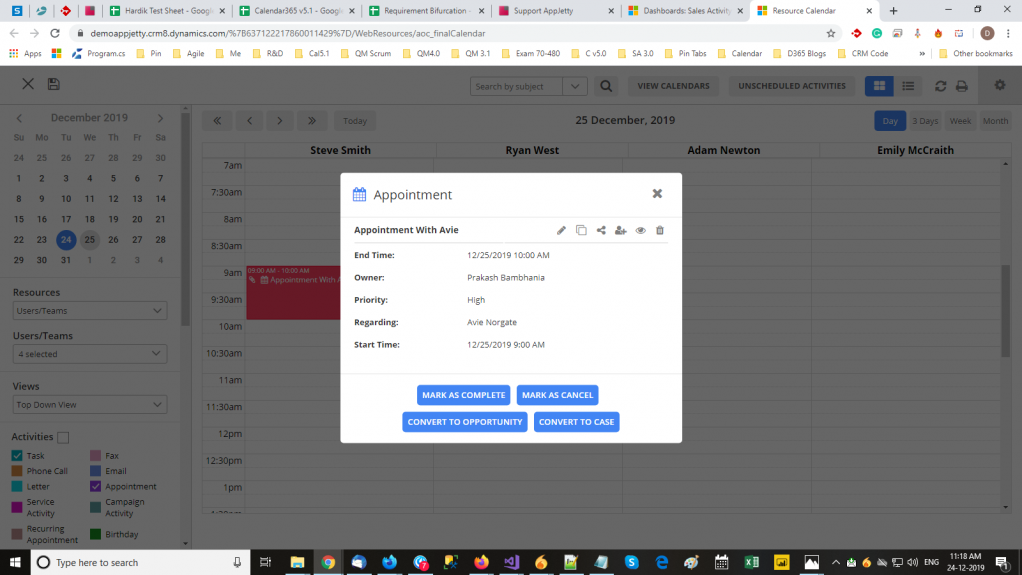
From there you can perform various operations like edit the appointment details, change its status, mark it completed, make it a case, etc. and it gets updated in CRM as well.
How to Manage Unscheduled Activities in Dynamics CRM:
There might be situations when you would have to manage sudden priority work in your schedule. Those are considered as unscheduled activities.
To manage the unscheduled activities, it is important to check the Active box.
On enabling the Unscheduled Activities option, you can manage unscheduled appointments and service activities without attendees and assigned resources respectively from the calendar.
After enabling the Unscheduled Activities option from the configuration, the button will appear on the header on the main calendar page.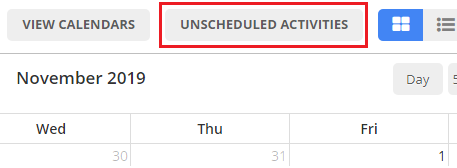
By clicking on it, there will be a dialog box with a list of Unscheduled Activities.
Select the start date, end date, and activity type to create the view of unscheduled activities as required. You can also type in the subject line in the search box to look for a particular activity.
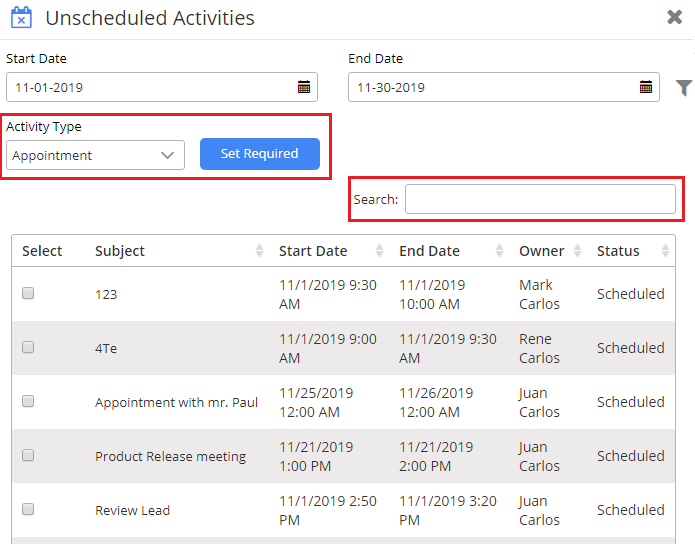
– If the activity type is ‘appointment’, it will show all the appointments that don’t have any required attendees assigned.
– To assign attendees to an appointment, select appointment as the ‘activity type’ from the dropdown, select activities and click on Set Required button.
– By clicking on the ‘Set Required’ button, it will open a dialog box to select the required attendee.
– Select the attendee as required and click on the Save button.
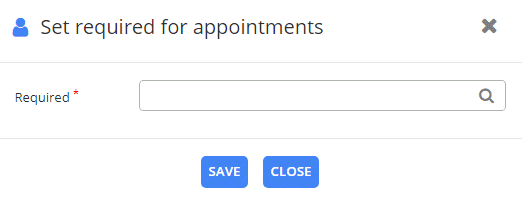
– After saving, attendees get assigned and that activity gets removed from the list of unscheduled activities.
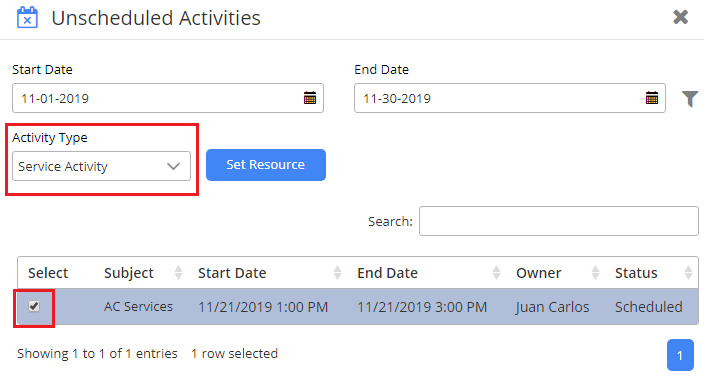
– If ‘activity type’ is a service activity, the list will have all the service activities that don’t have resources assigned.
– To assign resources to the service activity, select service activity as the activity type from the dropdown, select the service and click on Set Resource button.
By clicking on the ‘Set Resource’ button, a dialog box will open. From there, select the required resource and click on the Save button.
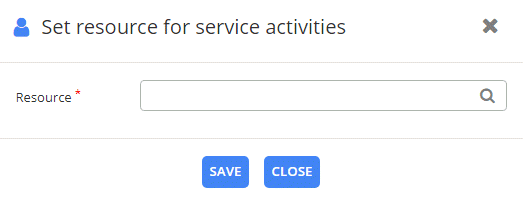
– After saving, resources get assigned and that activity gets removed from the list of unscheduled activities.
All product and company names are trademarks™, registered® or copyright© trademarks of their respective holders. Use of them does not imply any affiliation with or endorsement by them.


