

Territory management will help the Sales team to manage the region-wise sales and marketing campaigns.
Dynamics 365/CRM provides default functionality of creating and assigning territories to CRM users.
You can create a new Territory and assign the same to a Manager and an account from the Dynamics CRM backend. You will need to perform a lot of manual tasks inside the CRM to manage territories.
Apart from this, there are many other limitations to this default territory management functionality of Dynamics CRM. To overcome them, a Dynamics 365 map integration – AppJetty MappyField 365 will give you an overview of all of your sales territories and you can easily create and manage the Territories geographically from the map.
From the “MappyField 365”, you cannot just create and manage the Territories but you can also assign the same to managers and accounts right from the map of the MappyField 365. You can also merge and expand the territories as per different “Search Options”.
Veronica, who is working as general manager in a pharmaceutical company manages the sales of the medicines. Her responsibility is to provide the medicines to the registered Pharma/Medical Store as per their order. So she needs to create the territories and assign the region-wise territories to appropriate sales teams to handle the sales and revenue opportunities.
“Territory Management” feature of the MappyFIeld 365 will provide the four options to search the territories and manage them from the map: By Region, By Drawing, By Territory, and By FIle.
In this blog, we will explain how to add and manage the territory using Drawing Tools by visualizing data straight on a map.
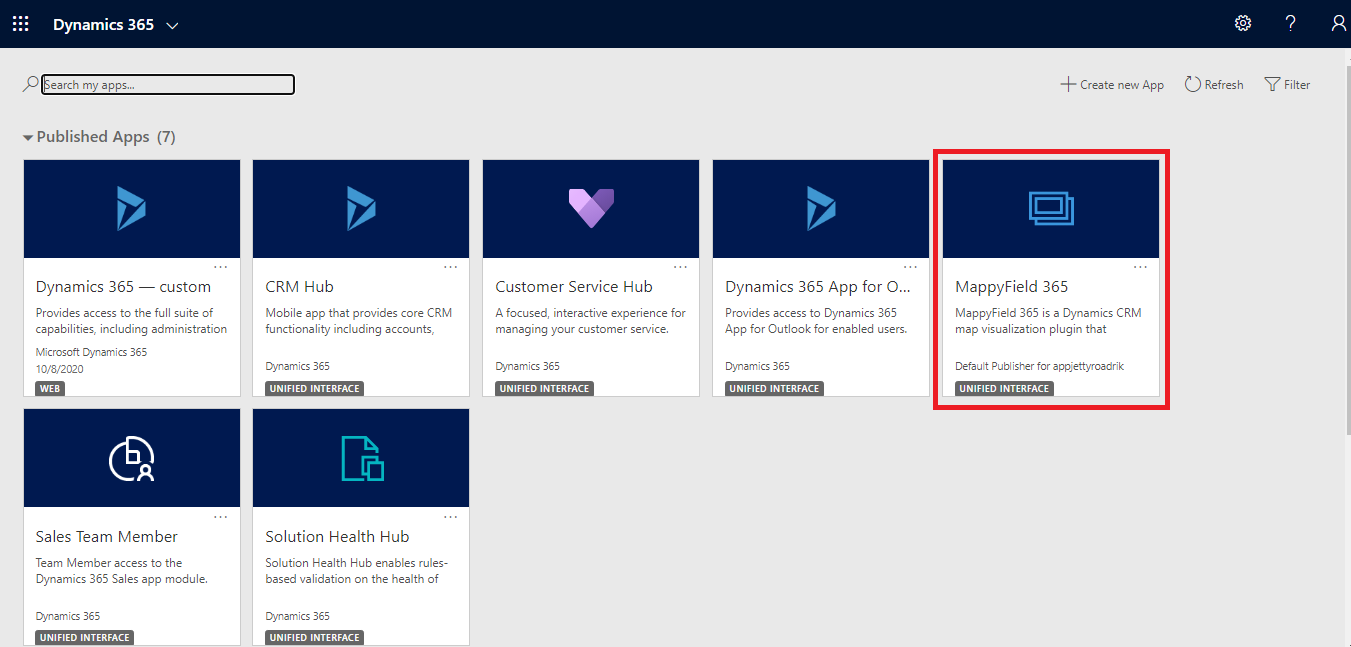
Step 1: Navigate to MappyField 365
Select “MappyField 365” from the Dynamics 365 dashboard or app list.
By default, you will be navigated to the “Map view” of the MappyField 365.
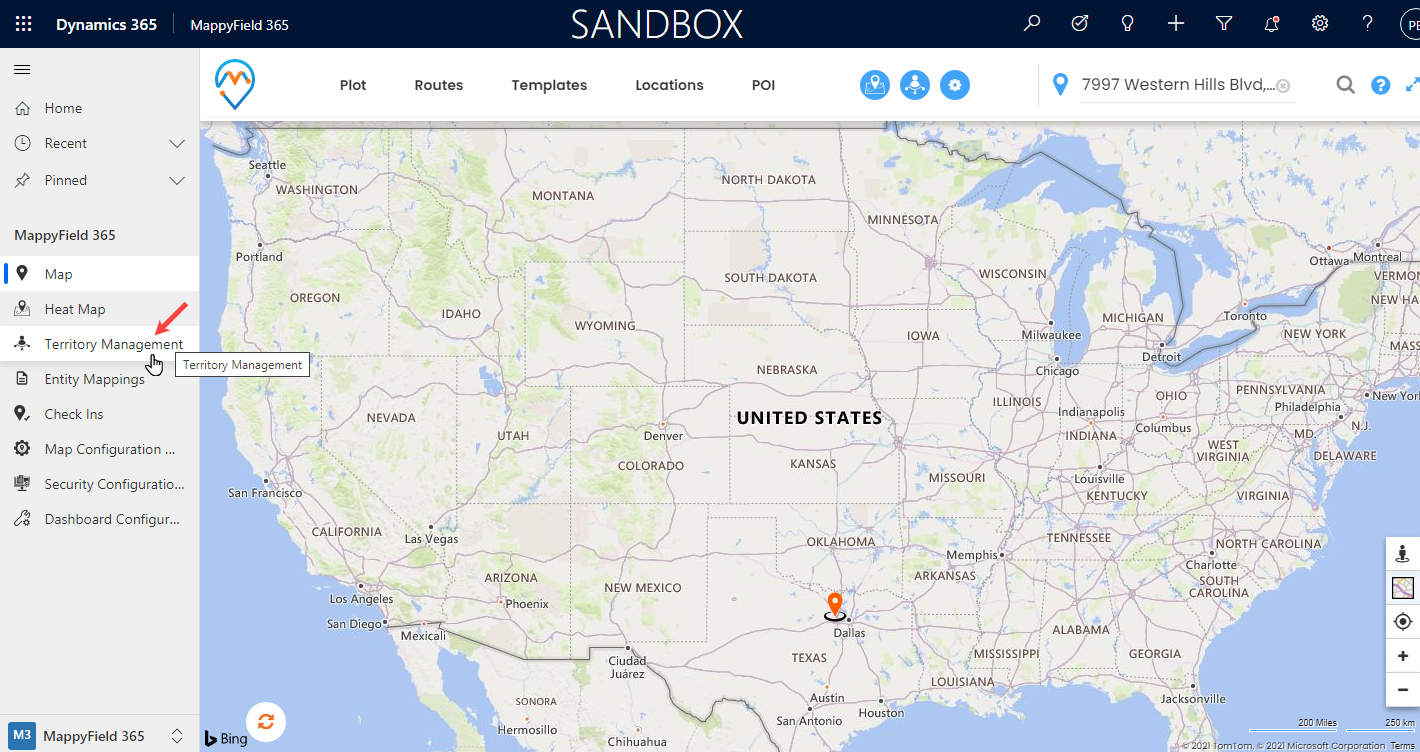
Click on the Territory Management from the navigation pane of the MappyField 365 to create and manage the territories.
Step 2: Navigate to Territory Management
After clicking on the “Territory Management”, you will navigate to the map of the Territory Management. From the MappyFIeld 365 menu, by clicking on the Territory Management, you will find the Search Options to create and manage the Territories by assigning the Sales Manager (CRM user).
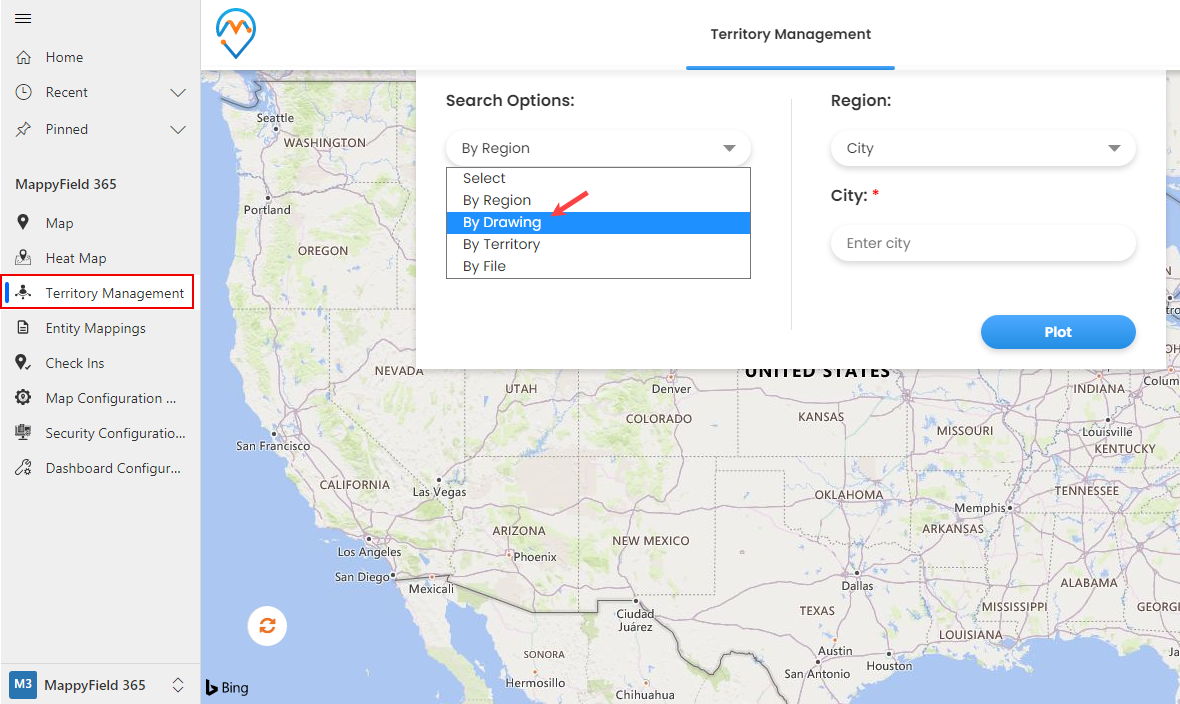
Here Veronica wants to create sales territories for a specific area on the map where her pharmaceutical supplies the medicines and even medical equipment on an urgent basis. She can select the “By Drawing” option to create Territory of a specific area on the map.
Click on the By Drawing search option. You will get the different “Shapes” to draw on the map and other editing options such as Edit, Delete Shape’s Fill Color, and Shape’s outline Color (border color).
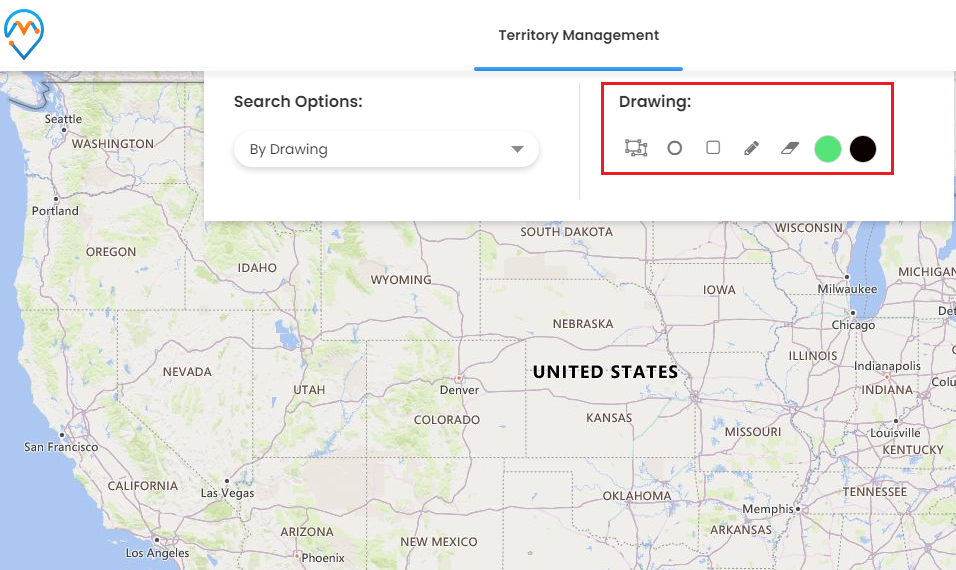
You can draw the shape on the map by selecting Polygon, Rectangle, or Circle as per your requirement.
Step 3: Draw area on Map
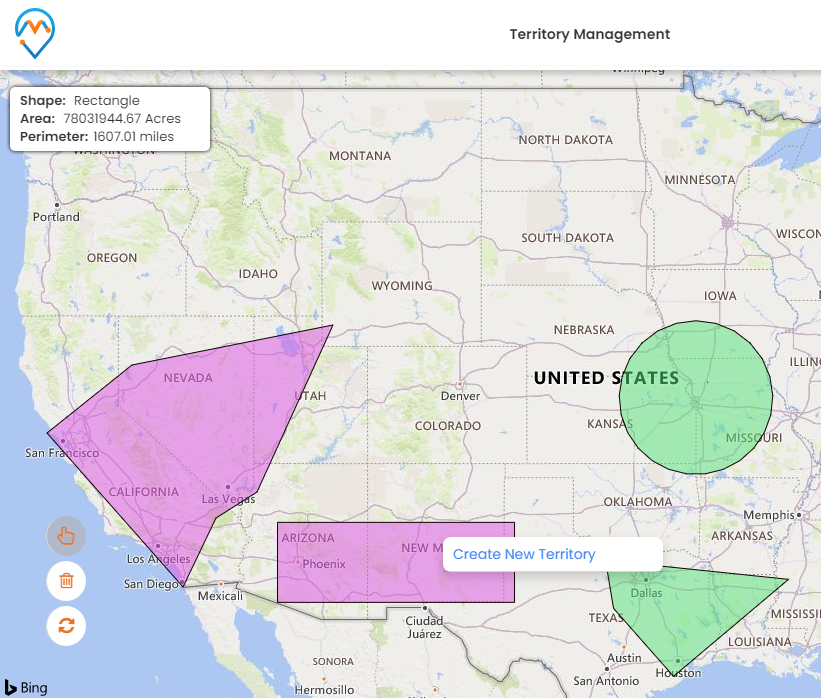
Select the shape which you want to draw on Map to create a territory. The ‘Polygon’ shape is drawn on the map.

As you have drawn the shape, you will get the ‘Shape Measure’ values from the left-top corner of the map.
Similarly, using different shapes, you can draw the shape on the area to add into the Sales Territories by assigning the Sales Manager/Sales Team.

Here, Veronica, the general manager of the pharmaceutical company has drawn the shapes using Polygon, Square, and Circle where their sales team handles the orders from the Pharma (Medical) Stores.
There are 4-different shapes drawn on the map of the specific area to create the territory. To select the drawn shapes, you need to click on the element selection (hand icon) and click on the drawn shapes.
Step 4: Create Multiple Territories
To create a territory, you must follow the below steps:
- Select the Shapes using element selection (hand icon).
- Click on the Shape for that area you want to create/manage the territory. The color of the shape will be changed once you click on the shapes.
- Right-clicking on the selected shape and you will get the Create New Territory option.
By clicking on the “Create New Territory” option, the + Create New Territory popup will appear. You can decide whether you want to add the selected territories (shapes) into existing territory or create a new territory for that.
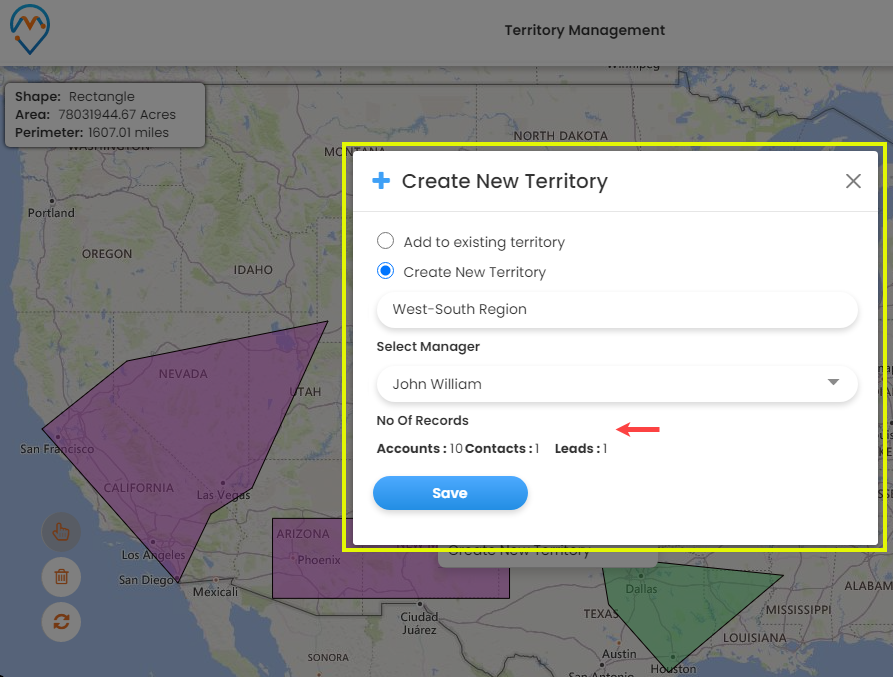
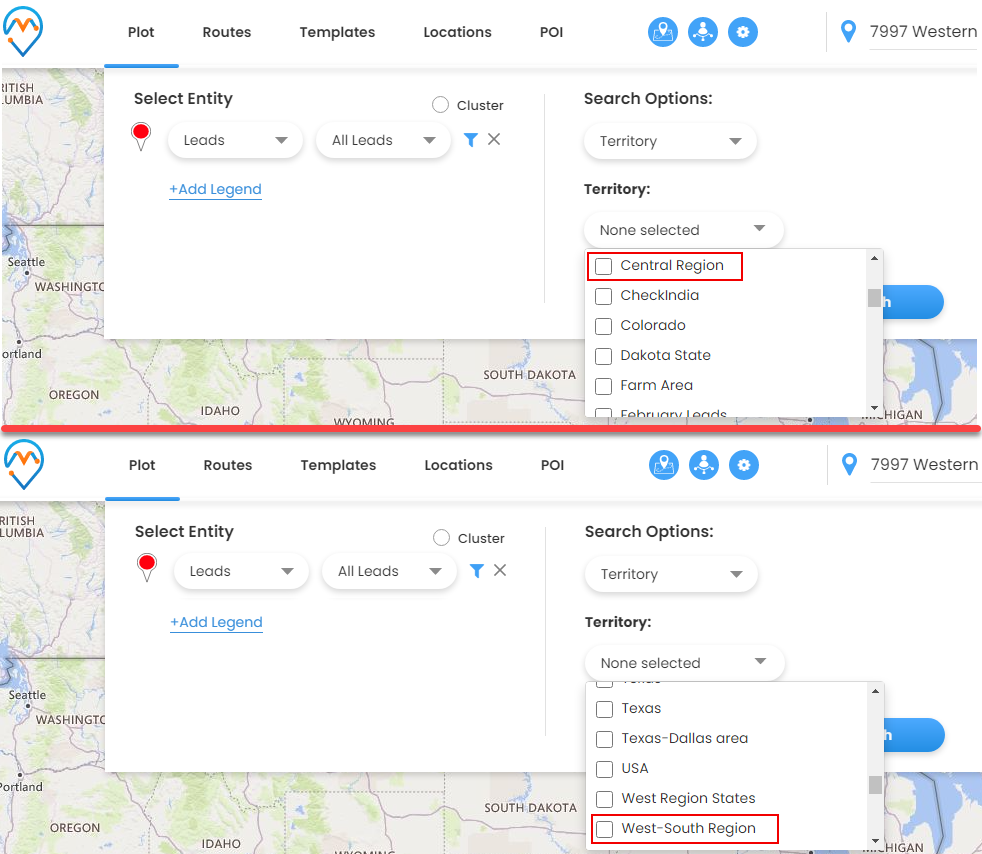
You need to insert a new territory name and select the Manager (or it could also be a Sales Team). Once you select the Manager, you will get the No of Records that belongs to the selected manager.
By clicking on the Save button the territory will be created.
Here the general manager (Veronica) wants to manage multiple territories from the drawn shapes. So she has added two drawn shapes in one territory named “West-South Region” and she will be creating a new territory for the remaining two shapes.
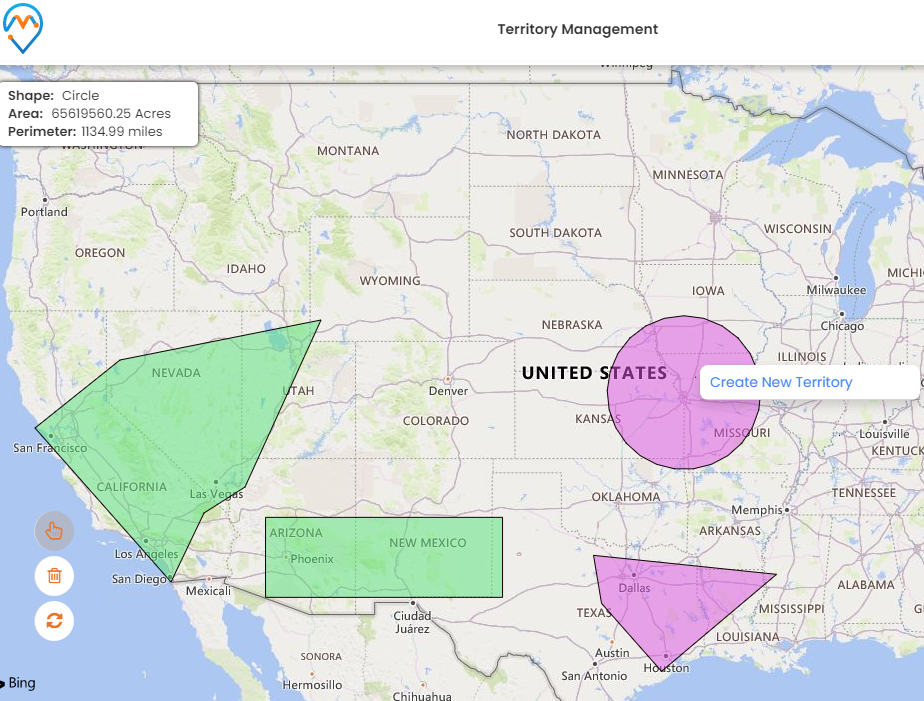
The remaining two shapes are selected to create the territory for another sales manager (or sales team).
By clicking on the “Create New Territory” option, the + Create New Territory popup will appear to create a new territory.
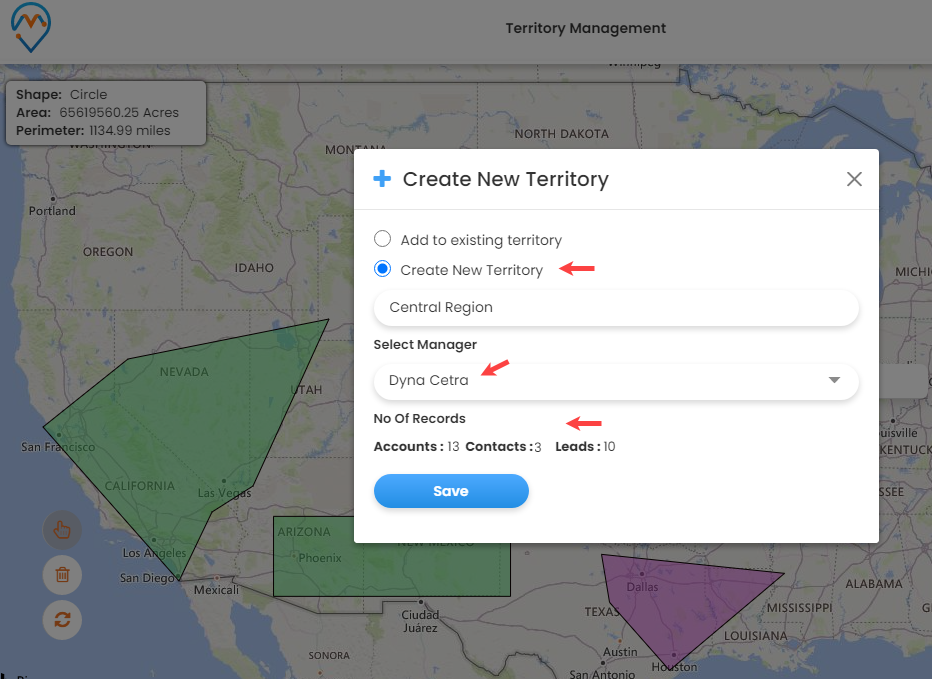
You need to insert a new territory name and select the Manager. By clicking on the Save button the territory will be created.
So in this way, you can draw the shape on a specific area on the map and you can create multiple territories by selecting the shapes. You can also create a territory by selecting a single shape.
Step 5: Search entity records by selecting Territory/Territories
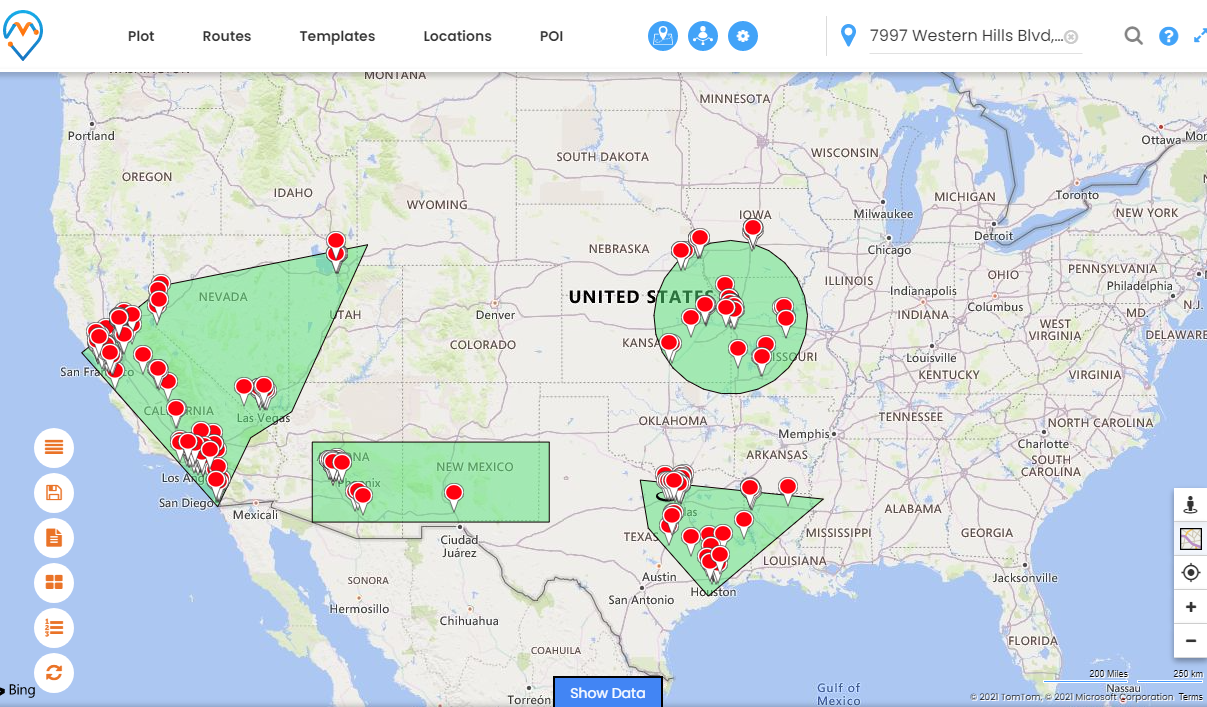
You can plot the records by selecting the Territory in the search option. So, the entity records will be plotted on that territory only.
The entity records will be plotted on the map as per the two different territories.
So the general manager, Veronica, can plot the required entity records on the map by selecting the created territories and track the activities on the map itself.
In this way, enhance the Territory management with the “Territory Management” within MappyFIeld 365 map. This will help the Sales managers or Dynamic CRM with administrator rights to reach out to the end-users and increase the sales orders by managing the territories without any boundary.
Using AppJetty MappyField 365, a “Microsoft DynamicsCRM” app for map integration, you can plot the CRM records on the map. Using user-friendly and advanced features, you can manage the teams and the CRM records on the map itself.
If you want to know about any feature regarding AppJetty MappyFIeld 365, feel free to reach out to us at [email protected] or you can just click on the “Contact Us”.
All product and company names are trademarks™, registered® or copyright© trademarks of their respective holders. Use of them does not imply any affiliation with or endorsement by them.


