

Activity management is a big part of managing a team. The better managed this is, the more efficient your team will be. It helps everyone stay on top of their tasks based. There are several factors that come into play while managing a team’s activities.
To manage and schedule the activities of Dynamics CRM, AppJetty Calendar 365 provides many functionalities & features to manage all the CRM activities including custom activities from the activity calendar of Calendar 365. Calendar 365 provides two types of calendars.
In Calendar 365, the sales managers with Dynamics CRM administrator rights can configure and decide what the fields and the title will show for the activity on the Calendar. You can select the attributes (fields) for the Tooltip, Detail & Title for all the activities individually.
– Title of the activity
– Details on the tooltip by hovering the mouse cursor on the activity, and
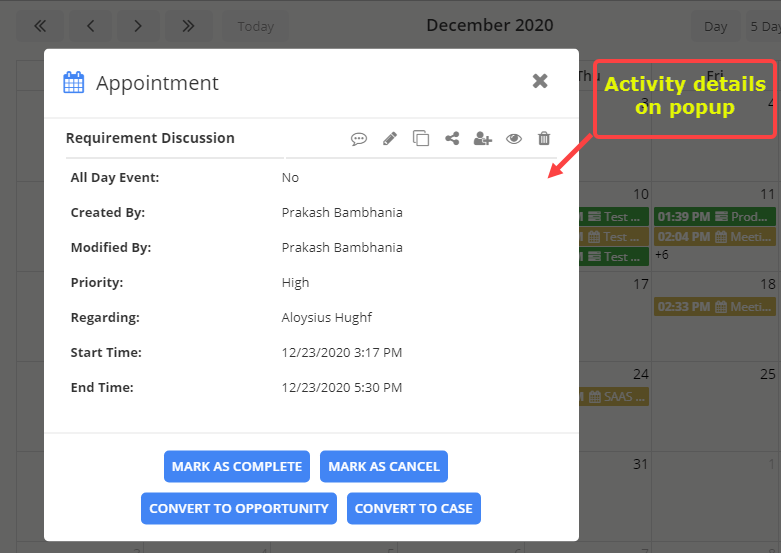
– “Detail view” (popup) by clicking on the activity.
Once the attributes are configured, it will display in both of the activity calendars of Calendar 365.
Tooltip attributes help to display details in a small box by moving the mouse cursor on the activity. From the tooltip, any user can easily visualize the activities and take an overview of all the activities.
From this blog, you will get an overview of how to configure the ‘activity appearance’ to show on the calendar.
You need to follow the below steps:
– Navigate to the Calendar 365 configuration
– Select the attributes (fields) for the activity
– View the activity appearance – Title, Tooltip & Detail view in the activity calendars
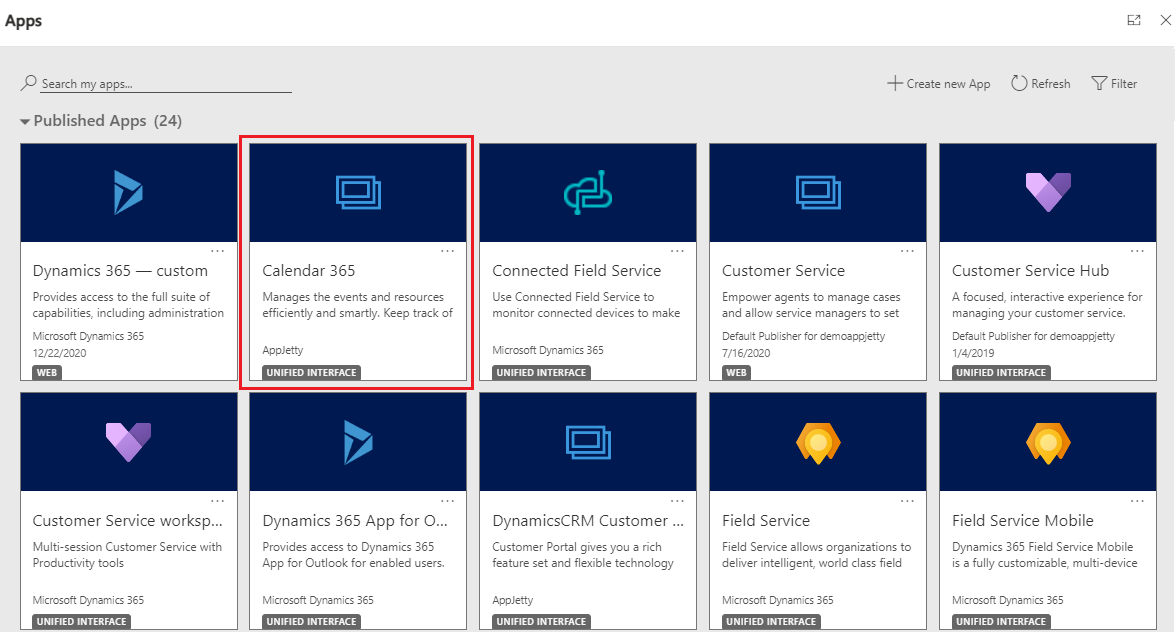
Step-1: Navigate to the ‘Calendar 365’
From the Dynamics CRM Dashboard, find the “Calendar 365” app and click on it.
OR
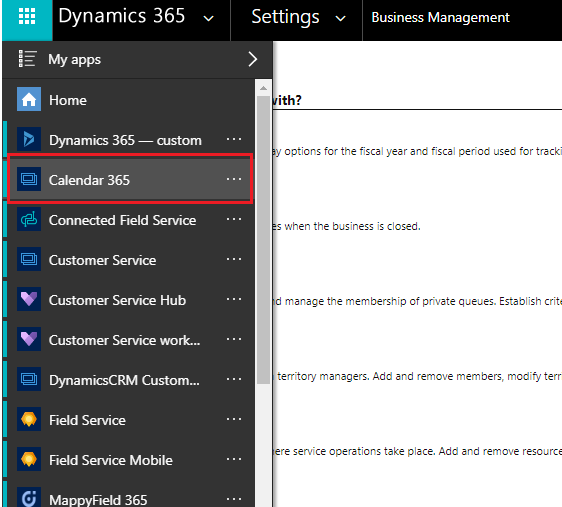
By clicking on Calendar 365, you will navigate to the Activity calendar of the Calendar365.
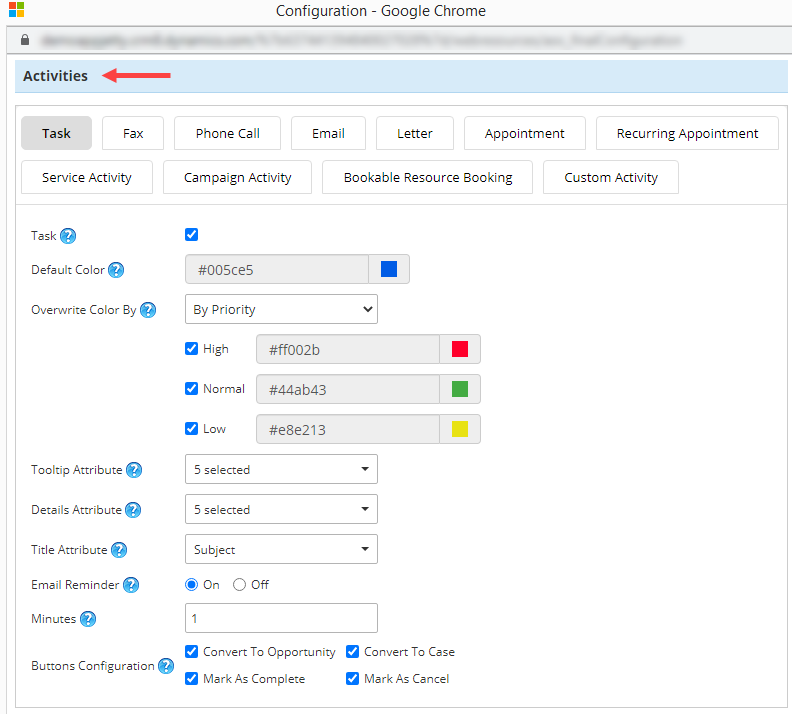
Step-2: Open the ‘Calendar 365 Configuration
From the page of the Calendar 365 Configuration, scroll down to the ‘Activities’ section where you can configure all the activities individually to show in the calendar.
Step-3: Set the attributes for the ‘Appointments’ activity
Let’s see how to set the attributes for the ‘Tooltip’, ‘Details’ & ‘Title’ of the appointment activity.
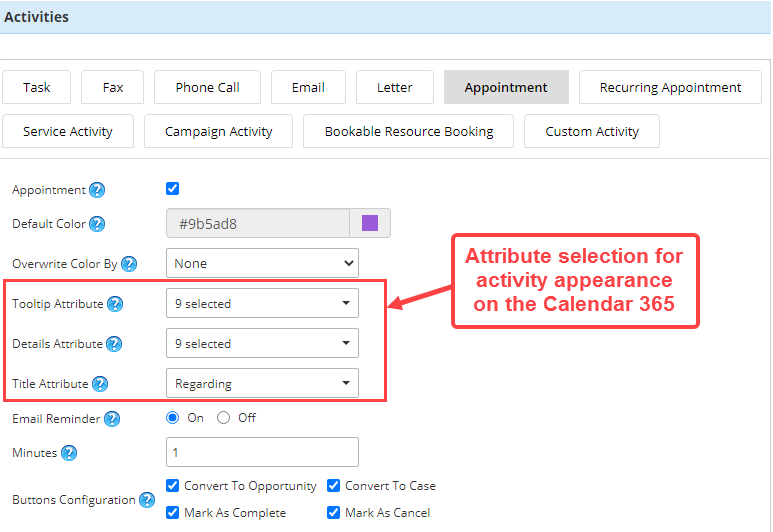
– Tooltip Attribute: Select the tooltip attributes to be included in the ‘activity tooltip’ that appears when hovering the mouse cursor on the activity in the calendar.
– Details Attribute: Select the details attributes to be included in the ‘activity detail popup’ that appears on clicking the activity in the calendar.
By default, the 5 attributes (Subject, Start Time, End Time, Owner, Regarding) for ‘Tooltip Attributes’ & ‘Detail Attributes’ will already be selected. You can select a minimum of 1 and a maximum of 10 attributes for both attributes.
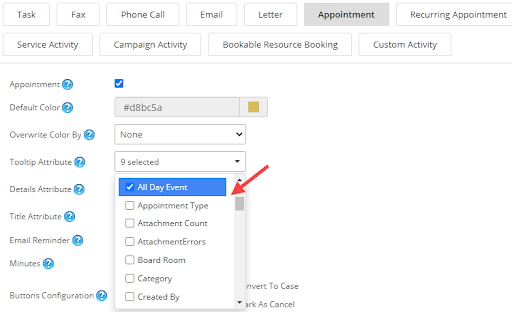
– Title Attribute: Select the title attribute to be displayed as the ‘title of activity’ in the calendar. The ‘Title Attribute’ comes with the default selection of the ‘Subject’ attribute. You can select only one attribute from the list.

Note: Admin users can select these attributes for all the activities individually and it will display in both of the calendars of Calendar 365.
After selecting the attributes for activity appearance in the calendar, click on the ‘Save’ button, and refresh the Calendar once.
Step-4: Visualize activity in Calendar
Let’s see how the activity appears in the activity calendars of ‘Calendar 365’.
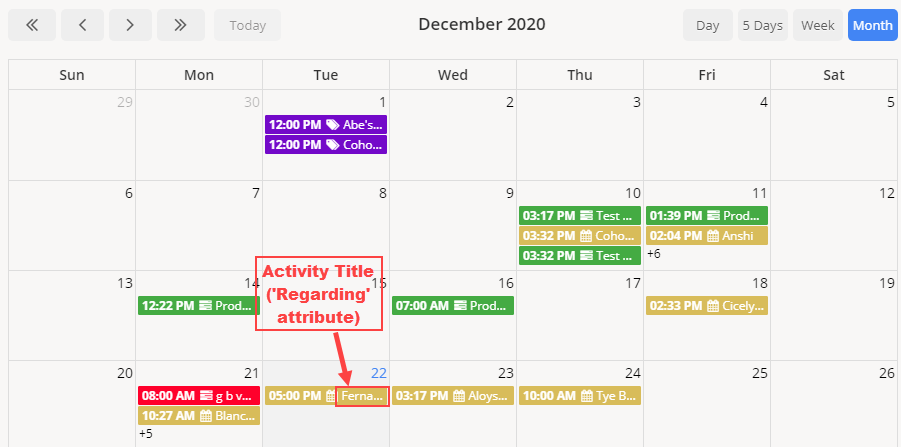
Activity Title:
– Once you or the users navigate to the activity calendar page, you will get multiple activities displaying the ‘title’.
Generally, the subject will appear as the ‘title’ of the activity, but you can change & select the ‘Title attribute’ under that specific activity from the Calendar 365 configuration.
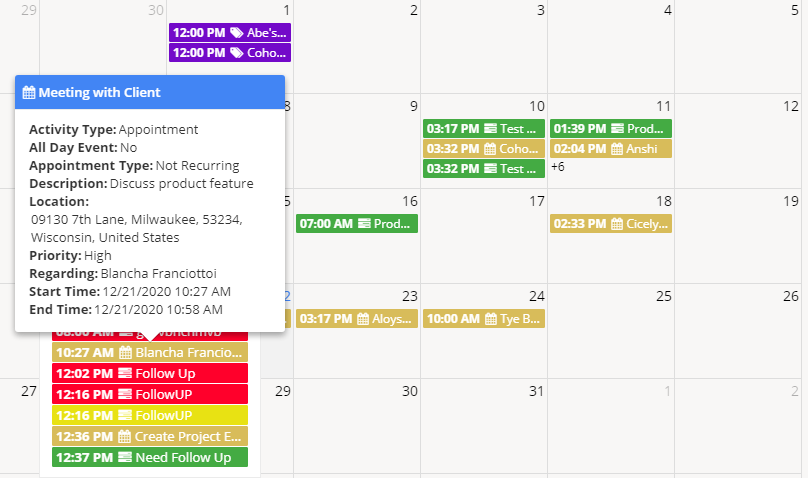
Tooltip:
– By hovering the mouse cursor on any activity, the details of the activity will be displayed on the ‘tooltip’.
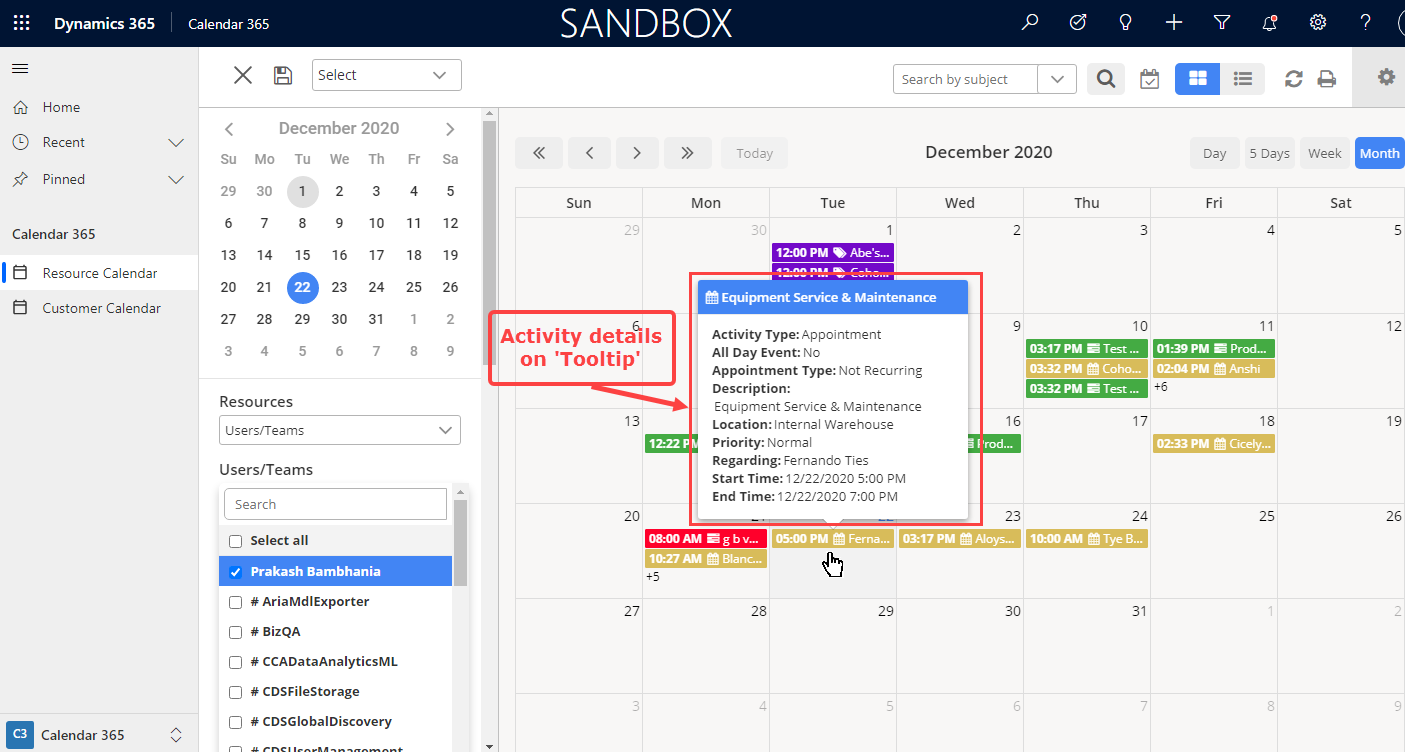
– Here you can see the tooltip details of the ‘appointment’ activity. You can also see the tooltip details of the activity when there are multiple activities on a single date.
Activity details (popup details):
– By clicking on any activity, the details of the activity will be displayed in the popup with various actions for the activity.
Being a sales manager or Dynamics user with admin rights, you can manage the attributes of all the activities individually and it will be visualized in the calendar.
Happy organizing with the Dynamics 365 marketing calendar.
All product and company names are trademarks™, registered® or copyright© trademarks of their respective holders. Use of them does not imply any affiliation with or endorsement by them.


