

Being an area manager or sales manager of any reputed organization, you can manage and track some activities like sales, services, product dispatch, transportation, etc. You can easily track all the activities and manage the entity records from the map of MappyField 365.
So Context Menu will help you to perform an action based on the selected location on the map itself. So you will not require going to the specific configuration every time to perform such actions. Just right-clicking from the map, you can perform actions for specifically selected locations or with the plotted records and configure the default settings for the MappyField 365.
Sometimes when you want to update the ongoing processes, you will be needing some quick action type options & menus. The MappyField 365 provides quick actions to manage the activities of your team members and share quick updates as well. A context menu option is one of them.
It is a pop-up menu that provides shortcuts to perform such actions from the MappyField 365 map itself. Whenever you right-click on the specific geography, a contextual menu will appear to perform quick actions on the map.
In this blog, you will get an idea about how the context menu of the MappyField 365 map will help you to perform quick actions and manage the location-based activity on the map itself.
Step 1: Navigate to MappyField 365
Select “MappyField 365” from the Dynamics 365 dashboard or app list from the header.
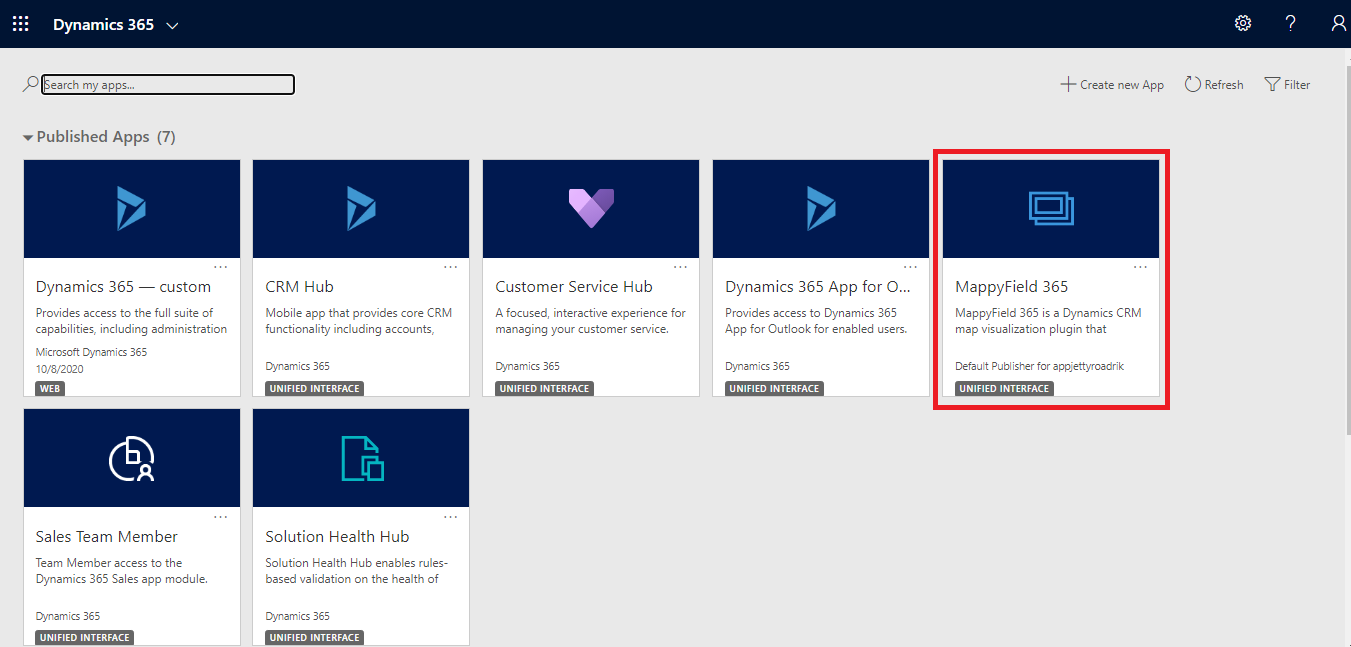
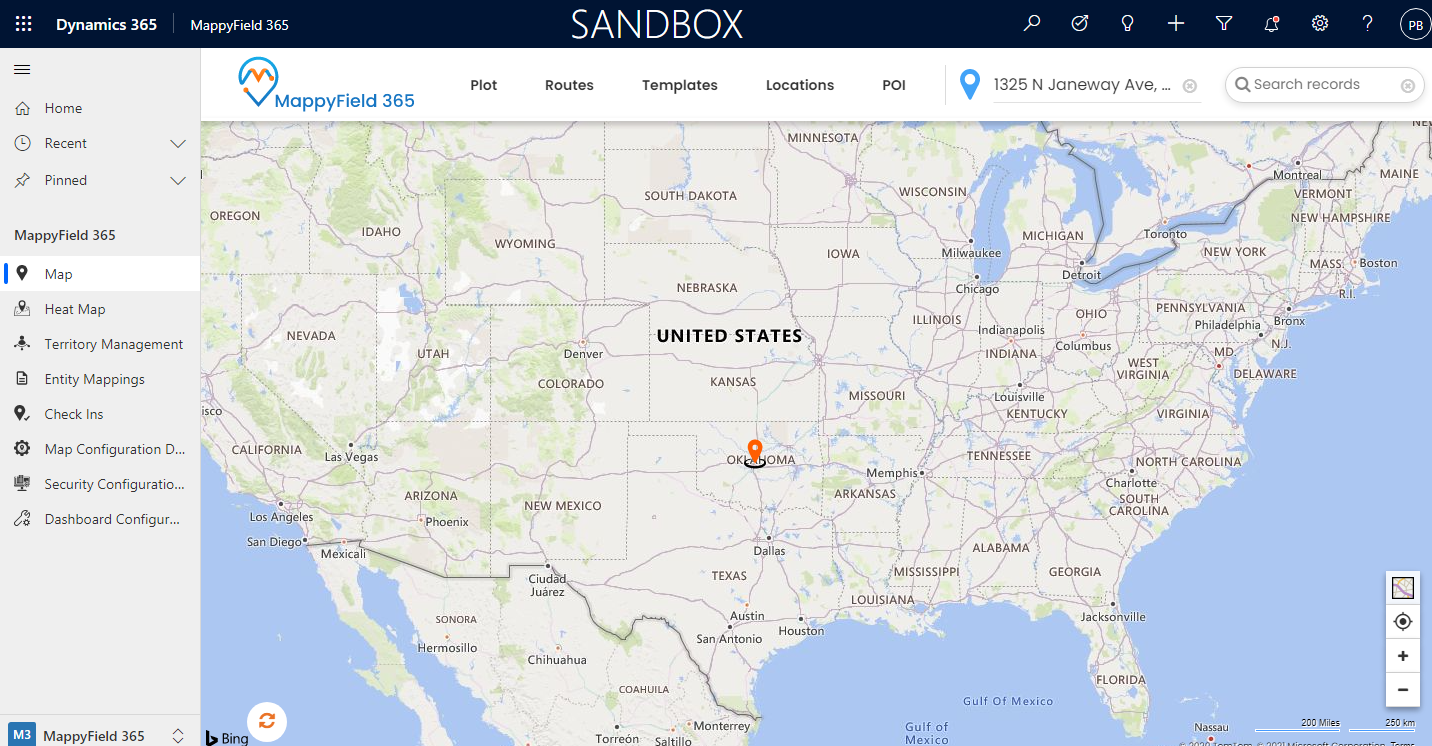
By clicking on the MappyField 365, you will navigate to the Map of the MappyFIeld 365.
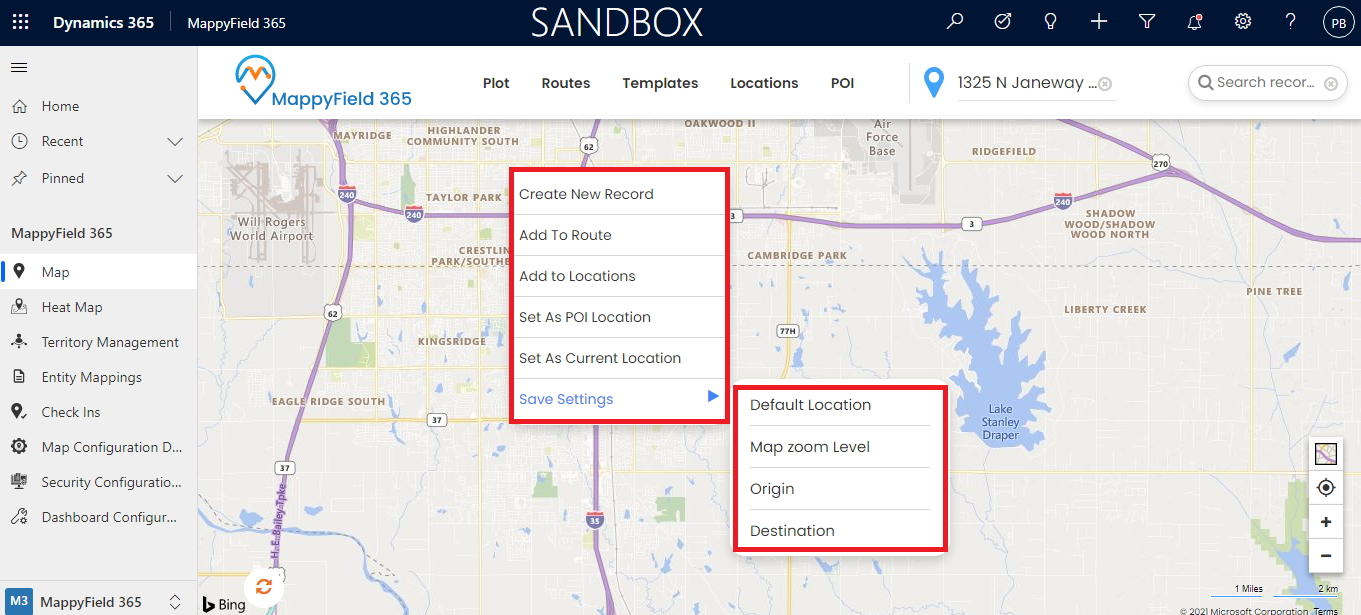
Step 2: Quick Action options from the Context menu
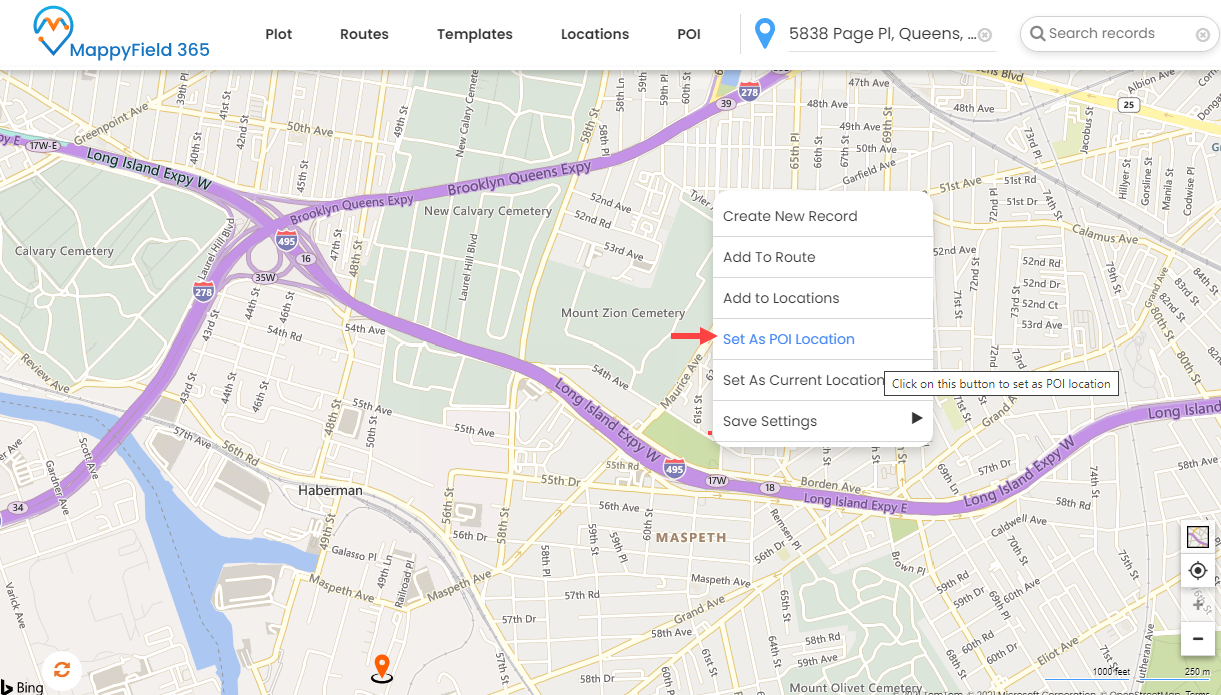
‘Right-click’ on the map of specific geolocation where you need to perform such action, it will open a “Contextual Menu” with the following options:
> Create New Record > Add to Route > Add to Locations > Set as POI Location > Set As Current Location.
Set default settings by hovering on the ‘Save Settings’ option:
> Default Location > Map zoom level > Origin > Destination.
Now, let’s understand the options of the ‘Context Menu’ individually:
Create New Record:
If you found a lead or found a new client, you don’t need to navigate to an individual entity to create a record for that.
You can create a new record for any location from the map itself just by right-clicking on that specific geolocation. It will show the context menu, click on the Create New Record It will open a popup to add any entity record (for Account, Contact, or Lead).
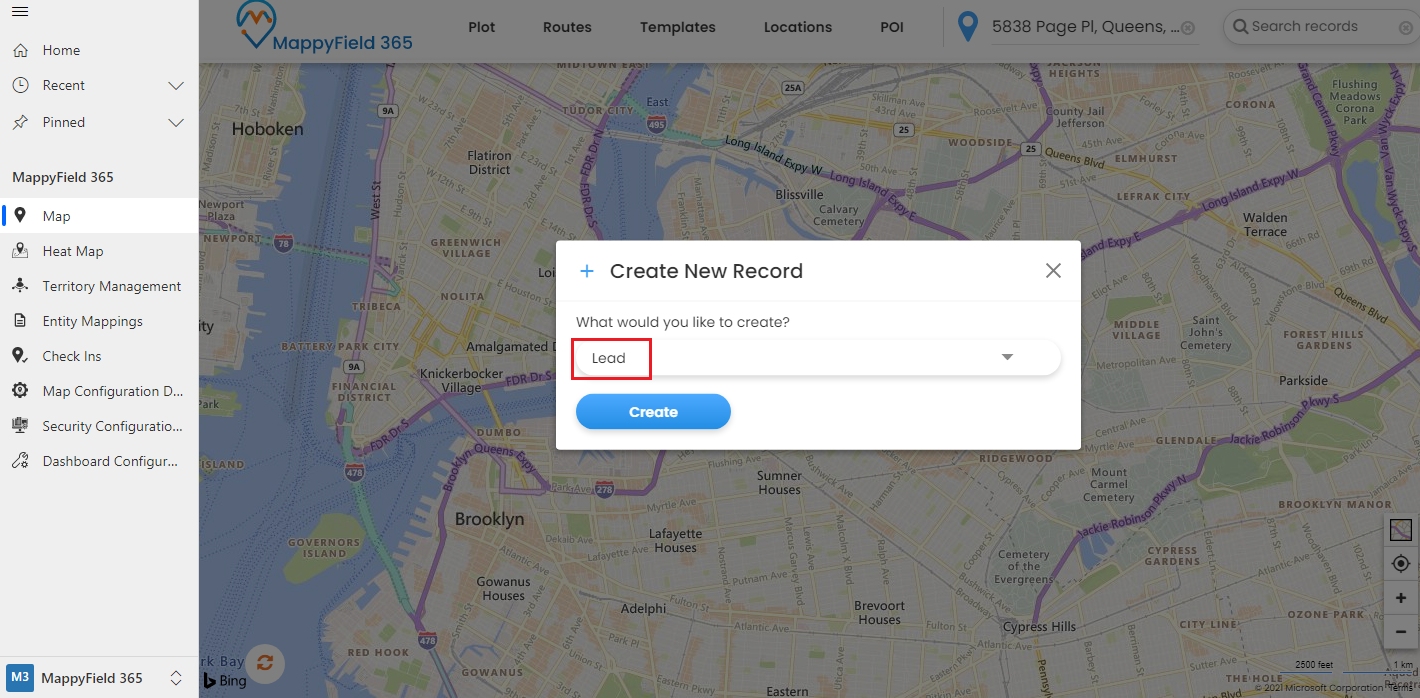
Once an entity is selected, click on the Create button that will open the CRM form in a new tab for creating a record.
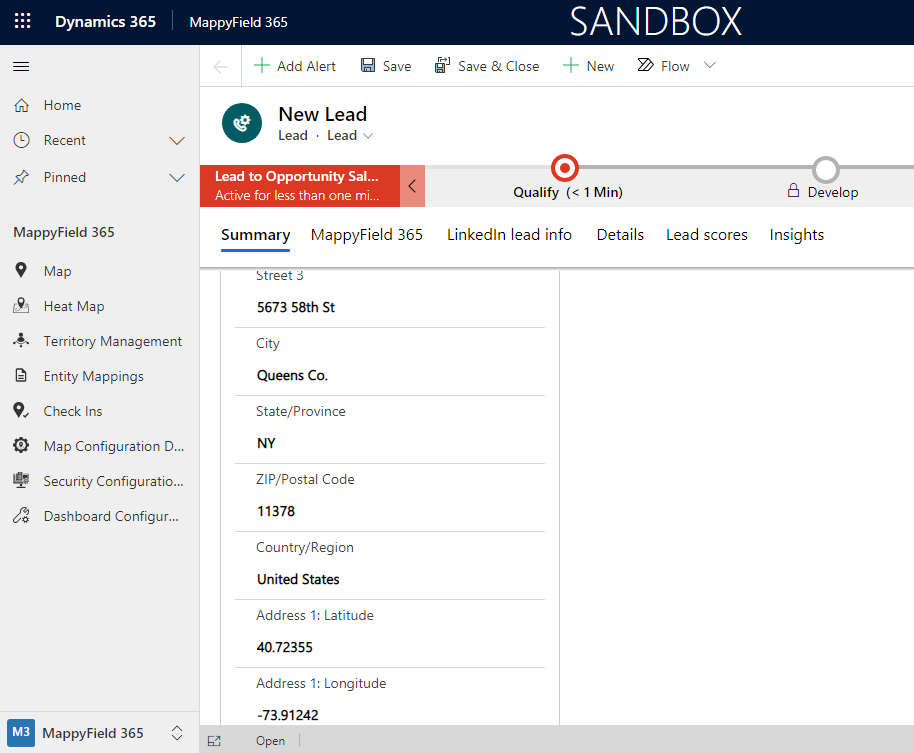
It will pre-configure the address for that record. Your selected location will be auto-filled in the entity details. Later on, you can save and edit & update the details.
Add To Route:
It will add the selected location as a route in the map. This quick option of the context menu will help if you have already plotted records on the map and create a Route.
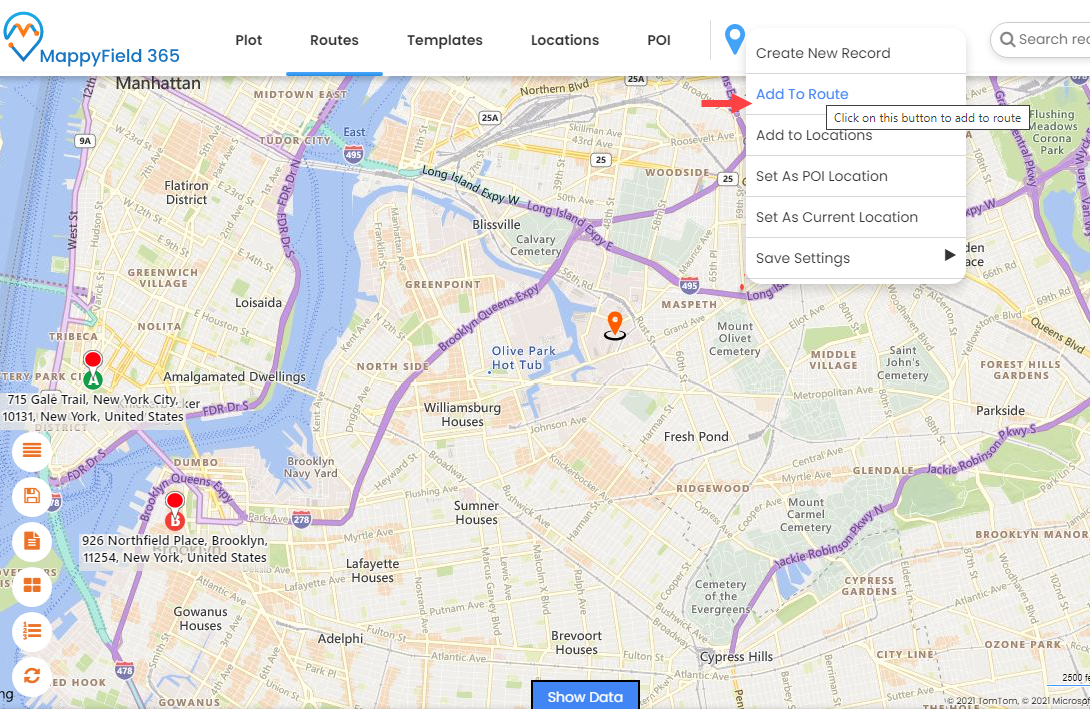
By clicking on the Add To Route, the right-clicked location will be added in the Route. So now you can visit that location as per your Route.
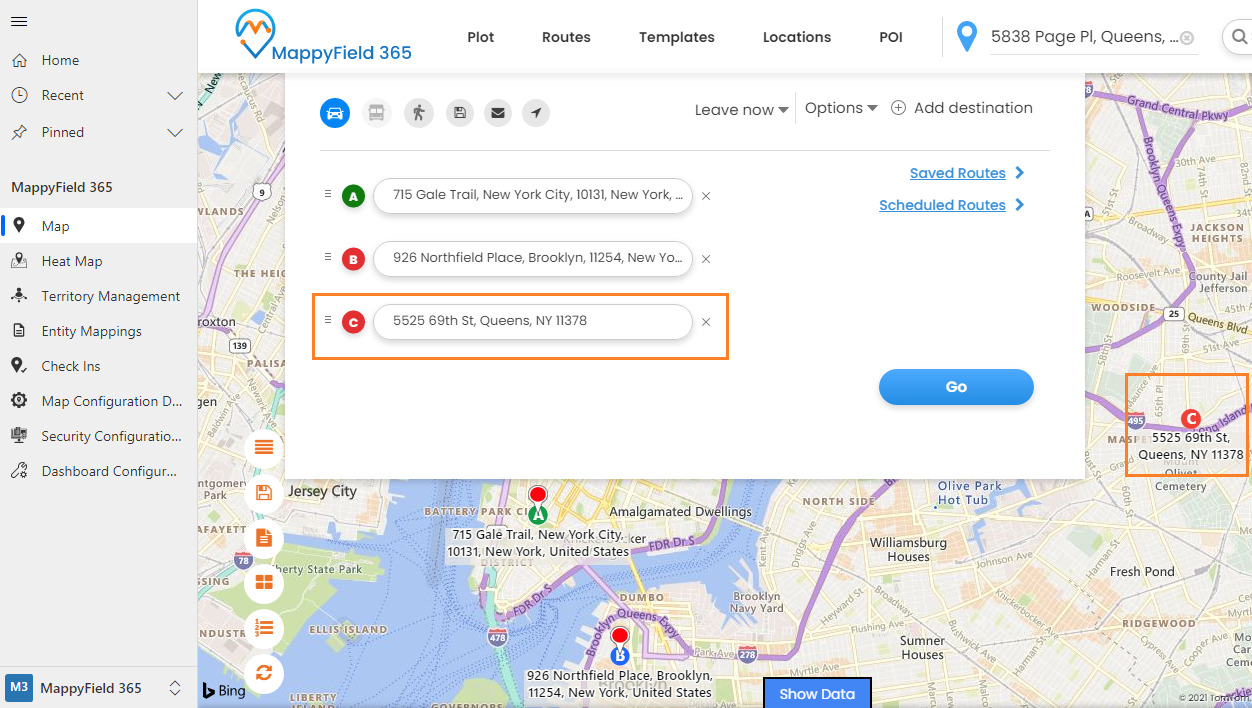
So from the context menu, it will easy to add the specific location into your routes to perform any sales/service visits.
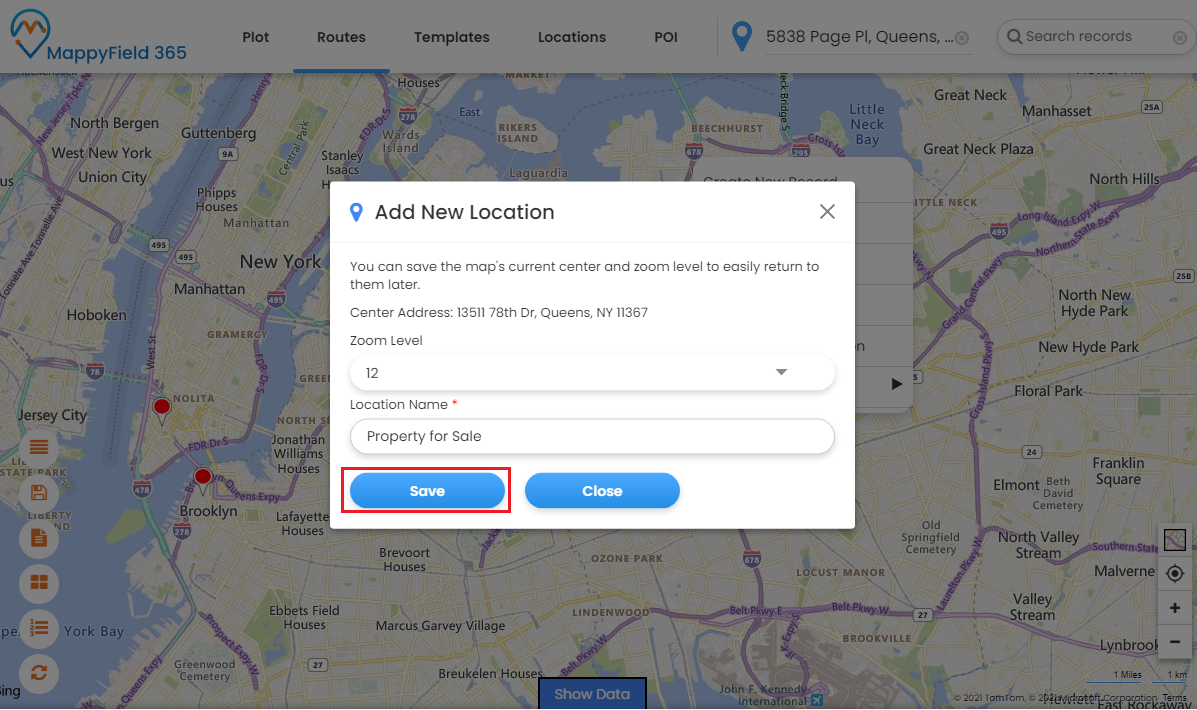
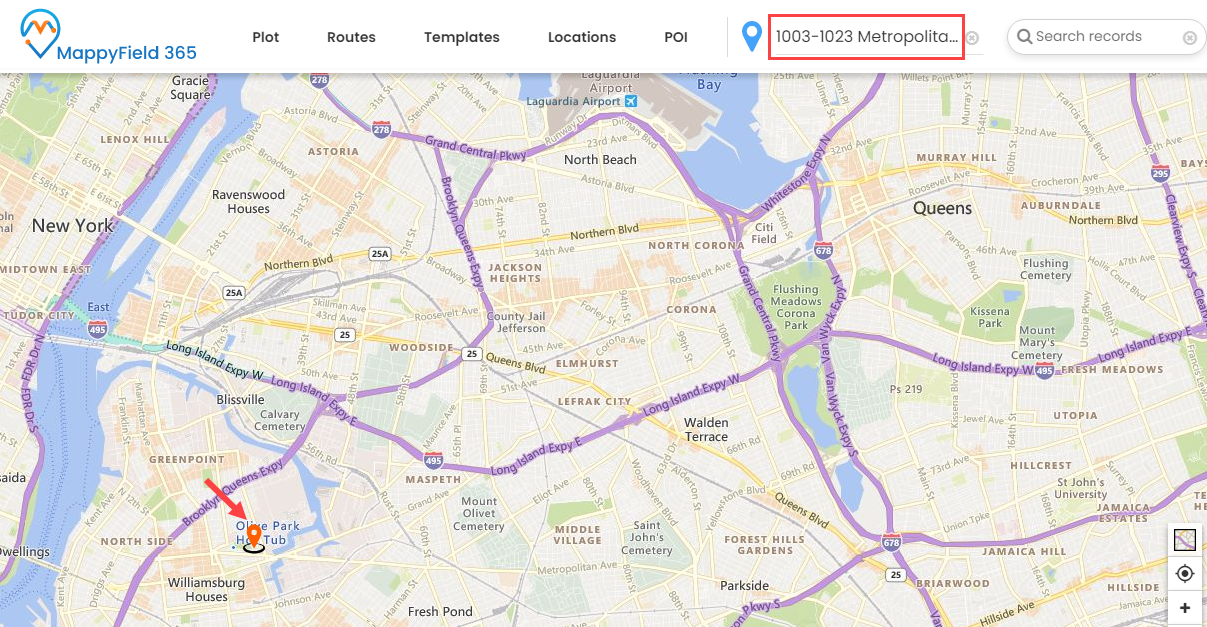
Add to Location
It will save the selected location with the default ‘zoom level’ & ‘location name’ for further use. So later on by clicking on that saved location, it will directly redirect you to that location.
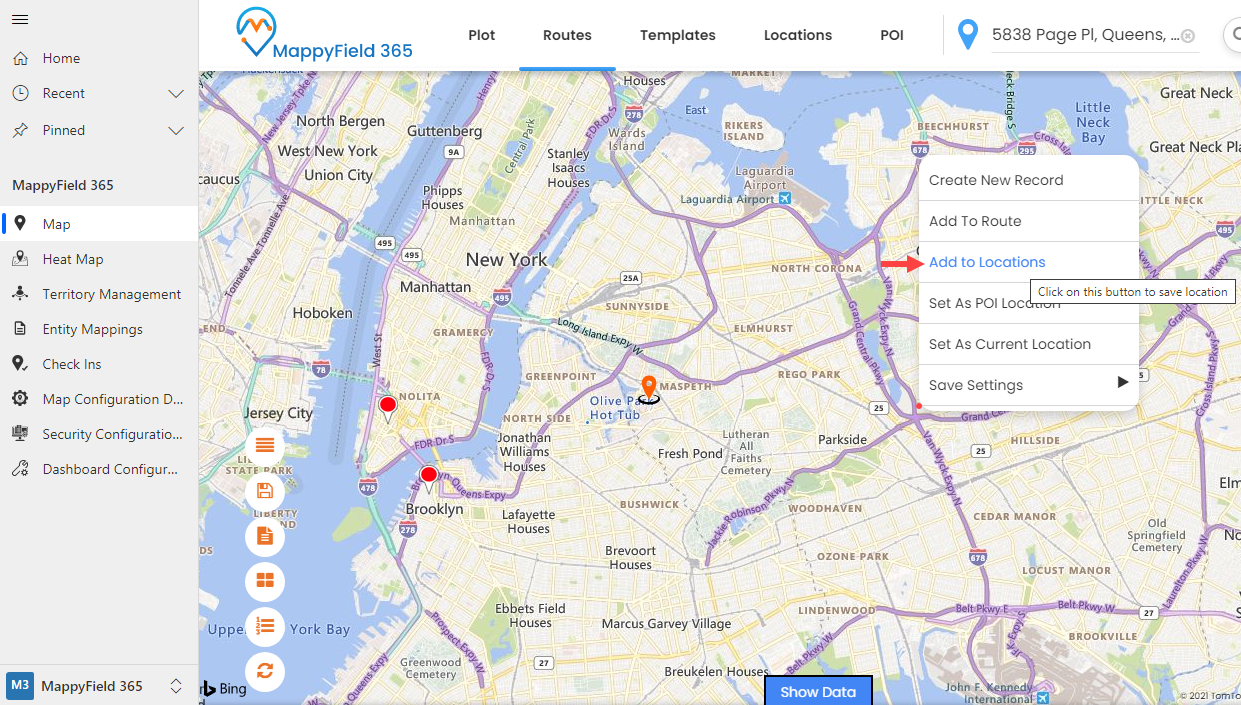
Suppose, your organization is looking for a new office and you found that prime location, this quick option of the context menu will help you to add and save the location directly from the map itself.
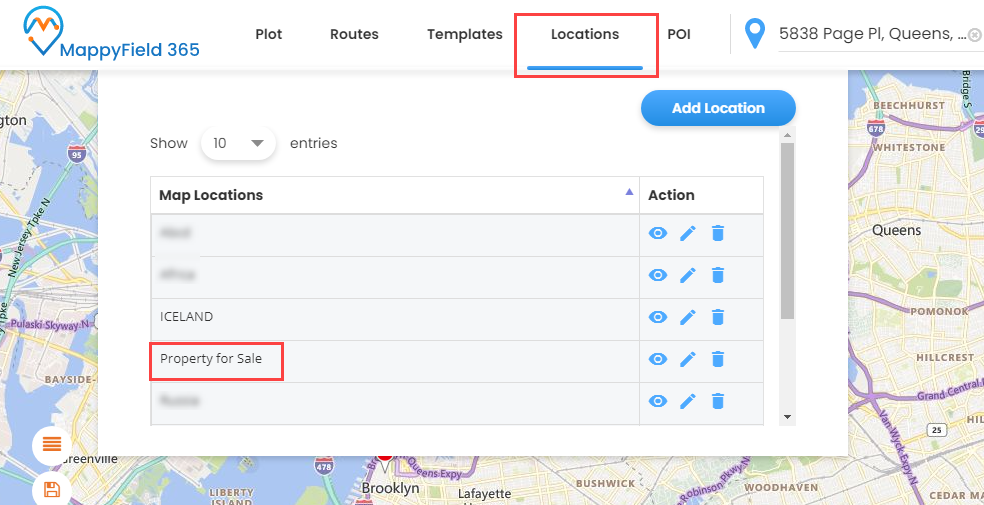
To view the saved location, click on the ‘Locations’ tab, here you will find the list of the saved location.
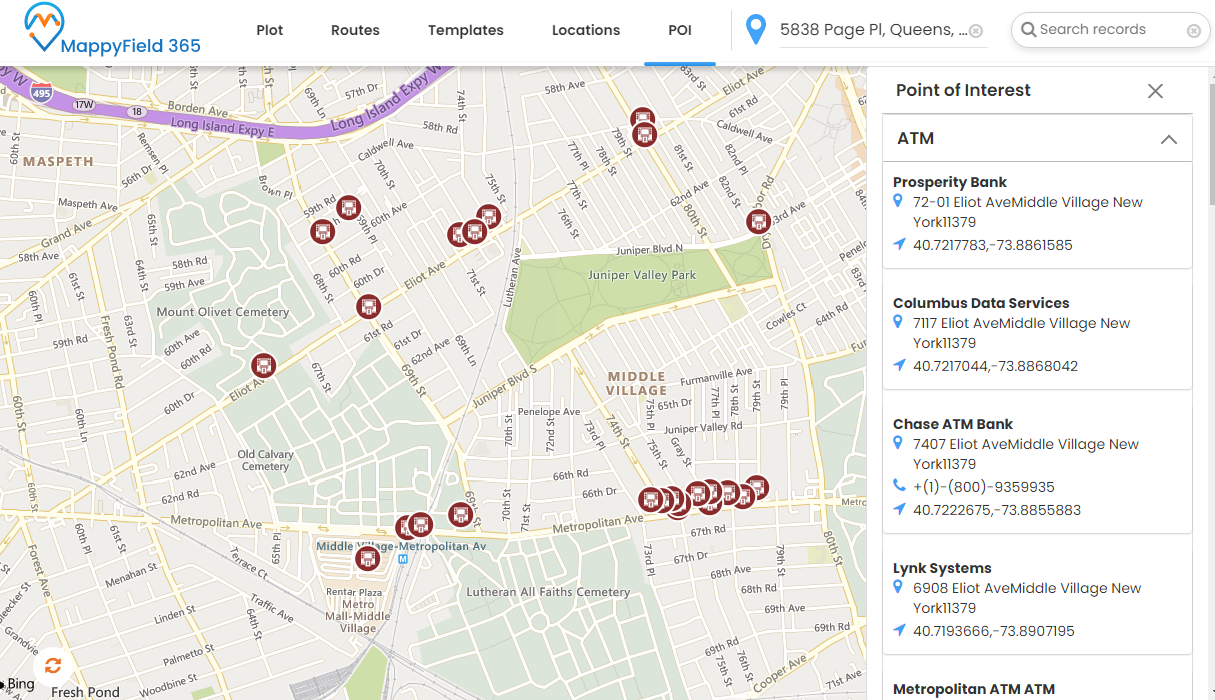
Set As POI Location:
It will add your selected location as POI Location.
If the sales reps plan to visit the client’s place for sales/service, they can search the POI based on the specific location/area.
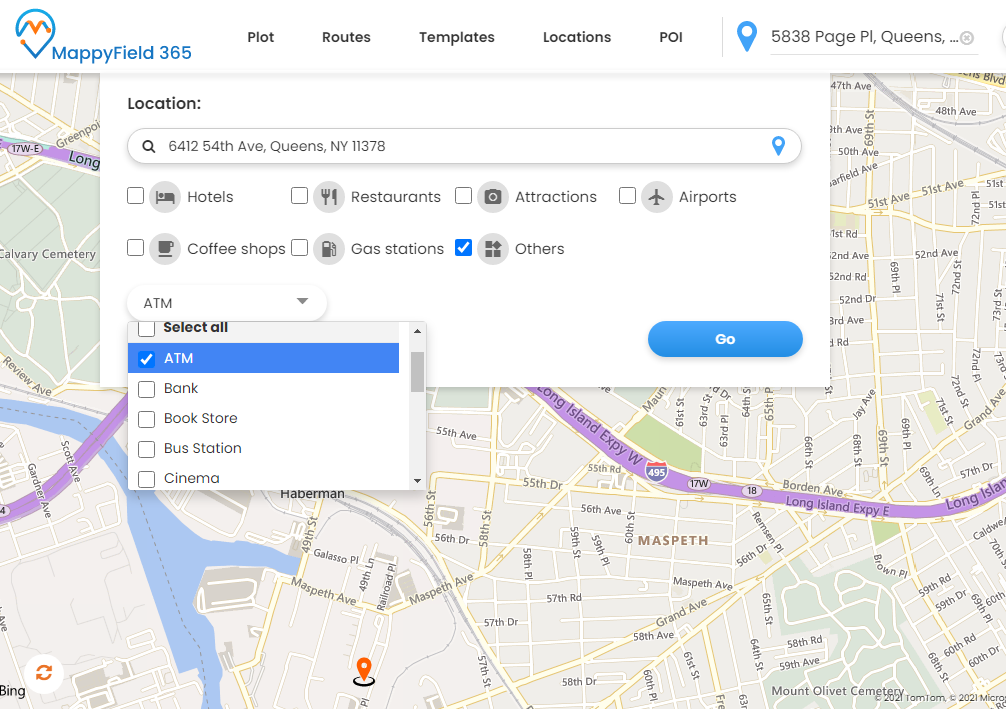
Based on the selection of the location, the sales reps will get the POI location nearest the selected location.
Set As Current Location:
You can change the current location just by right-clicking on the specific location on the map itself.
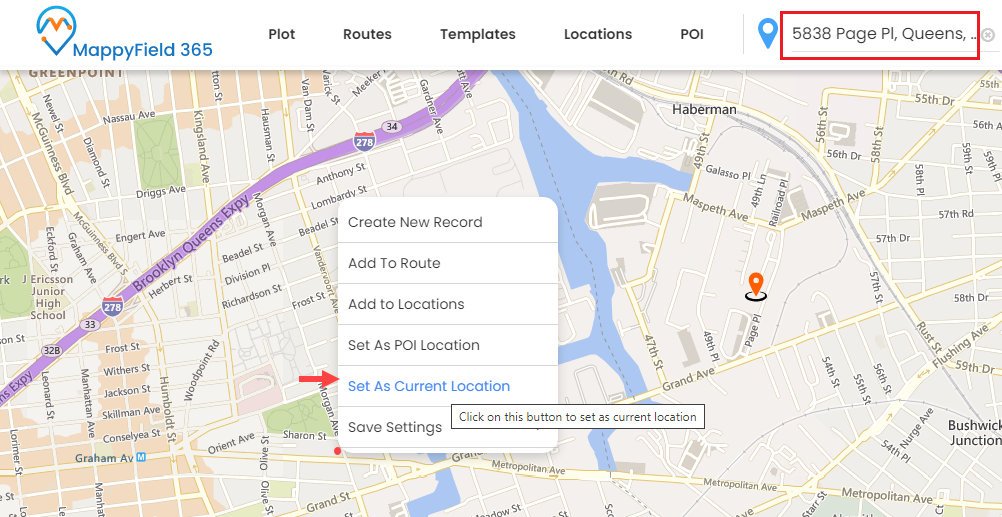
By clicking on the Set As Current Location from the context menu, the selected location will be set as per the current location and the address will also change.
Based on the Current Location, you can perform many actions like proximity search, POI, etc.
Save Settings
You can directly save some of your settings from the map. You will not require to navigate to the specific configuration to change the default settings of the Map. It is possible from the context menu.
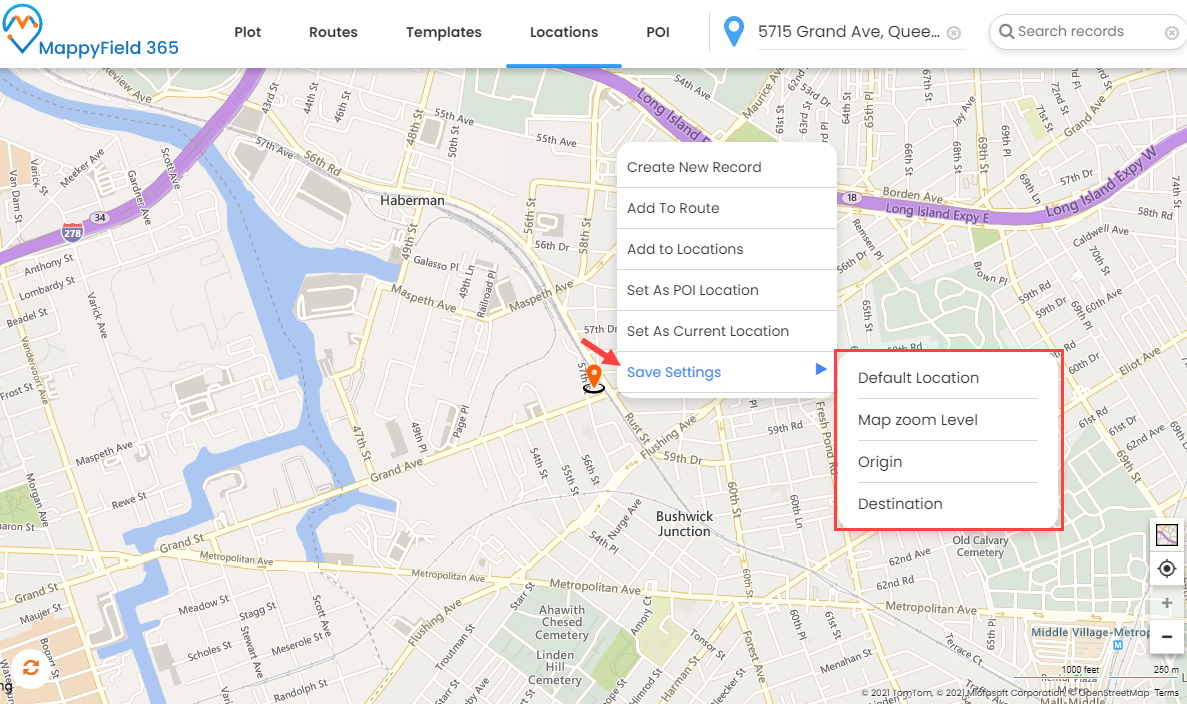
Default Location: It will set the selected location as a default location on the map.
Map Zoom Level: It will set the default zoom level of the map when the map is loaded.
Origin: It will set the default origin of the selected location.
Destination: It will set the default destination of the selected location.
Hence, the sales managers (or admin users) will not require to navigate to the specific CRM menu to add the records every time as they would perform quick action using the context menu of the MappyField 365.
MappyField 365 is a Dynamics CRM app that provides Dynamics CRM data visualization on the map. It helps CRM users to visualize the Dynamics CRM data by plotting the different entity records on the Map and managing the activities geographically.
All product and company names are trademarks™, registered® or copyright© trademarks of their respective holders. Use of them does not imply any affiliation with or endorsement by them.


