

Previously, launching a store meant having a large budget, buying inventory, and setting up storage space. It took a lot of effort, yet you couldn’t be sure if your products would sell.
However, now, with online platforms like Shopify, you can launch your store with a few clicks and in less time. This article will cover all about Shopify website management and how to launch your Shopify store as soon as possible.
Let’s get started!
How to Launch your Website with Shopify
First, set up your Shopify store. Create an account, choose a theme, configure settings, and add products. After adding all the necessary information, it’s time to make it live.
Choose a Domain Name
To make your website live, you need to choose a domain name, i.e., an online website where customers can find you. Shopify can help you with a domain name, or you can even purchase from third-party companies like GoDaddy or BlueHost. You can also check the best Bluehost alternative for hosting.
Update DNS records
If you’re using a third-party domain provider, you will have to update DNS records to ensure that the domain name points to the correct IP address.
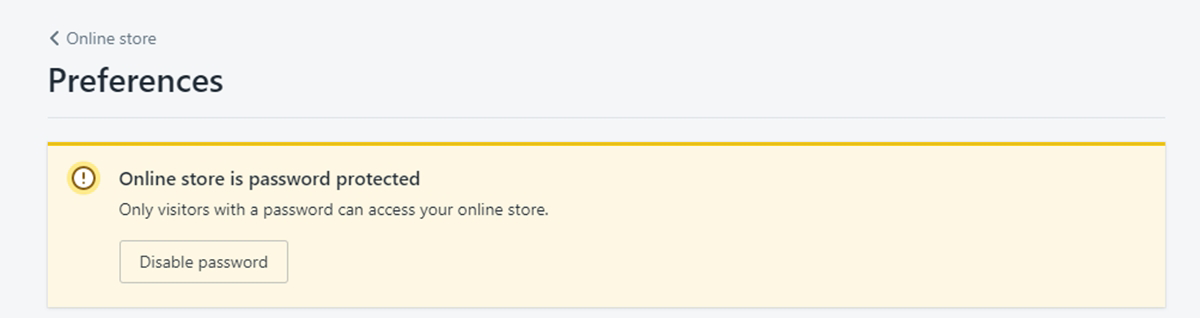
Remove storefront passwords
If your store theme is password protected, make sure to disable it before launch. If the option is enabled, it will leave a message for visitors, as shown in the image below.
Set primary and other domains
When you set up a store, you will get a default subdomain under myshopify.com. You can use this default domain, but a custom domain name will be better if you want to make it professional. For that, you need to register a domain.
Shopify allows you to add multiple domain names and set them as primary. And with that, you will have a fully functional store. You can configure other aspects of the Shopify store through the backend dashboard.
That’s not it! To run the store smoothly, here are some tips that you shouldn’t overlook.
Tips for Shopify Website Management
Businesses searching “how to manage my Shopify store” often find themselves with results like – check your title and meta tags, add sales channels, double-check payment gateways, adjust tax and shipping settings, review email notification settings, etc.
Here’s what you need to do to drive sales:
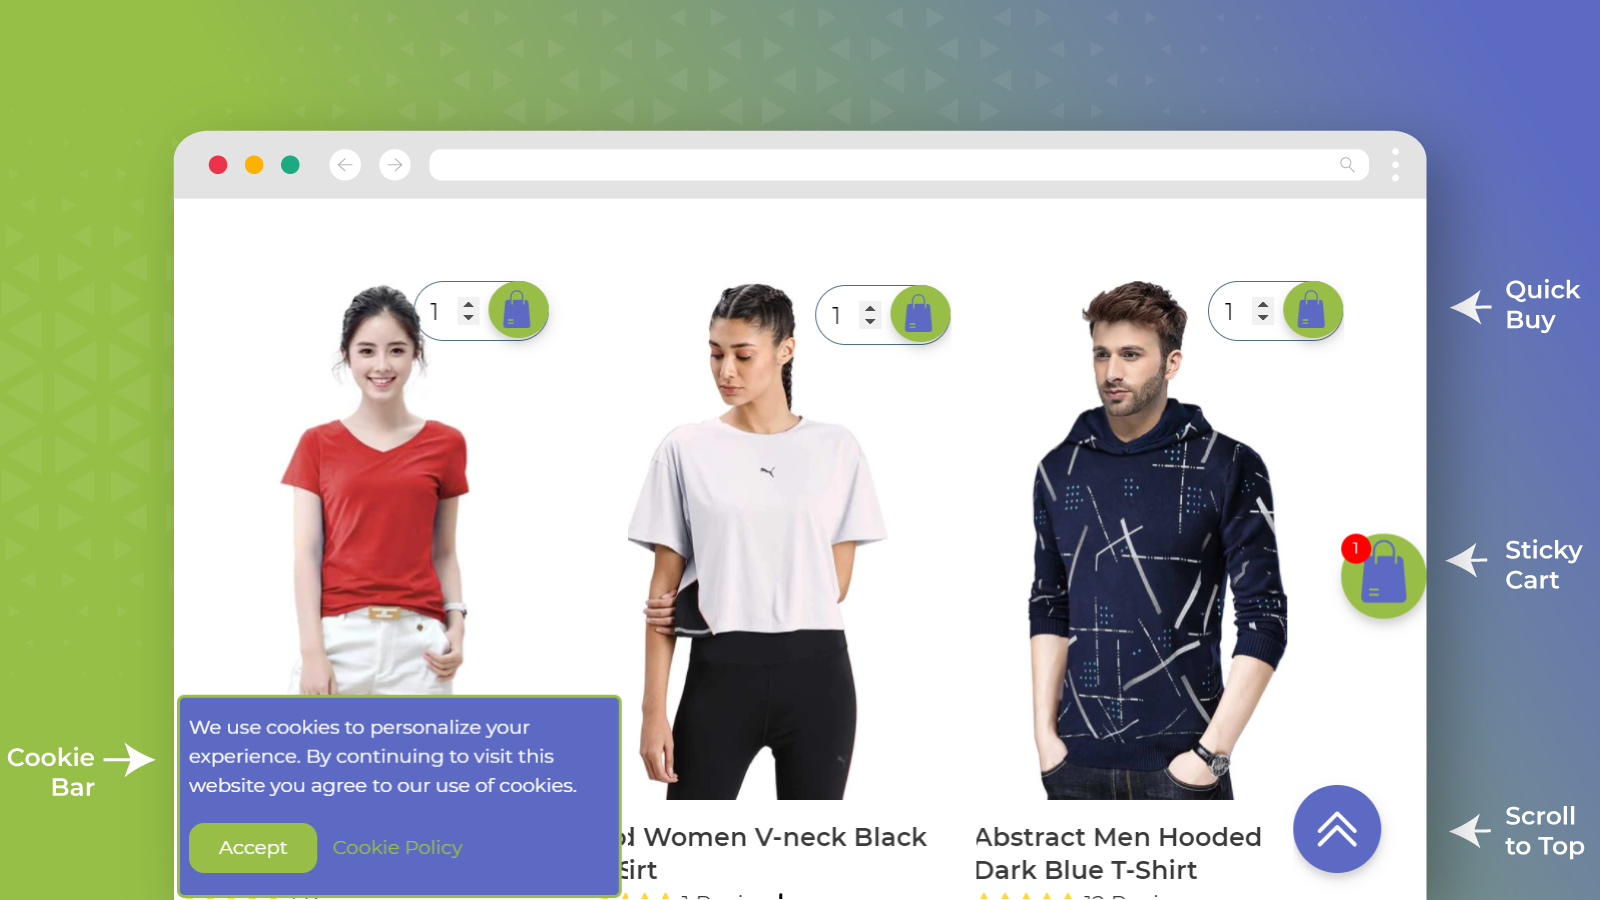
Recover Cart Abandonment
The easiest way to reduce cart abandonment is to ease checkout. For that, you need to show a clear call to action, provide a mix of delivery options, offer guest checkout, add add-to-cart and quick buy buttons. Send real-time reminders and back-in-store alerts to notify them about the products and their availability.
For that, Shopify lets you modify checkout settings. You can customize the style, i.e., add a logo, change color and fonts, etc. It is very important to customize the branding with a distinctive logo design with consistent colors and fonts. Next, choose whether you want to prompt users to create an account during checkout or proceed as a guest.
Additionally, consider these choices:
- Abandoned checkout: Send automated reminder emails to customers who couldn’t purchase due to one or the other reason.
- Customer contact: Let customers choose how they want to be reached by the support team.
- Quick buy: Add a button that prompts customers to make an instant purchase.
With CommerceXpand, you can do it all. This bundle of 20+ apps allows you to send real-time reminders, add a quick buy button, tab count, countdown timer, and more. You don’t need to add standalone apps to boost conversions or drive sales.
Ease Store Management
The next step in the Shopify store launch checklist is to add and organize products, customize product bundles for upselling. Make sure you have added all variants, price, tag, product type, title, vendor, etc. As with every season and sale, you may need to decrease the price, restore it, add tags to hundreds of products, or publish them on Amazon or Google Shopping sales channels.
However, adding/editing the details manually can be time-consuming. Hence, bulk edit product details. Apart from this, take pre-orders to attract more revenue.
How can you do this?
By integrating a third-party bulk editor. It lets you edit everything about product/variants such as inventory, compare-at-price, tags, title, category, attributes, and more. The bulk editor app allows scheduling bulk edit tasks for a future time and date. You can plan your holiday sales. Moreover, it lets you revert the changes with just one click.
It does all the repetitive tasks for you, letting you focus on Shopify website management.
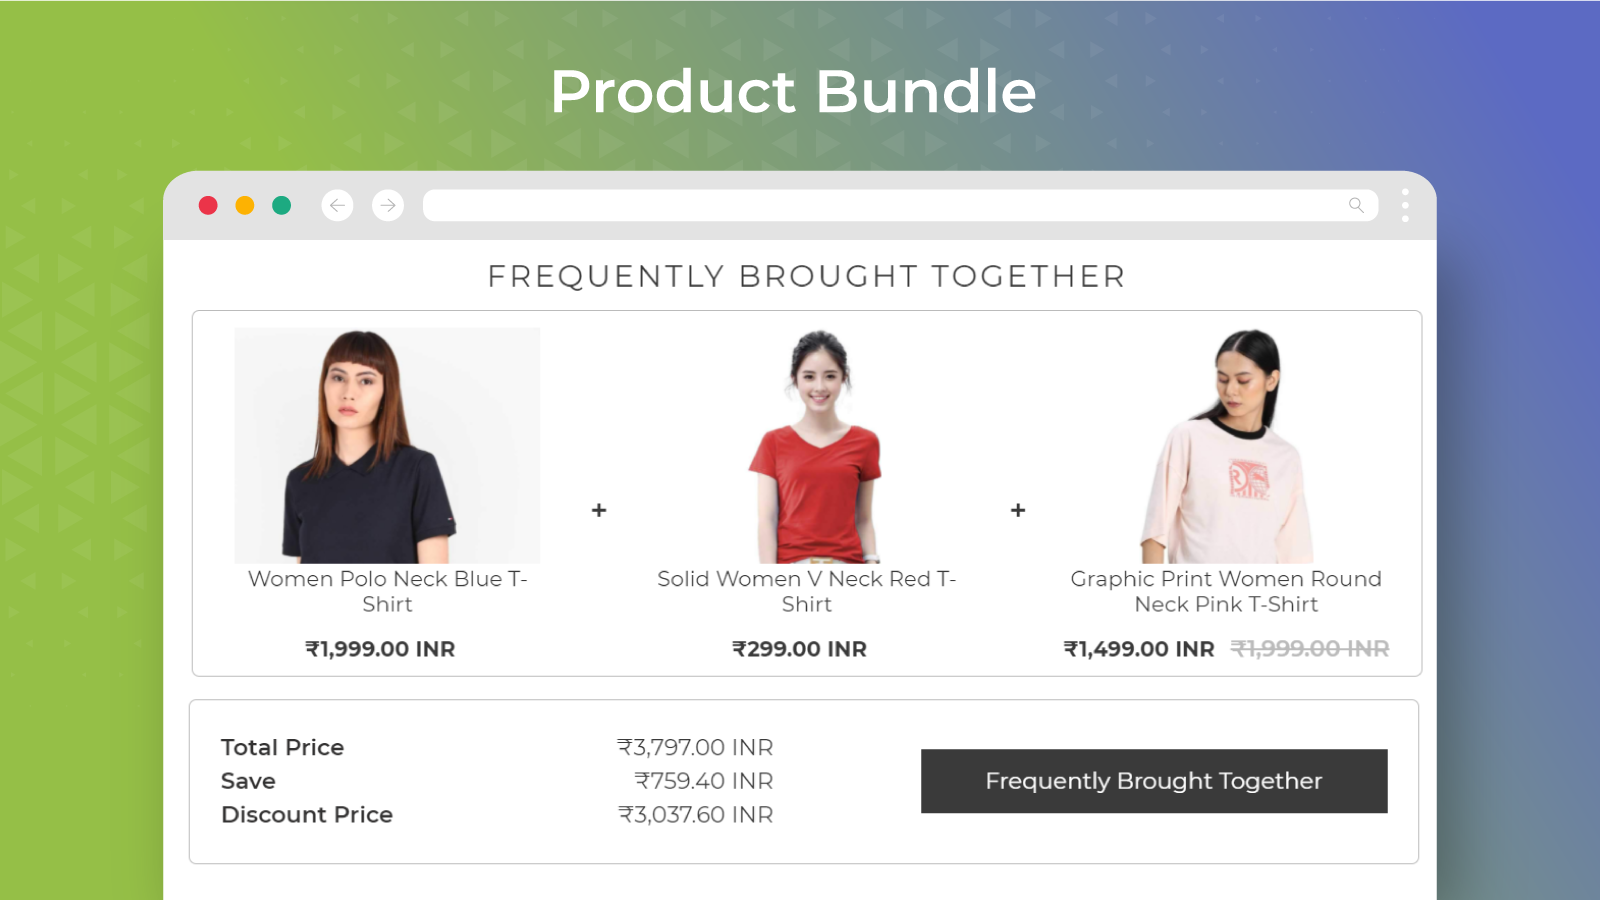
With Shopify product bundles, you can offer products in bundles and promote those at a discounted price. You can create different bundles like – frequently bought together, bundle by-products, bundle by collection, and buy one get one free.
This is one way of managing stores – integrating plugins and using the default Shopify features. But if you want it to be done easily and quickly, integrate CommerceXpand – a collection of 20+ Shopify apps.
With CommerceXpand, you can increase revenue by taking pre-orders, creating product bundles, and bulk editing product details all in one app.
Optimize Images
64% of the website’s weight is composed of images. If you can reduce the image size without affecting the image quality, it will positively impact page load speed and user experience. A webpage that takes more than 3 seconds to load loses 40 percent of its visitors. Image optimization is the only solution to reduce bounce rate.
Here’s how to optimize your images:
- Use keywords while naming images: This will boost the SEO ranking of your site and pages. Keywords can help in better conversion.
- Reduce the image size: You can use compressed images for web stores. Hence, compress and reduce the image size before launching with the help of image optimization tools.
- Optimize thumbnails: Pictures are all over eCommerce stores. Thus, make sure you use the smallest image size possible for Shopify eCommerce development.
- Enhance alt attributes: Alt attributes provide information about images. They also help in web accessibility. Make sure you optimize it with keywords.
- Choose the right file type: It’s recommended to use .jpg or .png file formats. For decorative images or thumbnails, you may also use .gif.
- Test images before launch: Run A/B testing and check what image is working and what is not.
Conduct Content Audit
Sometimes you may be so occupied with selling and managing the store that you won’t notice small mistakes like spellings, grammar, and broken links. Hence, proofread your content. It’s crucial as a small mistake can cause problems post-launch.
Homepage, knowledge base, etc., are the things that customers check out first. According to a study, 60 percent of customers are curious about the brand before initiating a purchase. So, proofread and refine your content to give a memorable reading experience to customers.
Make sure your content is SEO optimized. Look for broken links and 404s, image rendering issues, and mobile responsiveness on the technical side. Last but not least, protect your content from competitors and malicious people by configuring cookies, blocking redirection, and disabling the best-selling sort.
Implement Store Localization
It’s essential for businesses expanding globally to implement localization strategies, i.e., language translation and currency conversion. Quality translation of content and auto-switching of currency help enter local marketplaces. For example, customers in India can view the product price in rupees, while US-based customers can view it in dollars. They can translate the content in their preferred languages like Spanish, Hindi, or others.
Localization helps you sell your products or services across the globe without any barriers.
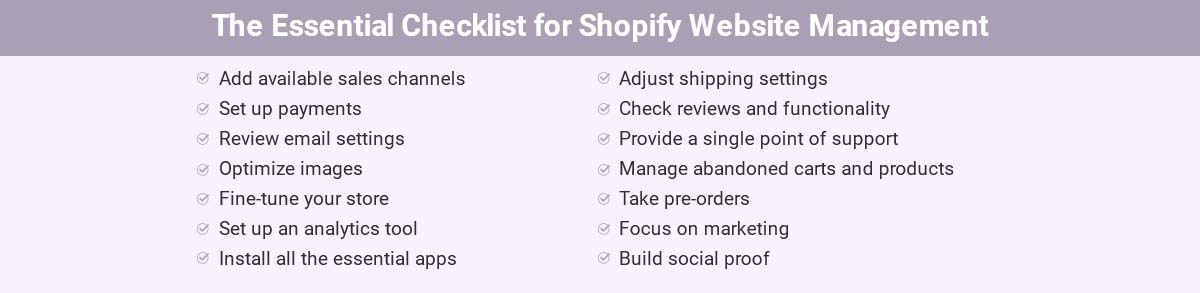
Just like these, there are a lot more things that you need to consider while launching your Shopify store. Creating a checklist helps you decrease complications and avoid mistakes while on the go.
The Essential Checklist for Shopify Website Management
Launch your Store with CommerceXpand
Now that we know about the essential launch items for Shopify, it’s time to implement them and start selling. You can integrate standalone apps for localization, image optimization, bulk editing, abandoned cart management, driving sales, etc.
Or you can go for a bundle of apps that let you launch your store in one day. That one app is CommerceXpand. For helping you boost conversions to protecting stores and improving customer experience, it offers 20+ apps with rich features essential at every stage of the buyer’s journey.
CommerceXpand frees you of the clutter standalone apps create. You don’t have to manage multiple apps to run your store, and most importantly, it reduces the cost of individual apps.
With a single click, you can download all the apps and even disable the unnecessary ones. Here’s how CommerceXpand helps you manage your store.
Apps include:
- Bulk Product Editor
- Pre Order
- Image Optimizer
- SEO Alt Tags
- Currency Converter
- Abandoned Cart Management
- Product Bundles
- Product Reviews
- Announcement Bars
- Content Protection
- Order Export
- Geo Redirection
and more.
All product and company names are trademarks™, registered® or copyright© trademarks of their respective holders. Use of them does not imply any affiliation with or endorsement by them.


