

Dynamics CRM has Bing Maps integrated by default. But there are certain limitations when it comes to navigating using Bing Maps inside of Dynamics CRM.
To overcome these limitations and achieve more from your Dynamics CRM, you can invest in a Dynamics Mapping tool that allows you to plot records on a map, visualize data with heatmaps, and manage your territories more effectively.
Not only that, but you can also find the shortest paths to cover more clients and meetings in a shorter period of time. And with the right app for navigation, your on-field sales reps can work more effectively.
In this blog, we are going to show you how to set a navigation app like Google Maps, Apple Maps, or Waze on a user level using the Dynamics Mapping tool. Further, we’ve also demonstrated how one can generate navigation links to go about their day.
For the demonstration purpose, we’ve taken MappyField 365 but you can browse around on MS App Source and find a suitable Dynamics 365 map integration.
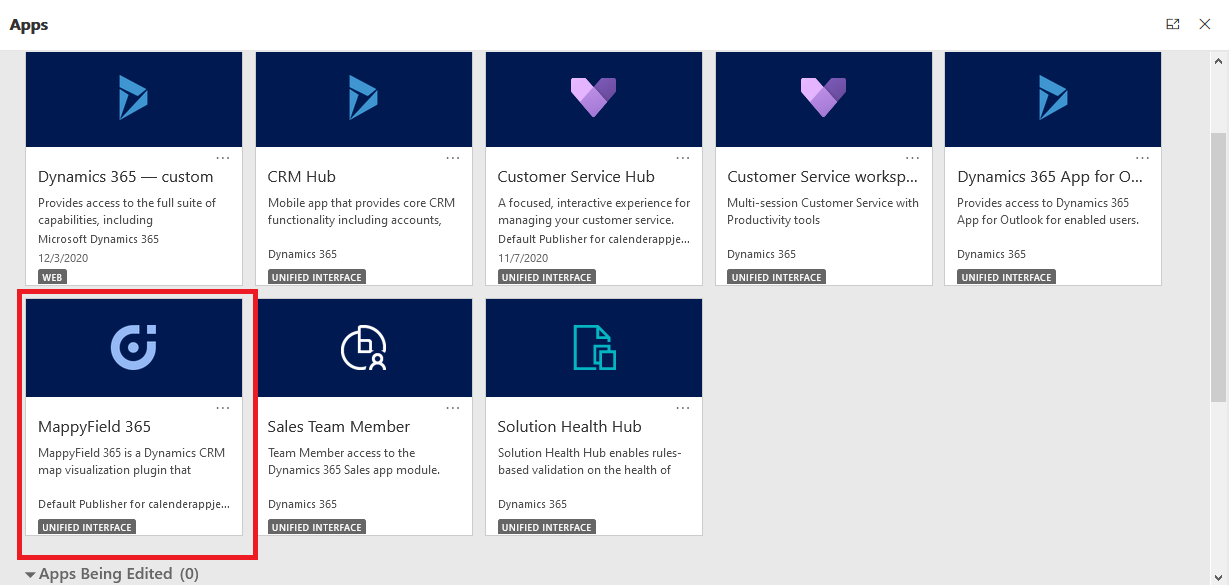
Step 1: Navigate to MappyField 365
After logging into Dynamics 365, click on “MappyField 365” from the Dynamics 365 apps dashboard.
Step 2: Select any one(Google/Waze/Apple) from the configuration
– Click on the “Map Configuration Details ” option and select the user (a record) for whom you want to set the Navigation Map.
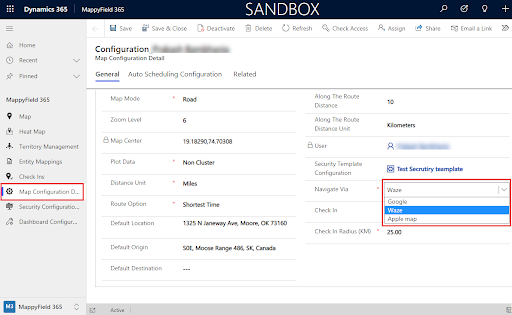
– You can set navigation maps at an individual level i.e. for one user you can set Google Maps while for another user, you can set Waze Map and so on.
– You can also set the Navigation Map based on the devices i.e. Google Map for Android and Apple Maps iPhones/iPads.
Based on the selection in the user configuration detail for ‘Navigation Via’, the navigation link will be generated from the MappyField, and by clicking on it, the user will be redirected to the respective App.
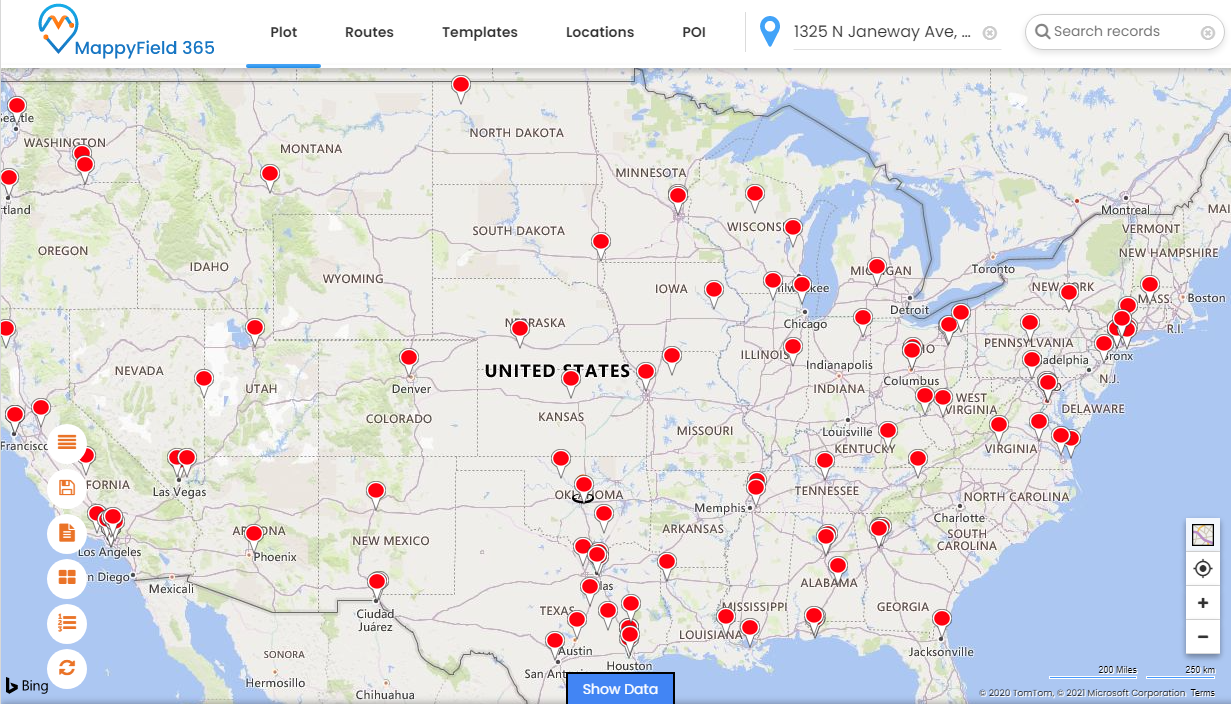
Step 3: Plot records on MappyField 365 map
Now, plot the records on the map by selecting the CRM entities that are configured from Entity mappings. Under the Plot tab, select the Entity and its Records view. You can also select multiple entities if you want.

The entity records will be plotted on the Map.
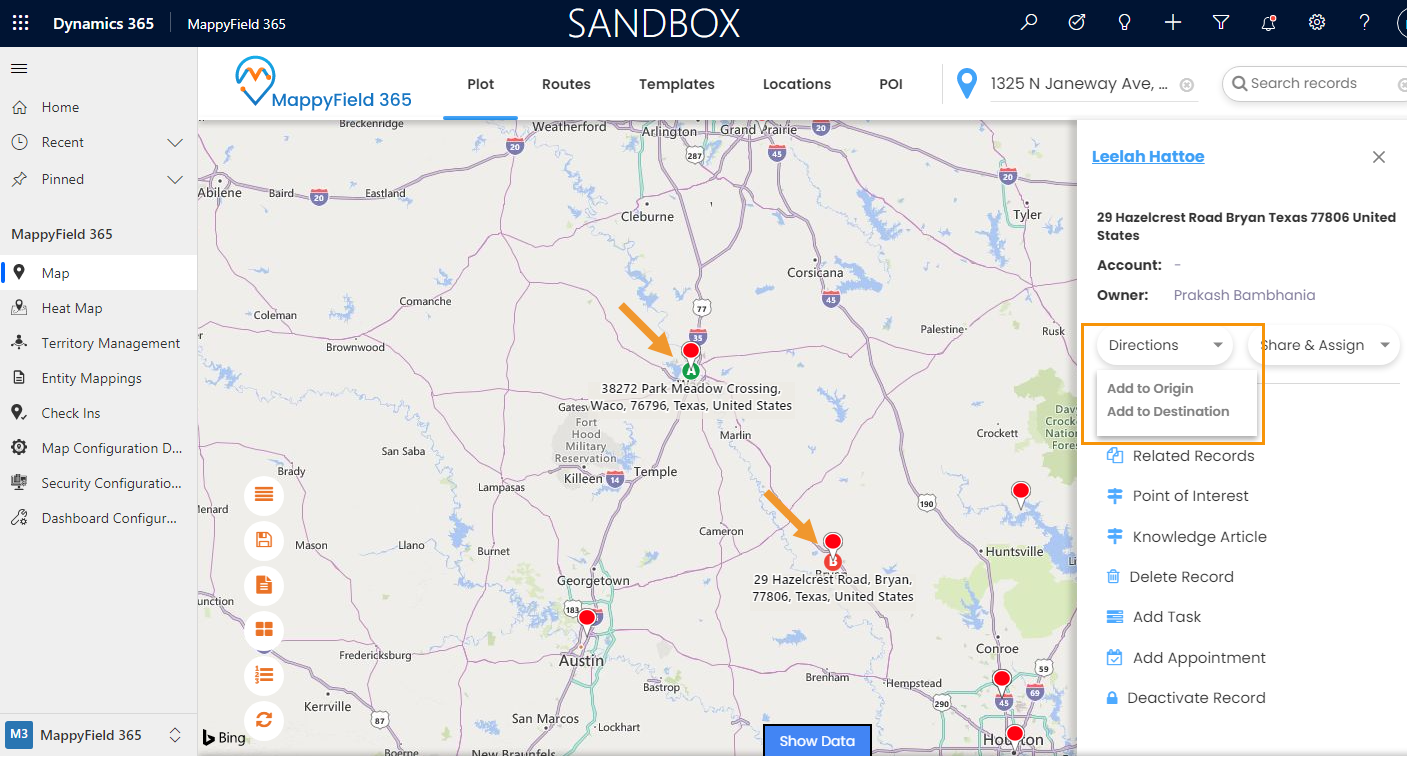
Step 4: Insert the Origin and Destination
After plotting the data on the maps, you can add the locations in two ways:
– Manually: Click on the “Direction” tab. From here, you can insert the starting & ending locations by inserting the address manually in “From” and “To” edit boxes.
– Pushpins details: By clicking on any Pushpin, the details of that record will popup. You can set the directions by selecting the “Add to Origin” option and the final destination by selecting “Add to Destination” respectively.
After selecting origin and destination, both locations automatically get inserted in the “Directions” tab.
– Now click on the Go button for directions on the map. You will get turn-by-turn directions of inserted locations.
The multiple locations selection option is also provided if you want to cover 2-3 clients in a single day.
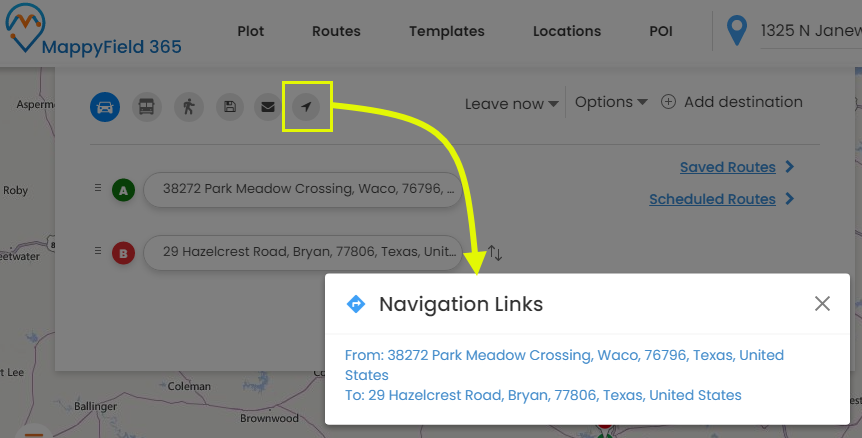
Step 5: Generating Navigation Links
– After the route is plotted on the map, click on the navigation icon to get the link of the plotted route.
– If you have selected multiple locations, you will get more than one link.
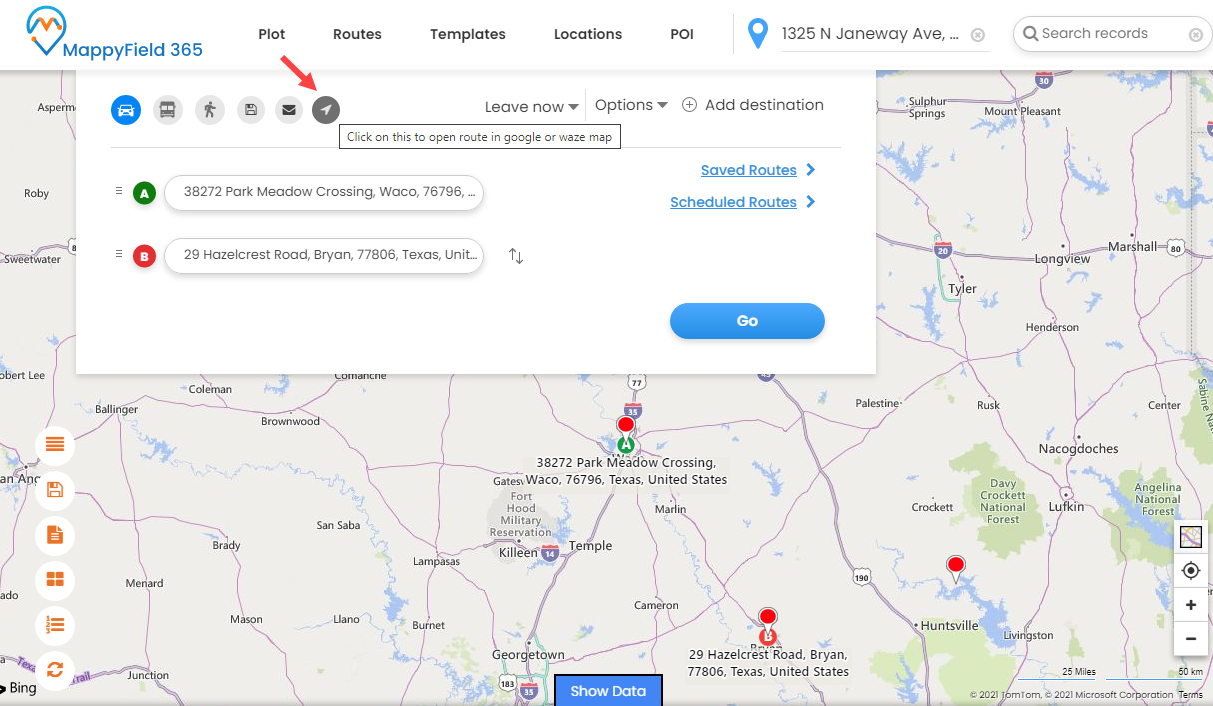
– This will open the “Navigation Links” popup with direction links as per the selection of the Origin & Destination locations.
– If there are multiple routes, the links are generated from waypoint A-B, B-C, so on.
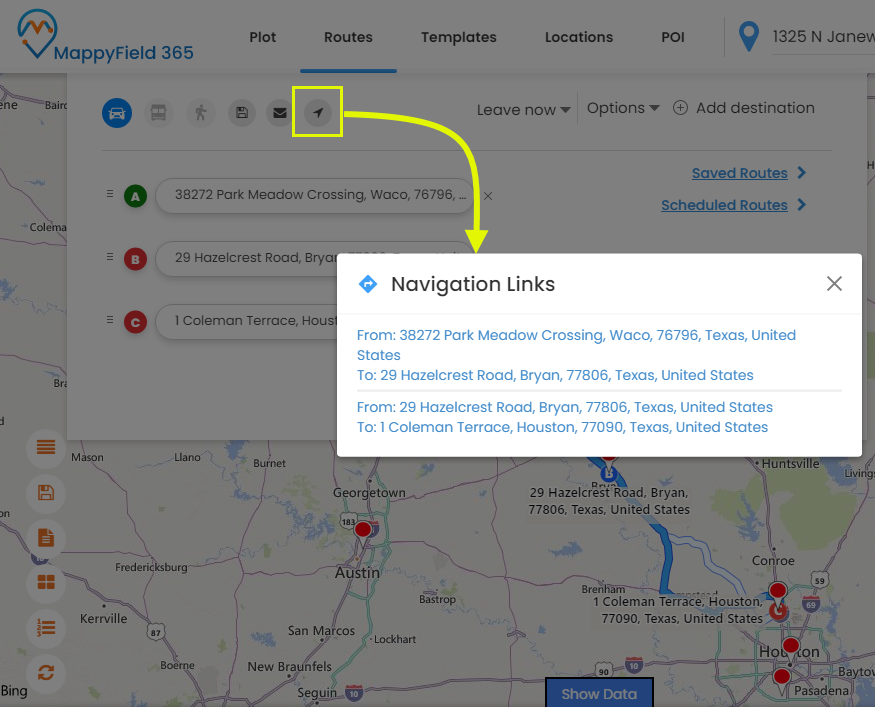
– By clicking on the links from the Dynamics Mobile/Tablet App, you will be redirected to the relevant Maps app as per the selection of Navigation Map in Map configuration details.
Therefore, the admin user can select any Navigation Map option from Google Maps, Waze, or Apple Maps. This makes it easier for the reps to access the links and make it on time for appointments and meetings.
All product and company names are trademarks™, registered® or copyright© trademarks of their respective holders. Use of them does not imply any affiliation with or endorsement by them.


