

What will you say about the idea of saving and earning money at the same time?
Seems impossible, right?
But it is not!
The number one pain point of any company having an on-field sales team is the amount of money and time that is lost because of sales reps not knowing the short routes or the traffic status.
This all can be resolved with a single feature: Shortest path first (SPF).
In this blog, we are going to showcase how you can enable this feature in your Dynamics CRM map integration and how your sales reps can use them as well.
For the demonstration purpose, we’ve taken MappyField 365 but you can browse around on MS App Source and find a suitable Dynamics 365 map integration.
You need to follow the below steps to enable the SPF and manage the routes:
– Enable Optimize Route option
– Plot the records and define the routes
– Routes based on SPF
– Save and manage the Routes
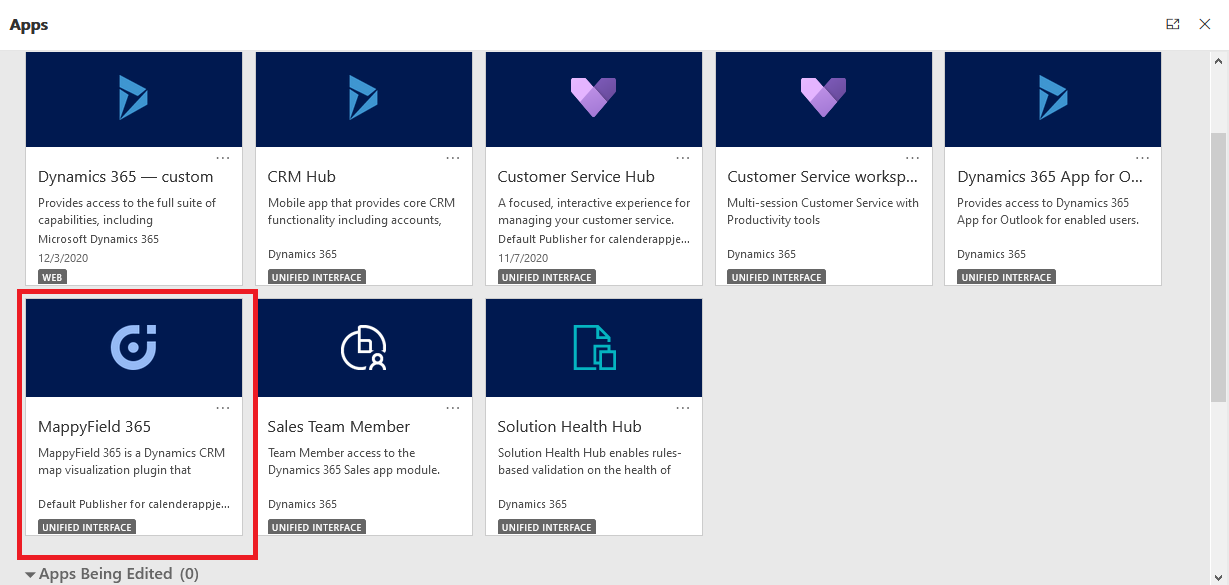
Step 1: Navigate to MappyField 365
After logging into Dynamics 365, click on “MappyField 365” from the Dynamics 365 apps dashboard.
Step 2: Enable SPF (Shortest path first) from the configuration
– Navigate to Settings → Solution → MappyField 365 → Setup and enable “Optimize Route”
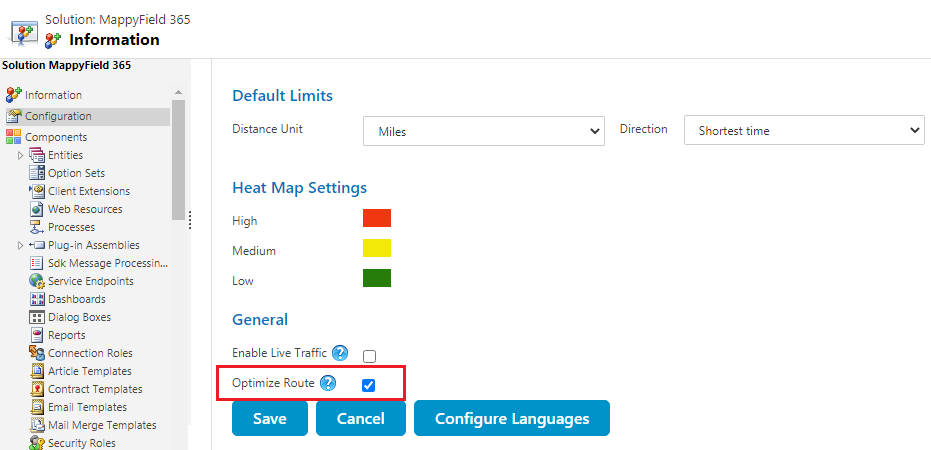
This will enable the shortest path first feature in MappyField 365 and now you can find the shortest path available for your route.
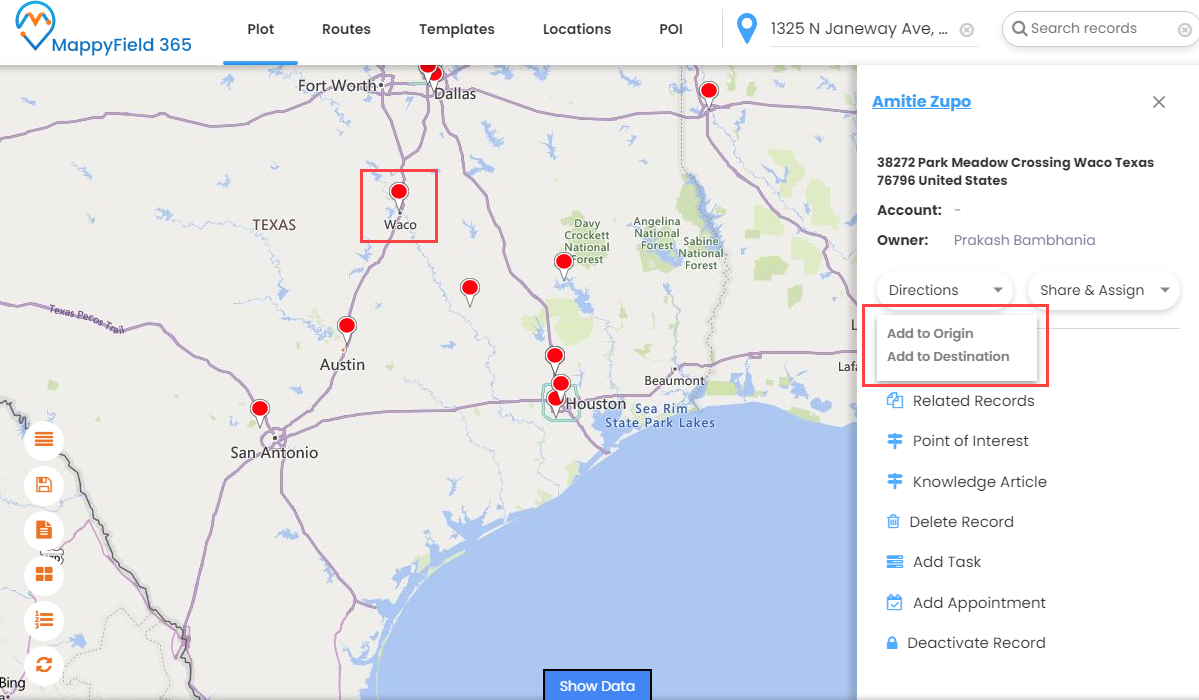
Step 3: Redirect to Map and define route on the map
– Define the ‘Routes’ by selecting the required records as per Origin to Destination. You can also define the Route by entering the place name under the ‘Routes’ tab.
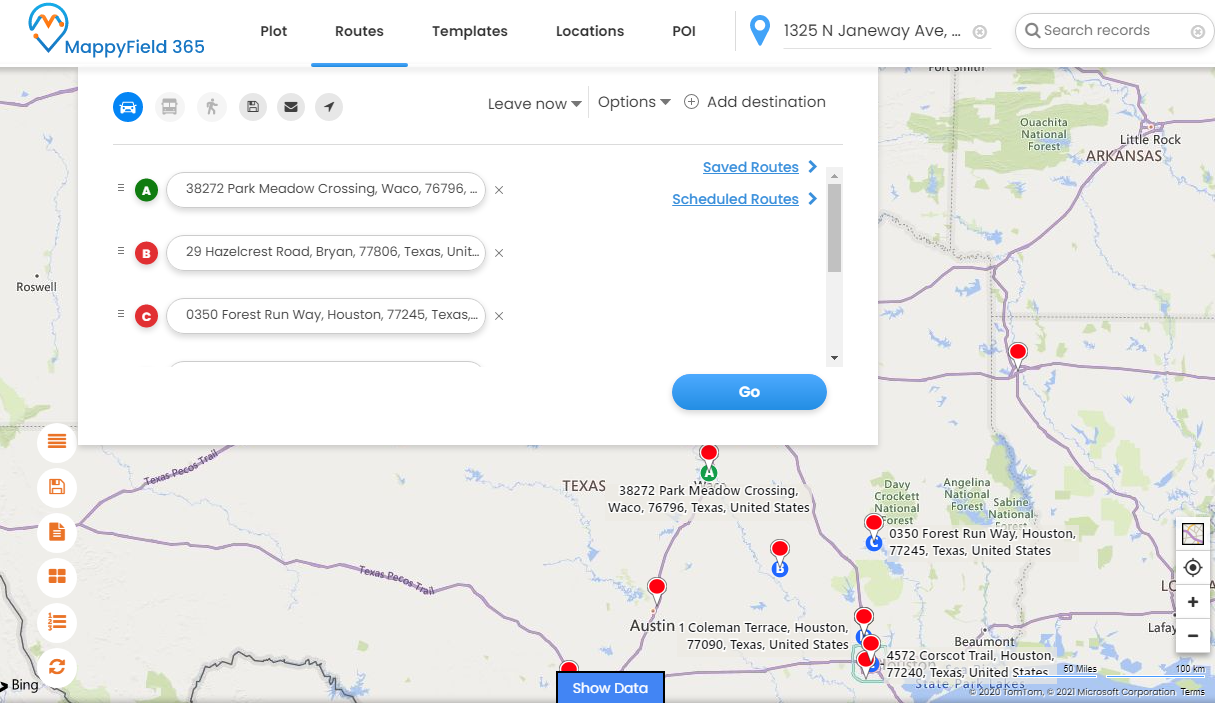
After plotting the route click on the Go button to plot the shortest route on the map.
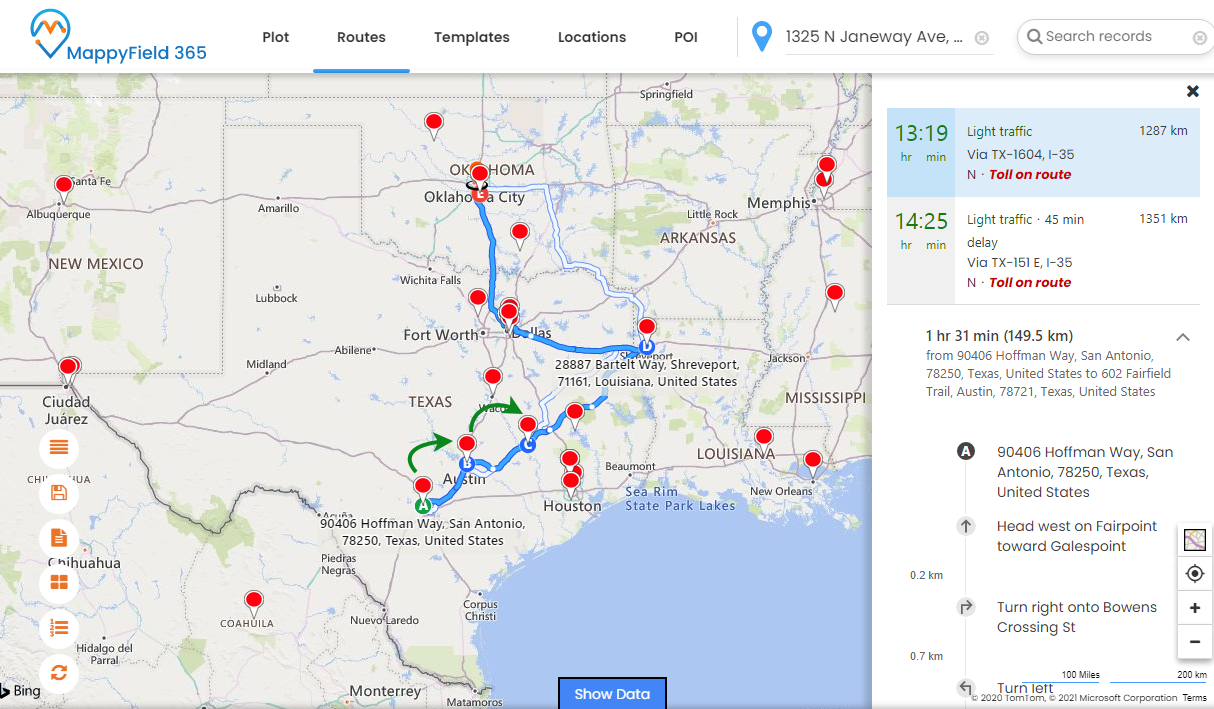
Before ‘Optimize Route’ (SPF) option is enabled:
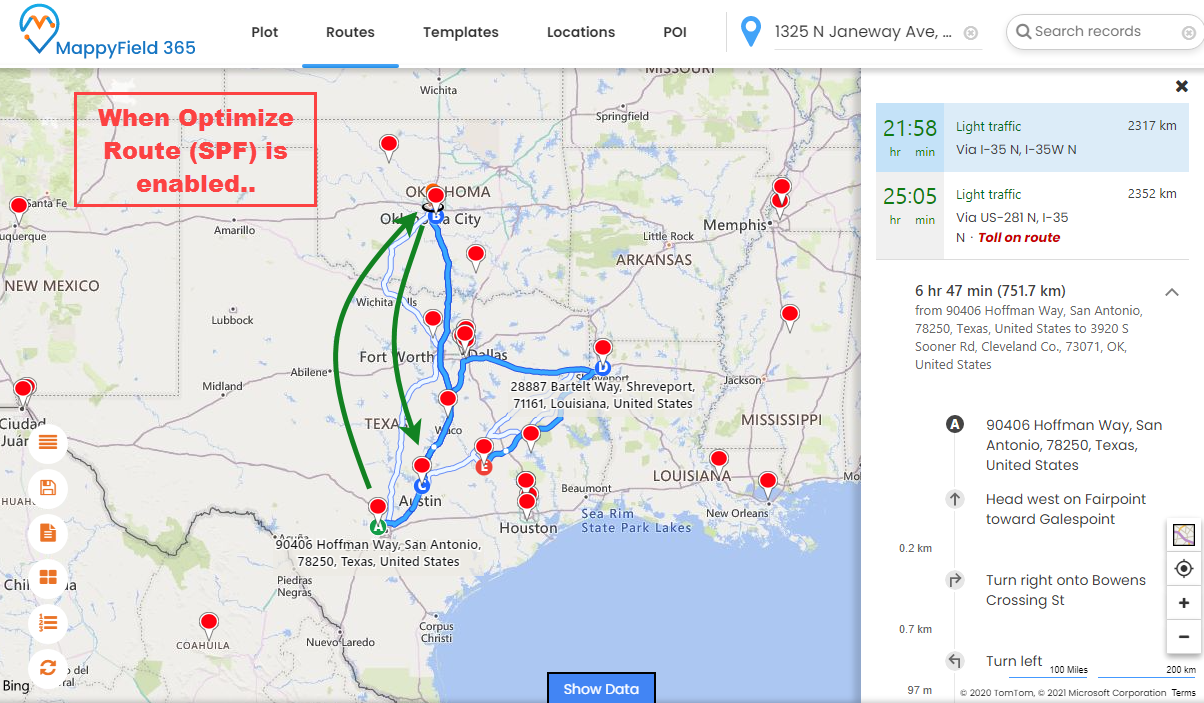
After ‘Optimize Route’ (SPF) option is enabled:
Step 4: Save and assign the Route to the user/team
– To save the selected Route, navigate to the “Routes” menu and click on the save icon.
– This will open a popup with options to save the route. You will need to enter the name for the route, assign it to the User/team, and add a Date for the route and priority. This means you are not only sending route details, but you are also communicating the date this meeting/task needs to be done and the priority, directly to the user.
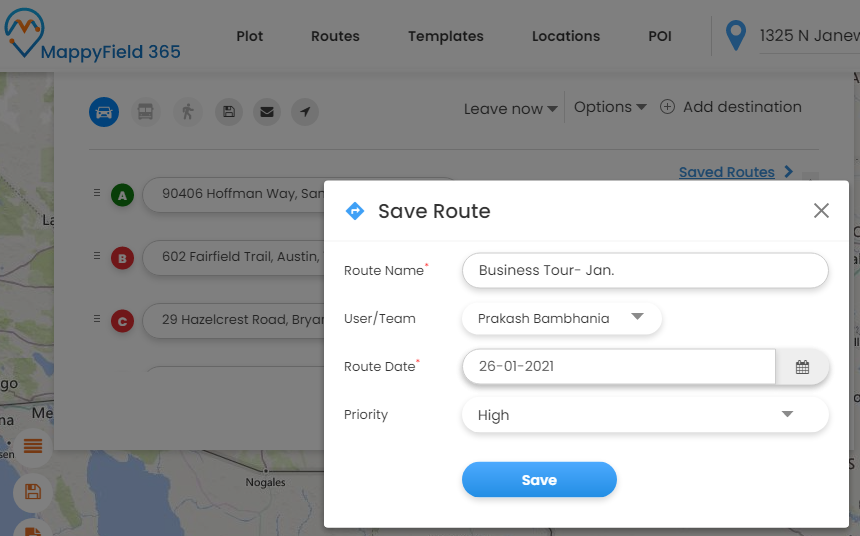
– After inserting the details, click on the ‘Save’ button and the routes will be saved.
– To check the saved routes, navigate to “Routes” and By clicking on Saved Routes, the detailed slider will appear on the right.
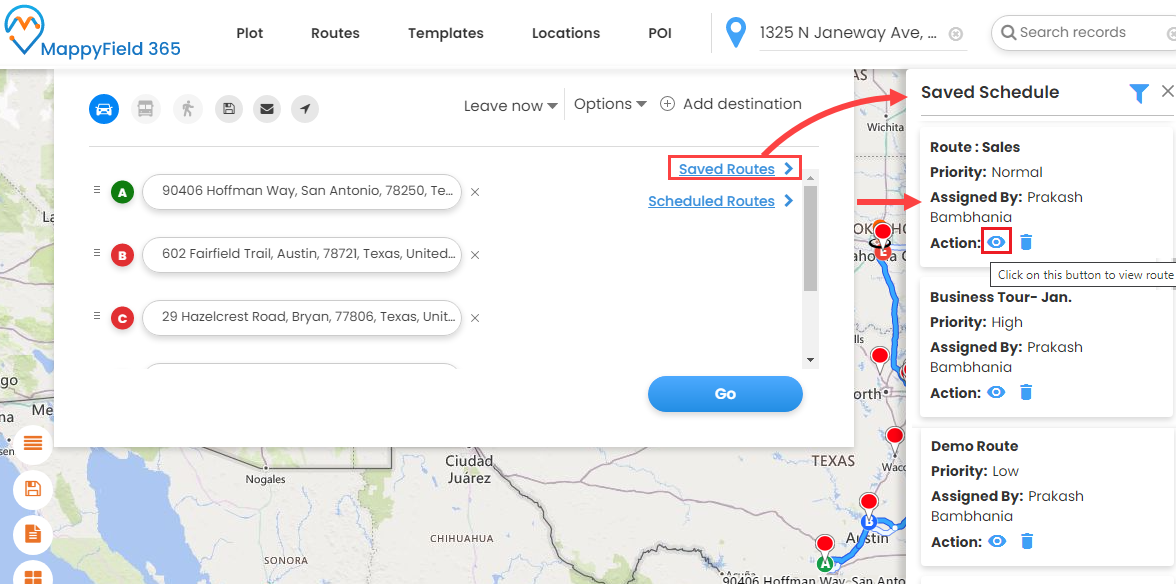
– From here you can check assigned routes to the user/team and view the routes. You can also delete unwanted routes as well.
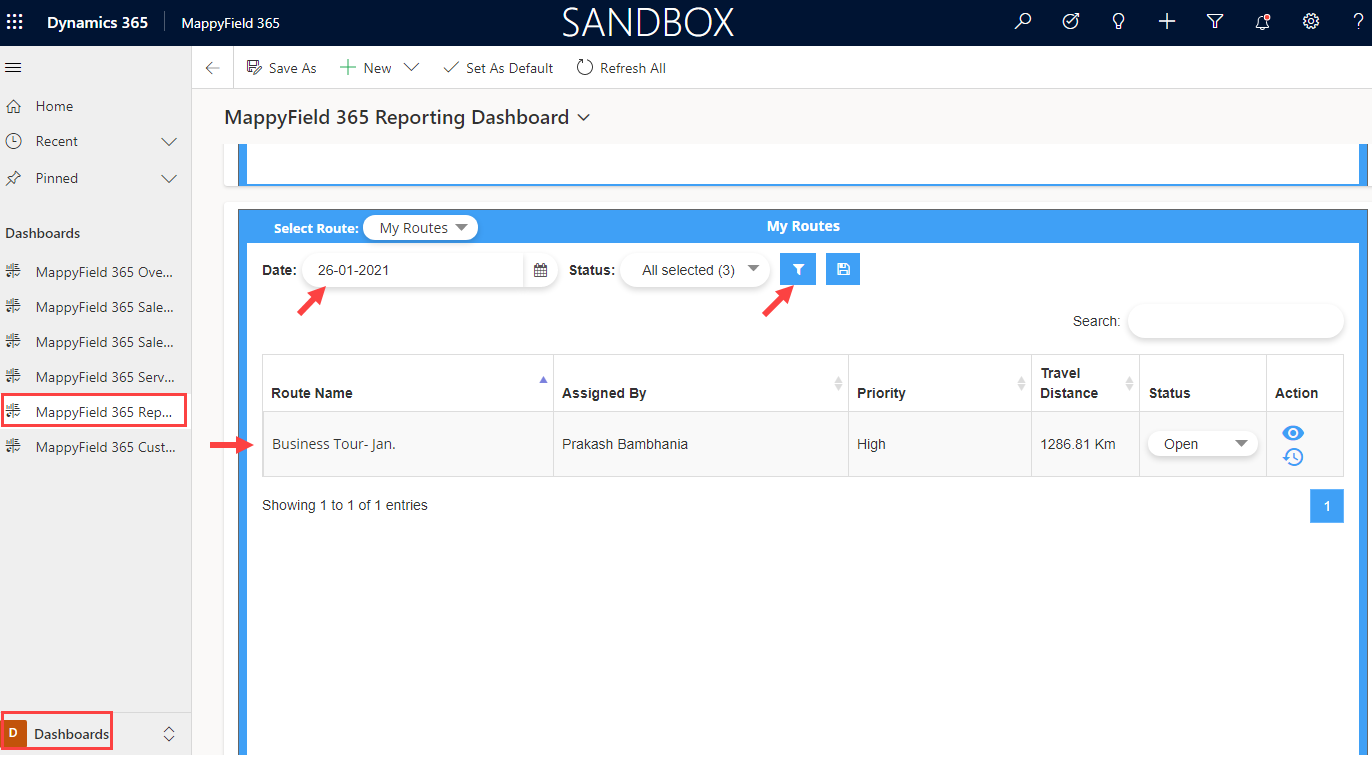
– The users can check the assigned routes from the MappyField 365 default dashboards in the “Reporting Dashboard”, along with the priority of that particular route.
This way you can save time, money, and decrease redundant communication as well.
All product and company names are trademarks™, registered® or copyright© trademarks of their respective holders. Use of them does not imply any affiliation with or endorsement by them.


