

Managing the CRM activities such as appointments, tasks, sales meetings, calls, etc. are challenging tasks for the Sales Managers or DynamicsCRM users with administrative rights.
There might be situations when you would have to manage sudden priority work in the schedule without knowing who attendees, person or team will require. You need to add any resources in that sudden priority work but you don’t know what exactly resources are required.
Dynamics CRM default calendar will have some limitations to manage the activities from the calendar. You need to configure by navigating different modules to display the activities on the calendar.
AppJetty Calendar 365 app that integrates with Microsoft Dynamics CRM/365 will provide the facility to manage, schedule, and track the CRM activities on the calendar itself. From Calendar 365, users can add the activities directly from the calendar itself without selecting the attendees or resources.
Suppose, Roy Lance is a Marketing executive of kitchenware products. He goes to the field for product demonstration at Furniture retailers, Big malls, and new construction sites for marketing the products. Now, one furniture retailer shop schedules a meeting regarding the business deal, but he doesn’t know who will be in that meeting. So, he will add an appointment activity in the dynamics calendar of Calendar 365 without selecting the required team/person.
Calendar 365 allows users to add Required & Resource later for the Appointment and Service activities respectively. The activities with no attendee assigned will be listed as Unscheduled Activities.
This blog will explain how to set CRM records of “Required” & “Resource” by enabling the Unscheduled Activities option.
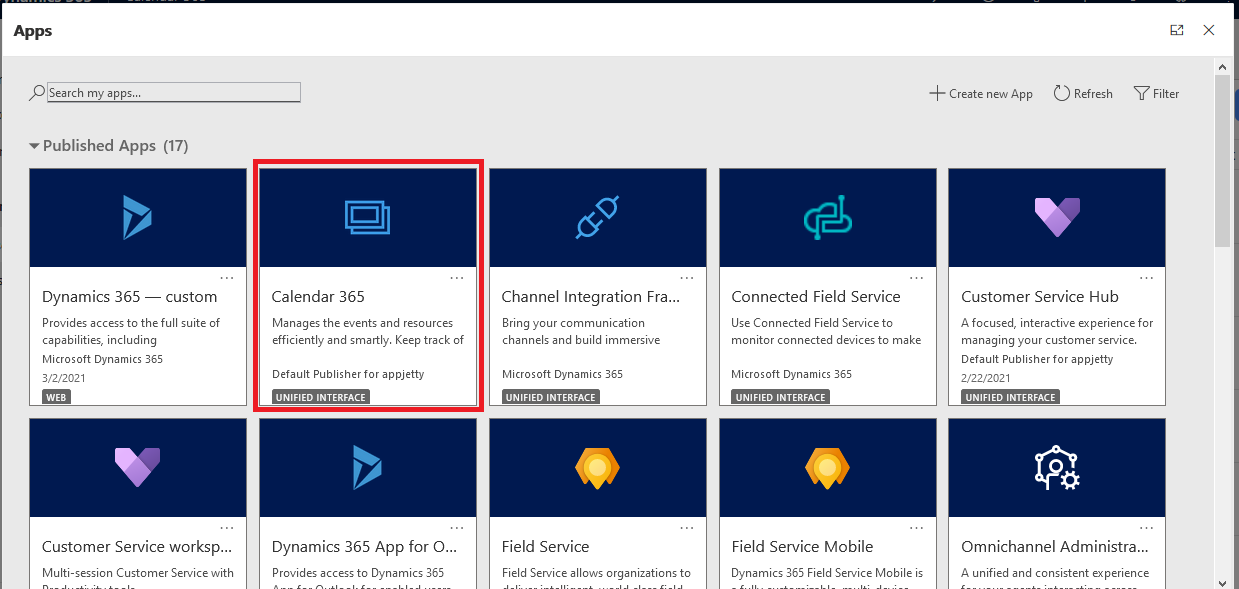
Step 1: Navigate to the AppJetty Calendar 365
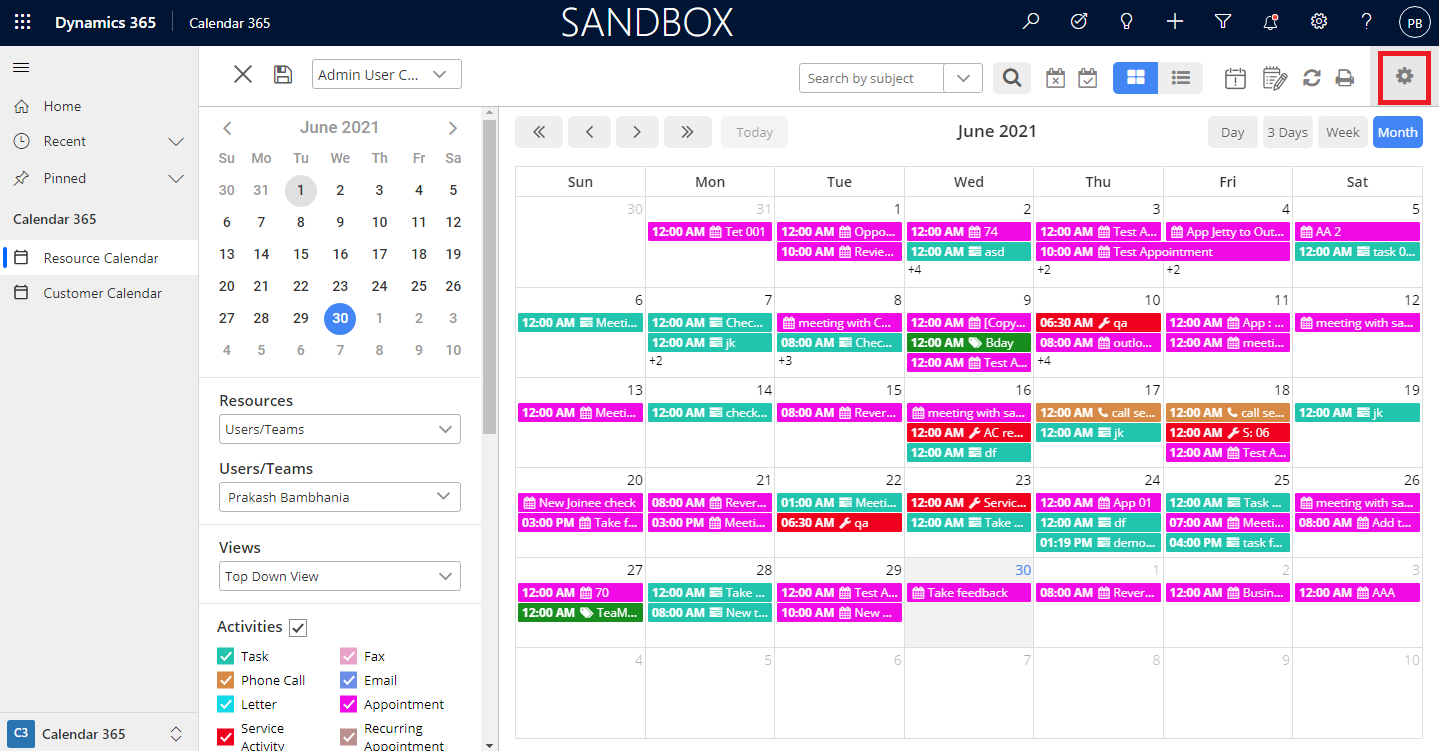
Open Calendar 365 to manage and track the CRM activities of the team members.
You will find the ‘Settings’ (gear) icon to configure Calendar 365 settings and make the calendar view as you want from the top-right side corner.
Step 2: Enable the Unscheduled Activities from the Configuration
From the “Configuration” tab, scroll down and navigate to the Unscheduled Activities section. To get the list of the activities that are added without assigning the CRM records of Regarding or Resources, ‘Active’ the Unscheduled Activities option.
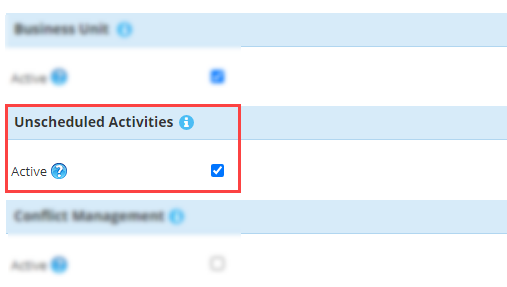
By enabling the ‘Unscheduled Activities’ option, click on the Save button to save the changes
Step 3: Unscheduled Activities option on the calendar
Navigate to Calendar 365 and click on the ‘Refresh’ icon to apply the changes of Calendar 365 configurations.
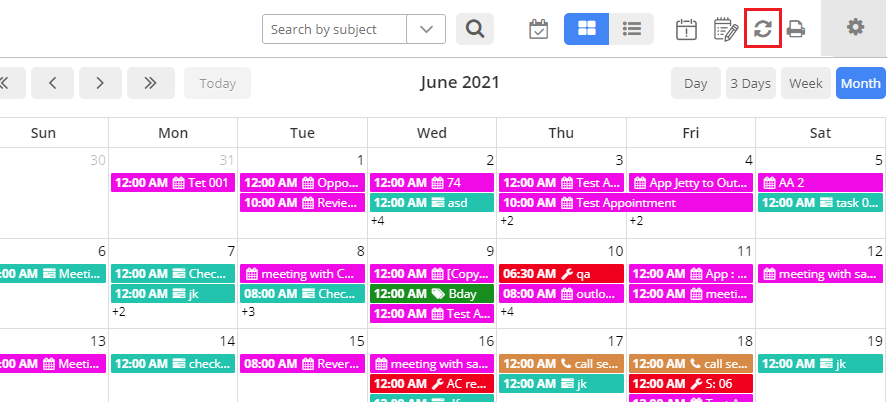
Once you refresh the calendar, you will get the “Unscheduled Activities” icon.

By clicking on it, you will get the popup named “Unscheduled Activities”. You will get the listing of the Unscheduled appointments and service activities without attendees and assigned resources respectively.
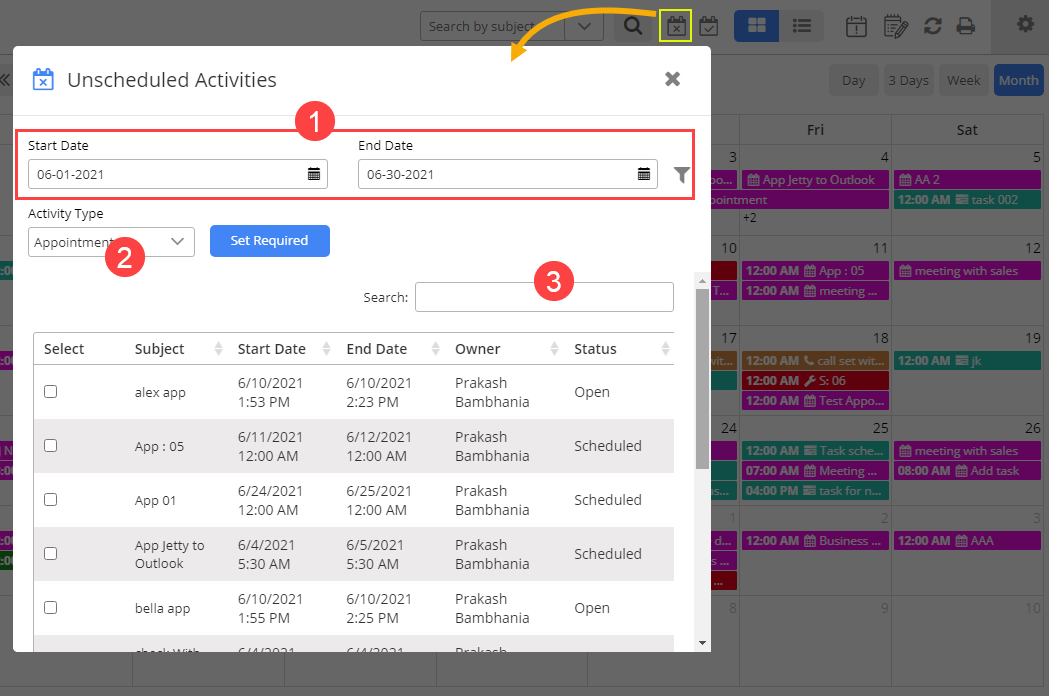
You will get the list of activities for the current month. You can filter the list of activities.
1. Date Range: Filter the listing as per the date range.
2. Activity Type: Get the unassigned Required & Resource as per the selection of Appointment & Service respectively.
3. Search the specific activity by inserting the Text label of Title, Subject, or Owner.
In our example, a Marketing Executive (Roy Lance) has added the Appointment activity without assigning the attendees that will be listed in the Unscheduled Activities. Whenever the attendees are finalized, he or his manager can assign the “Required” CRM records from the Unscheduled Activities listing.
Step 4: Appointment/Service activities without Required/Resource CRM records
For Appointment
Suppose, you get the updates there will be a business meeting with the client, but you don’t know who will be in the attendees/team (Required).
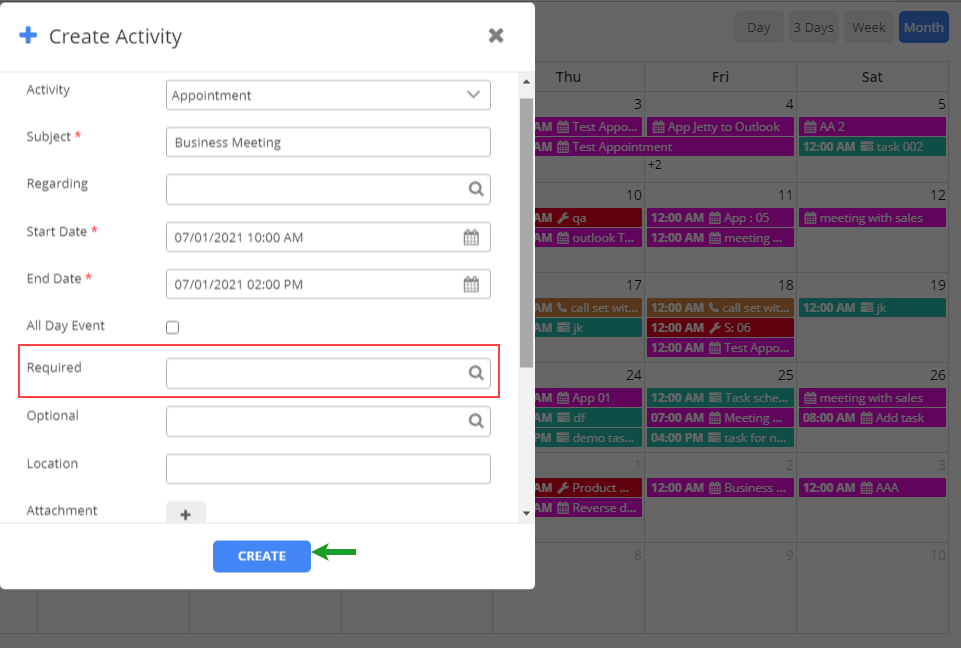
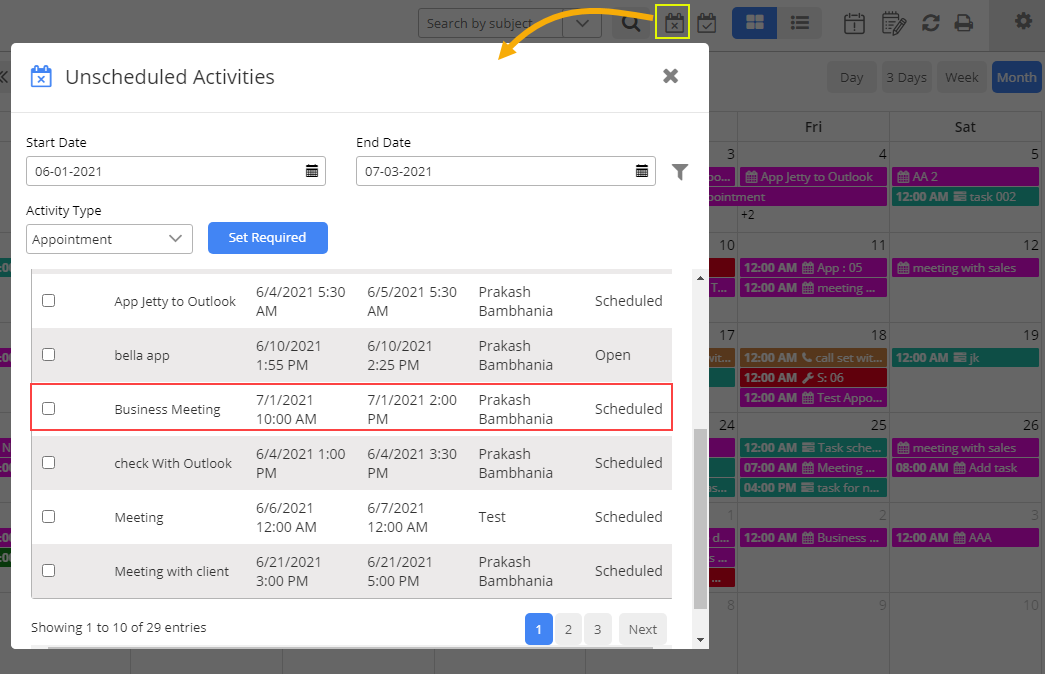
So, an Appointment activity is created without Required (attendees) and it will be listed in the Unscheduled Activities list. The list will show all the appointments that don’t have any required attendees assigned.
From the list select the activity to set the Regarding and click on the Set Required button. You can also select multiple activities and set the Required for all.
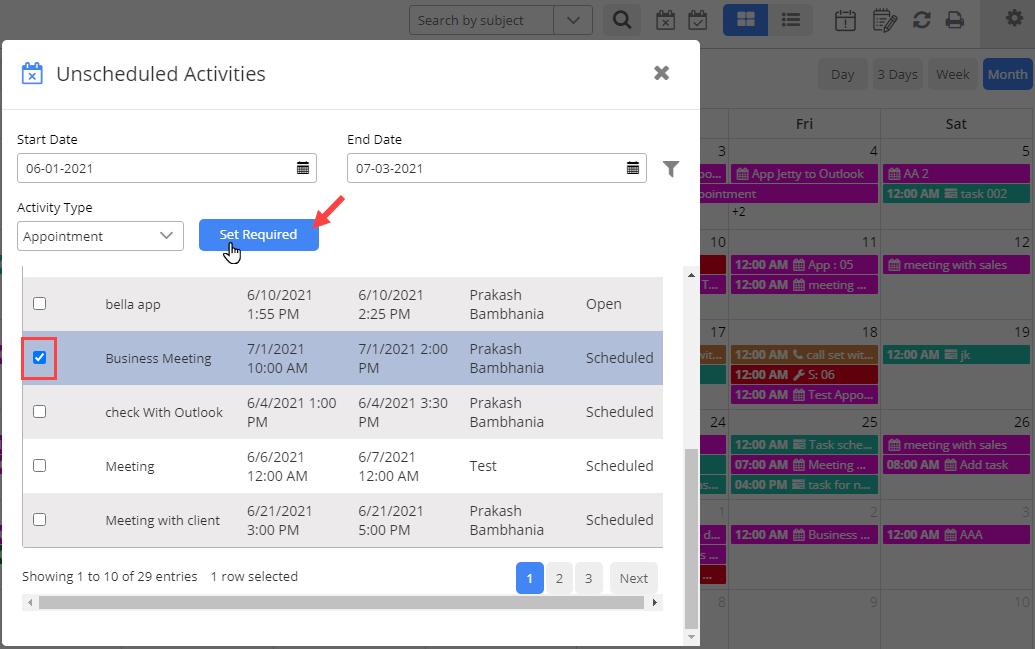
By clicking on the “Set Required” button, (1) the popup will appear to set “required” for appointments. By clicking on the ‘search’ icon, (2) you will get the “Look Up Records” popup to select the required CRM Records for the appointment activity.
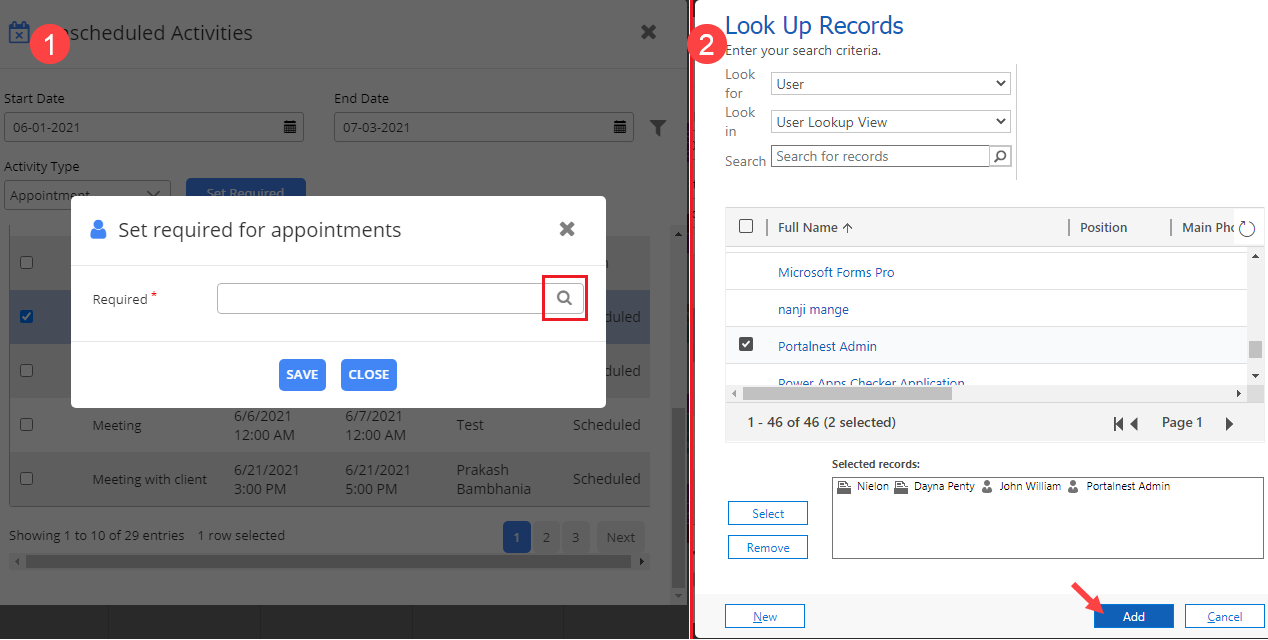
After selecting the ”Required” CRM records, click on the Add button to assign the attendee to the selected appointment activities.
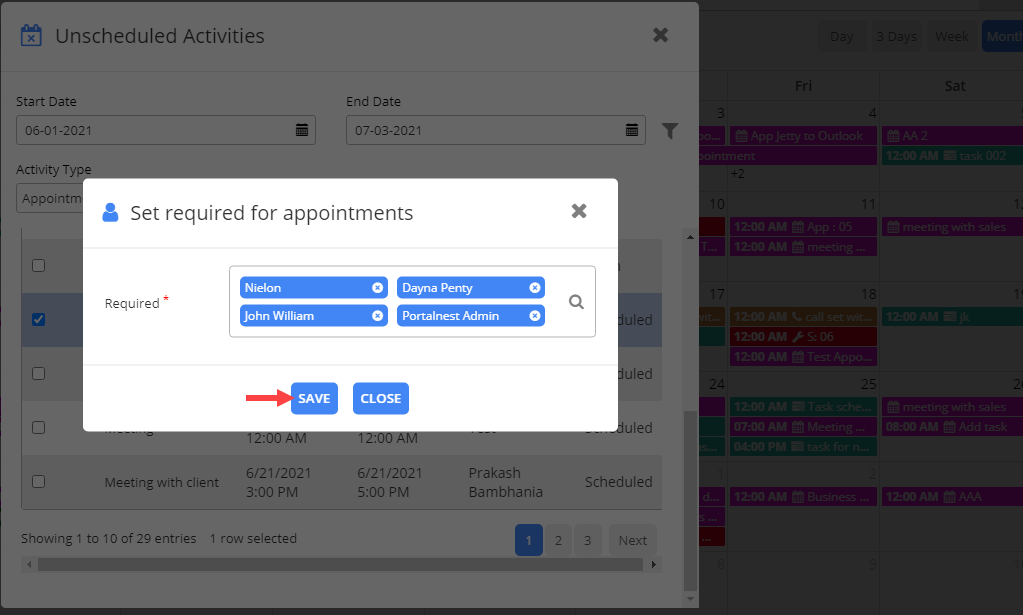
By clicking on the Save button, the selected attendees will be added to the appointment activity and you will get a message that the Required field is set for the activity.
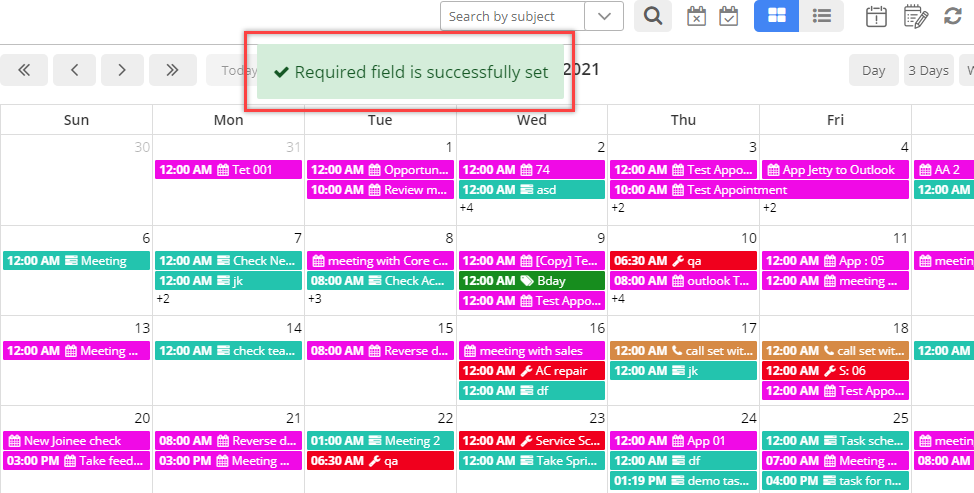
Once the Required field is set, the activity will be removed from the Unschedule Activities.
Hence, Roy (Marketing Executive) has created an appointment activity as he gets the confirmation from the client. So later, his manager who is handling the marketing and other activities from Calendar 365, can check unscheduled activities and assign the attendees (Required field) for the Appointment activity or assign the resource for the Service activity
For Service:
Similarly, you can add the Service activity without the “Resource” field.
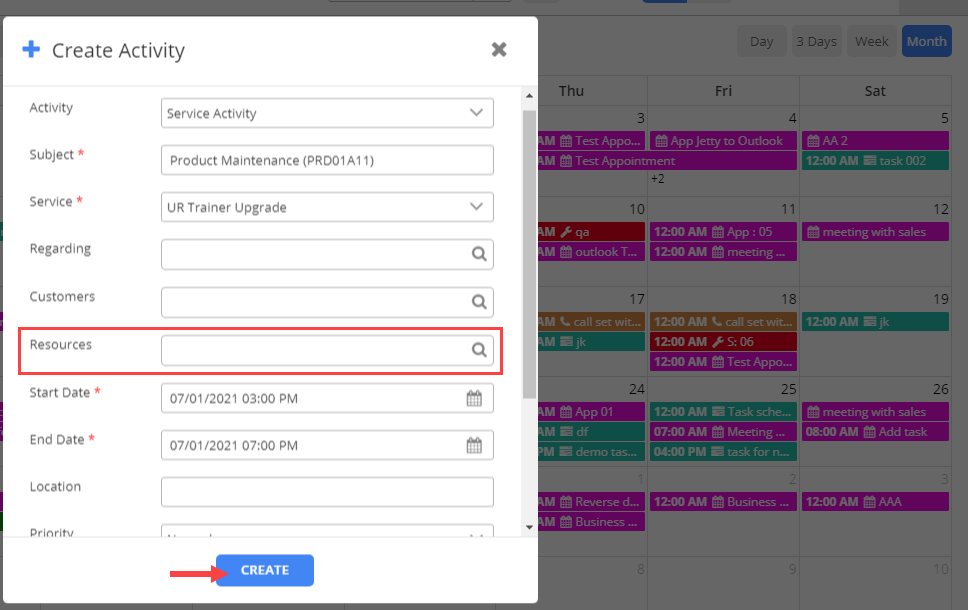
That activity will appear in the Unscheduled Activities list. All the service activities that don’t have resources assigned. You can select multiple activities if the resources are the same.
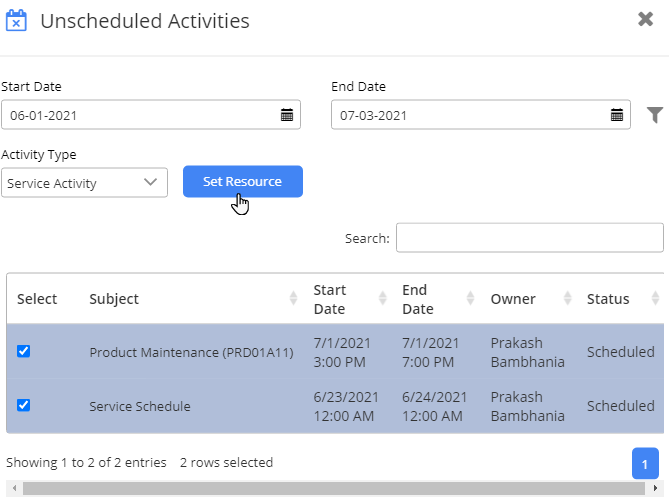
After selecting the activities, click on the Set Resources button and the “Look Up Records” popup will appear to select the CRM records for the Resource.
After selecting the Resources and by saving the assigned resources, you will get the message that the resource is set.
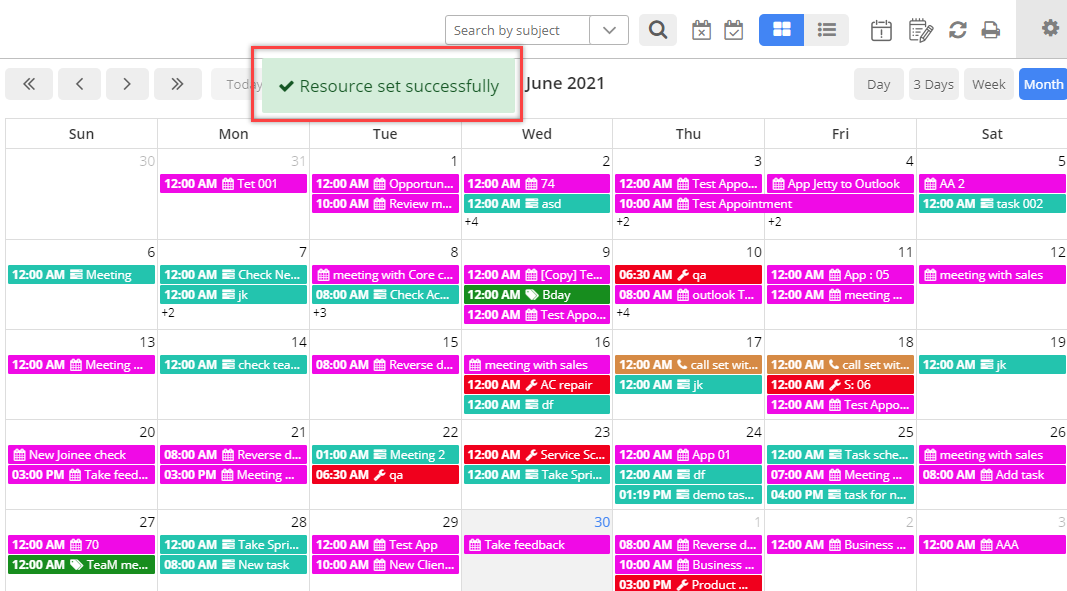
In this way, the DynamicsCRM users can easily create the Appointment activity without assigning the attendees (Required field) and Service activity without assigning the Resources on an immediate basis. Later, they can check the Unscheduled Activities and update them.
AppJetty Calendar 365 plugin is compatible with Microsoft Dynamics 365 (online and on-premises). Manage all your activities including tasks, recurring appointments, phone calls, service and campaign activities, etc right from your Dynamics CRM.
If you want to know about any feature regarding AppJetty Calendar365, feel free to reach out to us at [email protected] or you can just click on “Contact Us”.


