

Being a field executive, you need to go out for the client meeting or for any activities at the client’s place/location.
Microsoft Dynamics 365/CRM provides the default map in that you will get just the location (pushpin) of any client or industry but there are certain limitations that you cannot perform the “Routes”. You need backend configurations but still, you need to navigate to the different options.
“AppJetty MappyField 365” is an MS DynamicsCRM mapping app with the Bing maps integration that will help to search the Routes between clients’ locations quickly from the map itself. Hence, you will not require to navigate to the different options for getting the Routes.
MappyField 365’s Route scheduling option allows the Sales Reps or Service Executives to make optimum use of the time. So they can make the decision to reach out to another client’s place quickly scheduling the Routes and easily manage their time for traveling and cover all places which they want to meet.
Suppose “Bianca”, a Sales Executive who is on the field for a product demo, needs to schedule her product demo with clients. So from the map of the MappyField 365, she can easily search the Routes between the client’s locations just on the go by adding the records to the Route search option.
From “MappyField 365”, you can schedule the routes between more than two records/locations and also customize the order as per your need. MappyField 365 users can search the Route in 3- different ways:
- Context Menu: Right-clicking on the specific location Context Menu
- Records (Pushpins): Clicking on the required record (pushpin)
- Data Grid: Selecting the required records from the Data Grid
In this informative blog, we will explain how to schedule the Routes between the locations.
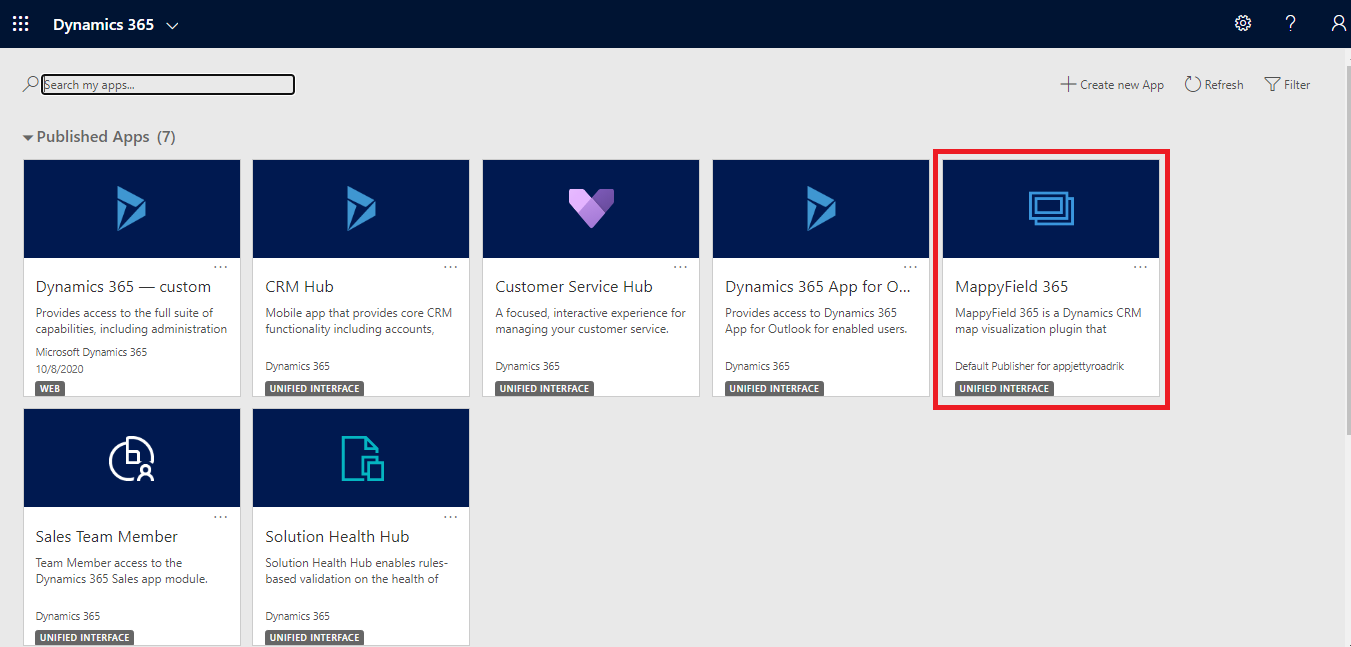
Step 1: Navigate to MappyField 365
Select “MappyField 365” from the Dynamics 365 dashboard or app list.
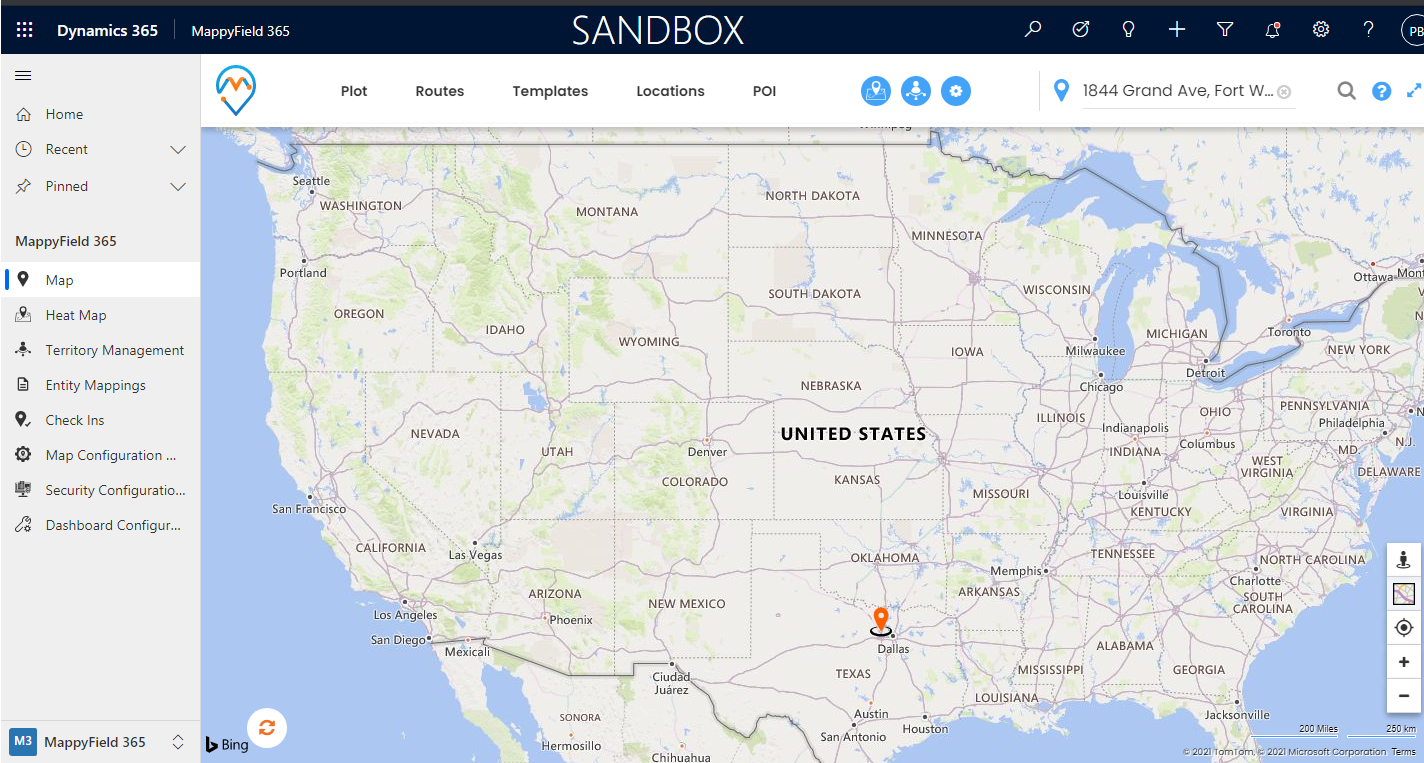
By default, you will be navigated to the “Map view” of the MappyField 365 with all the default configurations.
Step 2: Plot entity records on the map
Click on the “Plot” menu from where you can select the Entity with its view and click on the “Search” button to plot the records on the map.
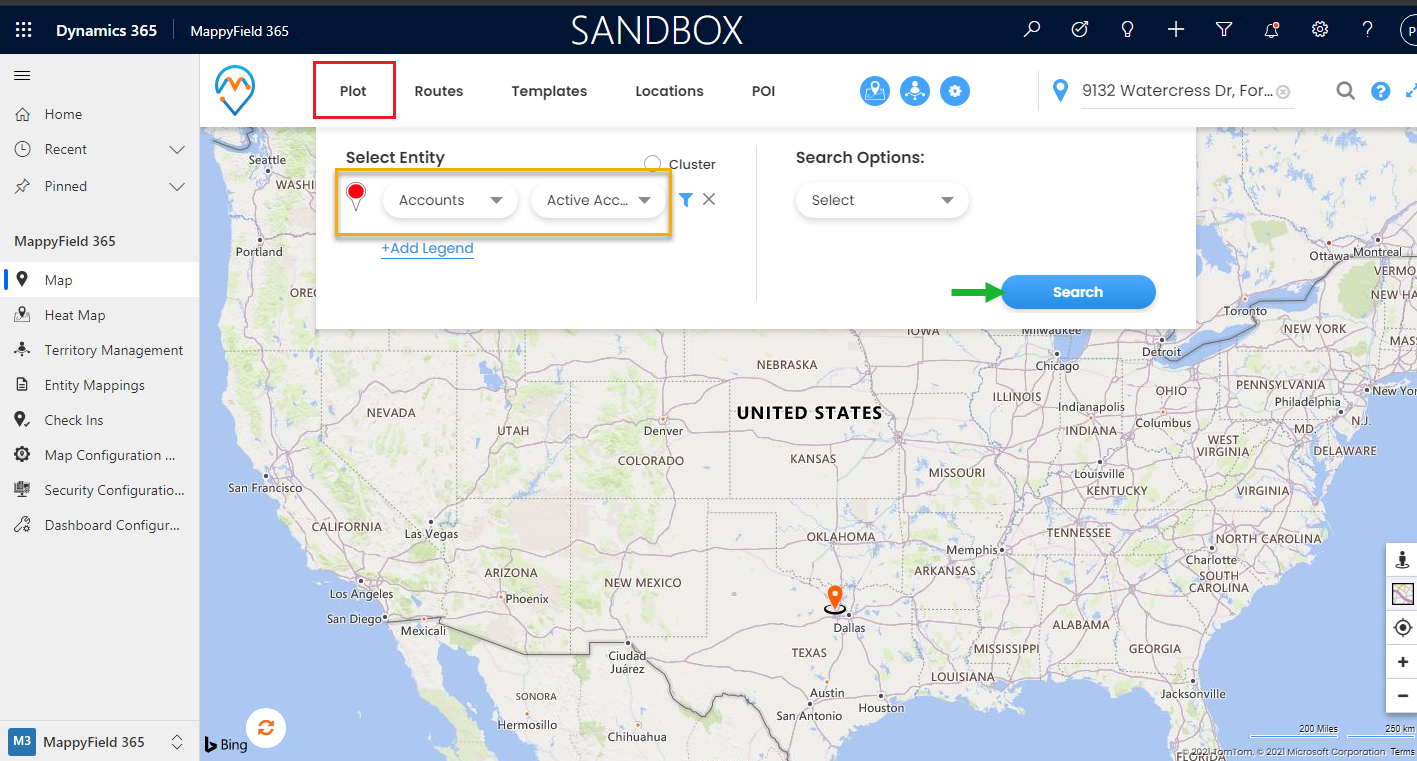
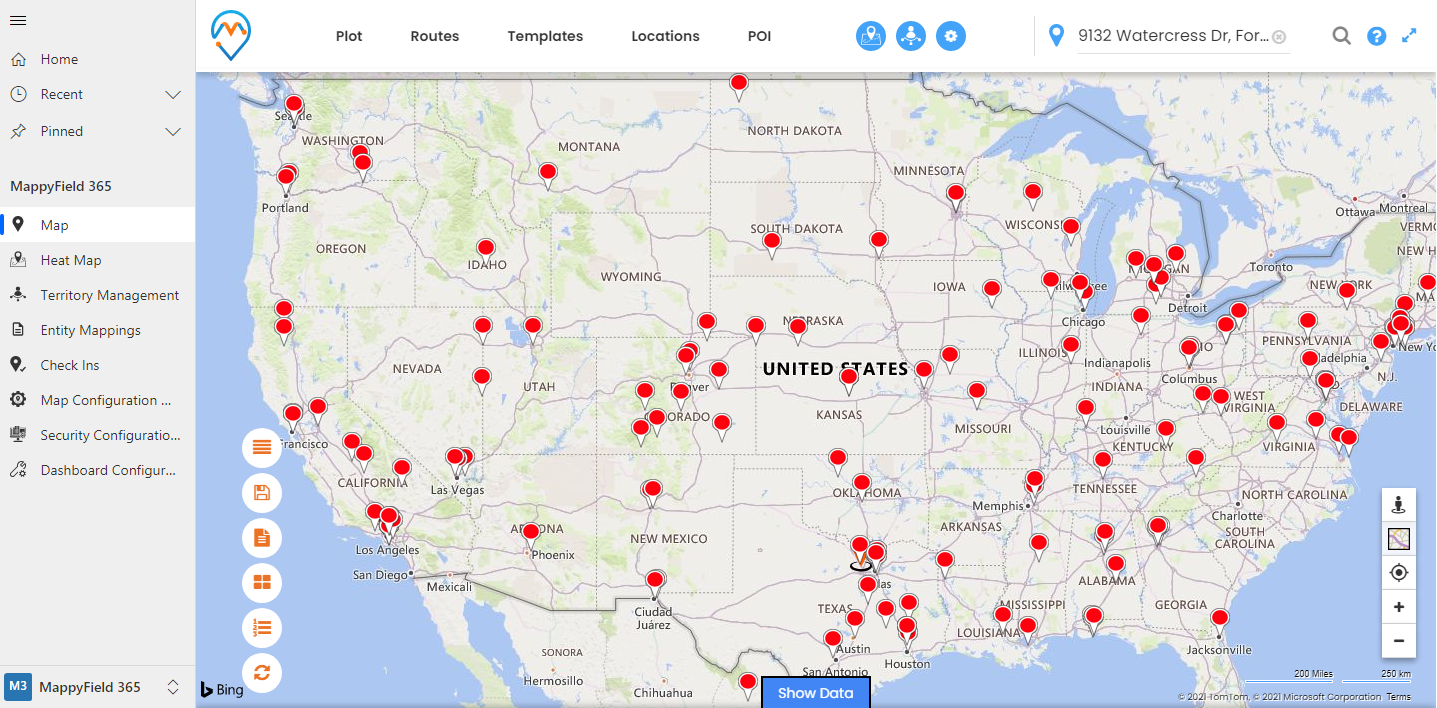
By clicking on the Search button, the entity records will plot on the map with the pushpins.
Step 3: Add required records to Route
You can easily add the required records or specific locations in different 3-ways:
3.1 – By right-clicking on the specific area
3.2 – By clicking on the plotted records (pushpins)
3.3 – From the Data Grid
3.1: By right-clicking on the specific area
Right-click on the specific area, the “Context menu” will open and you will get the “Add To Route” option.
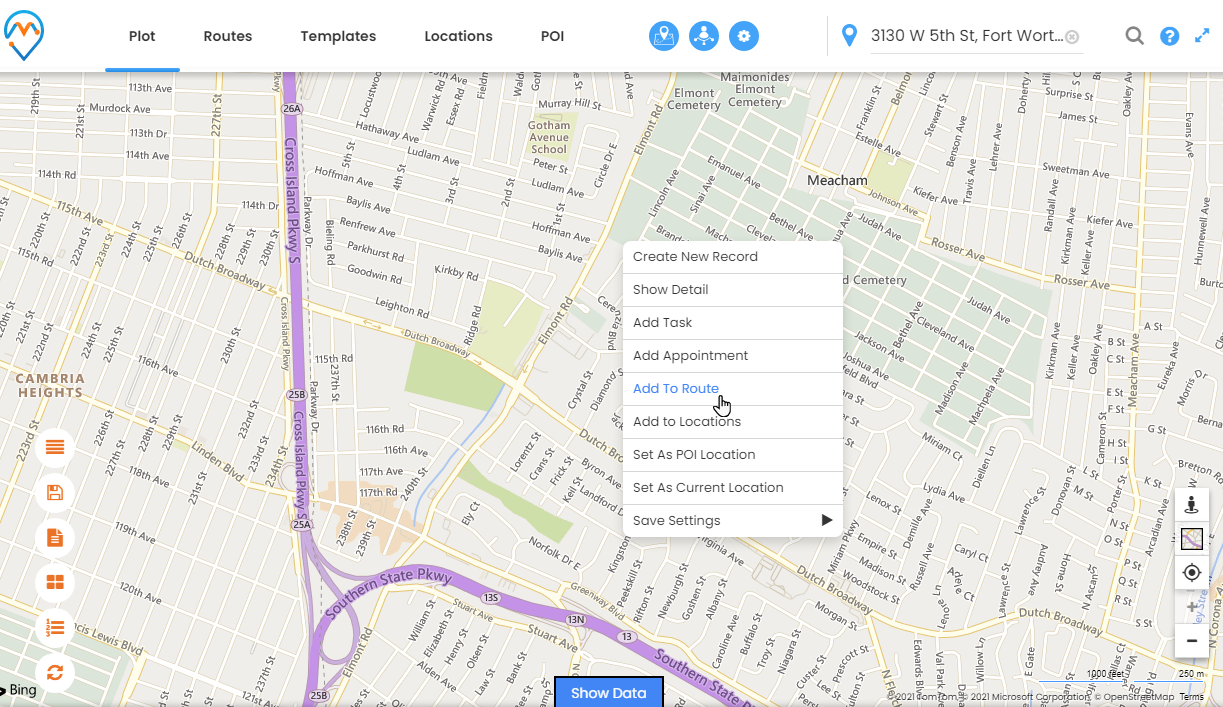
Click on the “Add To Route” option to add the desired location to the Route. You will get the mark “A” on that location.
Similarly, you can select another location and by right-clicking on it, you can add that location to the Route search.
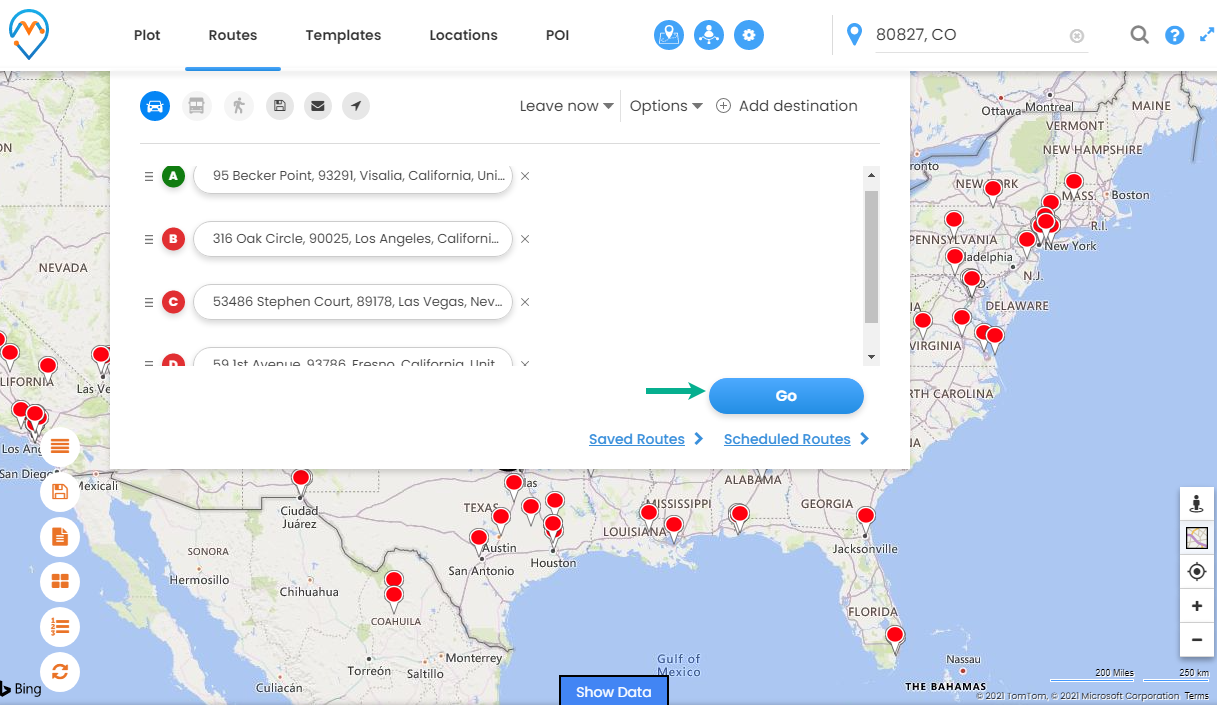
You can check the added routes under the “Routes” menu.
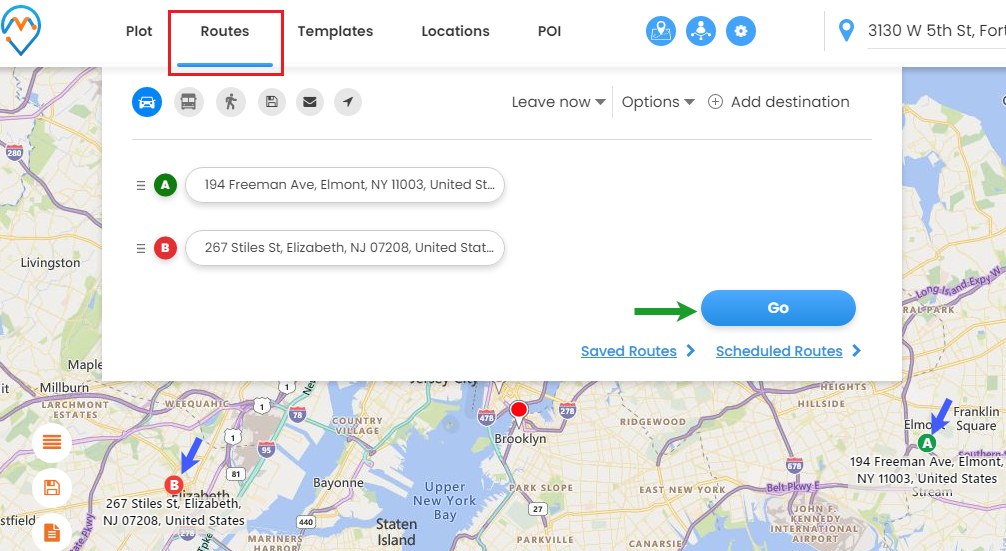
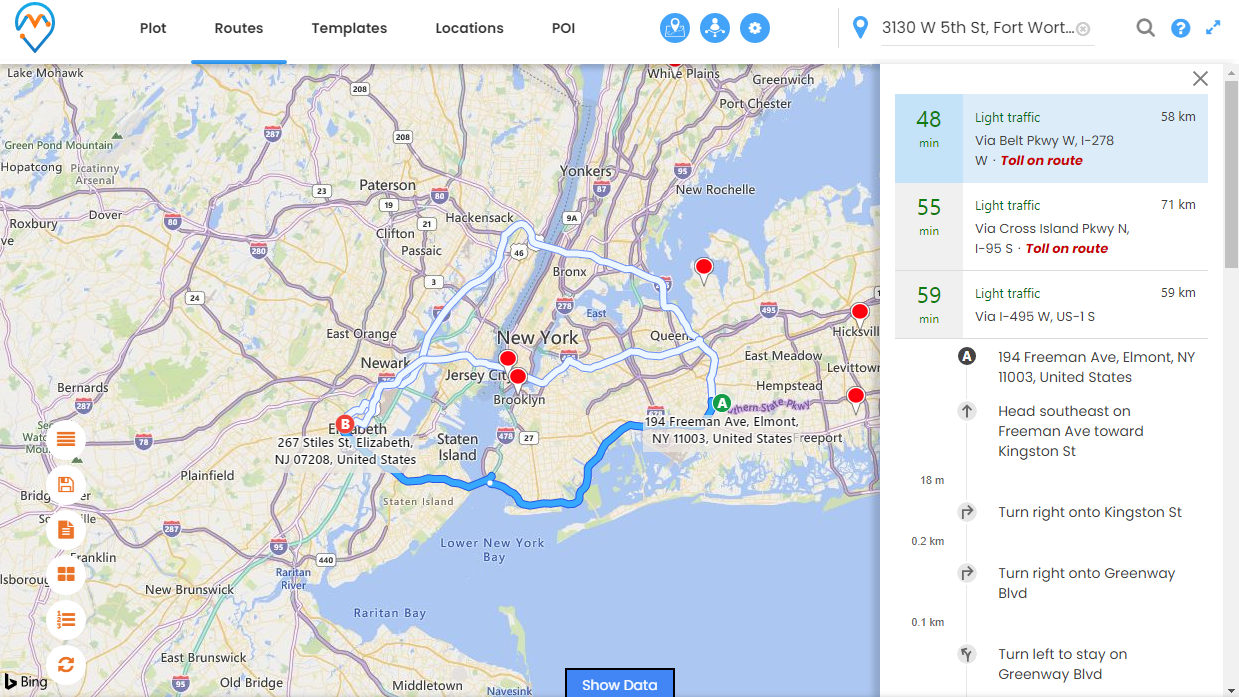
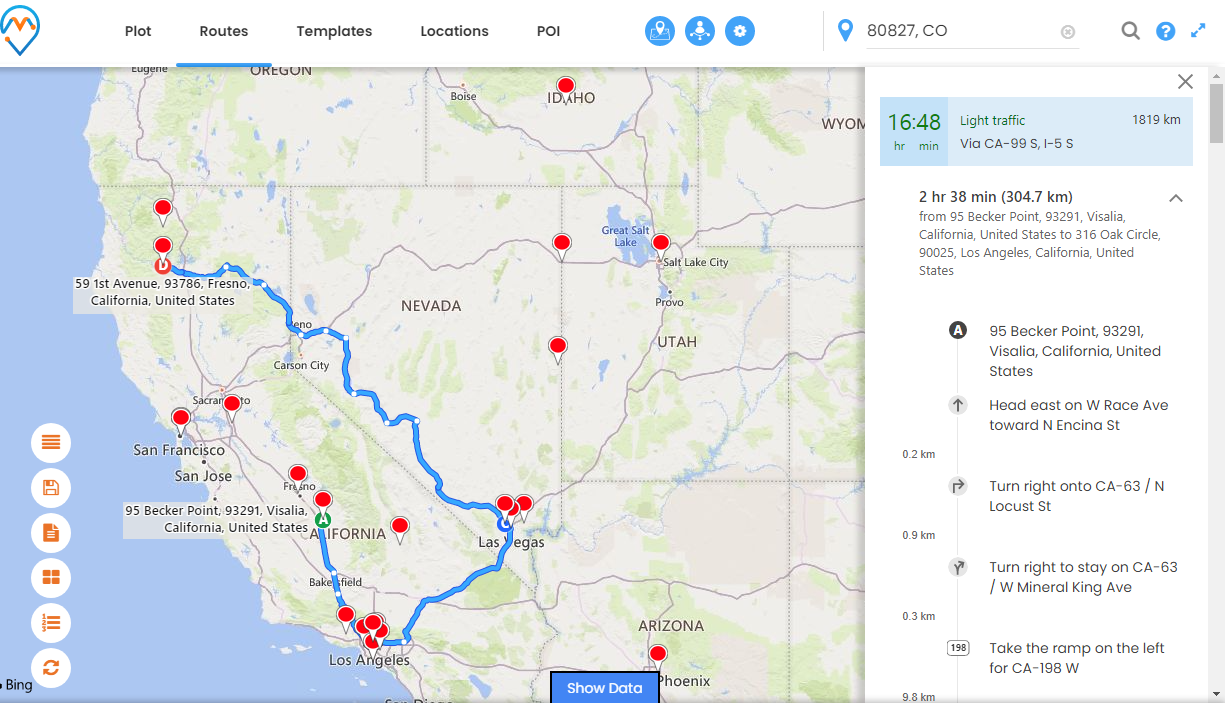
By clicking on the “Go” button, the Route will be added to the map, and from the right side, you will get the details of the direction with the traffic details.
A sales executive, Bianca can add the specific locations to the routes and schedule her activities/meetings based on the Route on the map.
3.2: Add required records (pushpins)
You can search the route between two clients’ locations. You can easily add the specific records to the Routes and get the direction on the map.
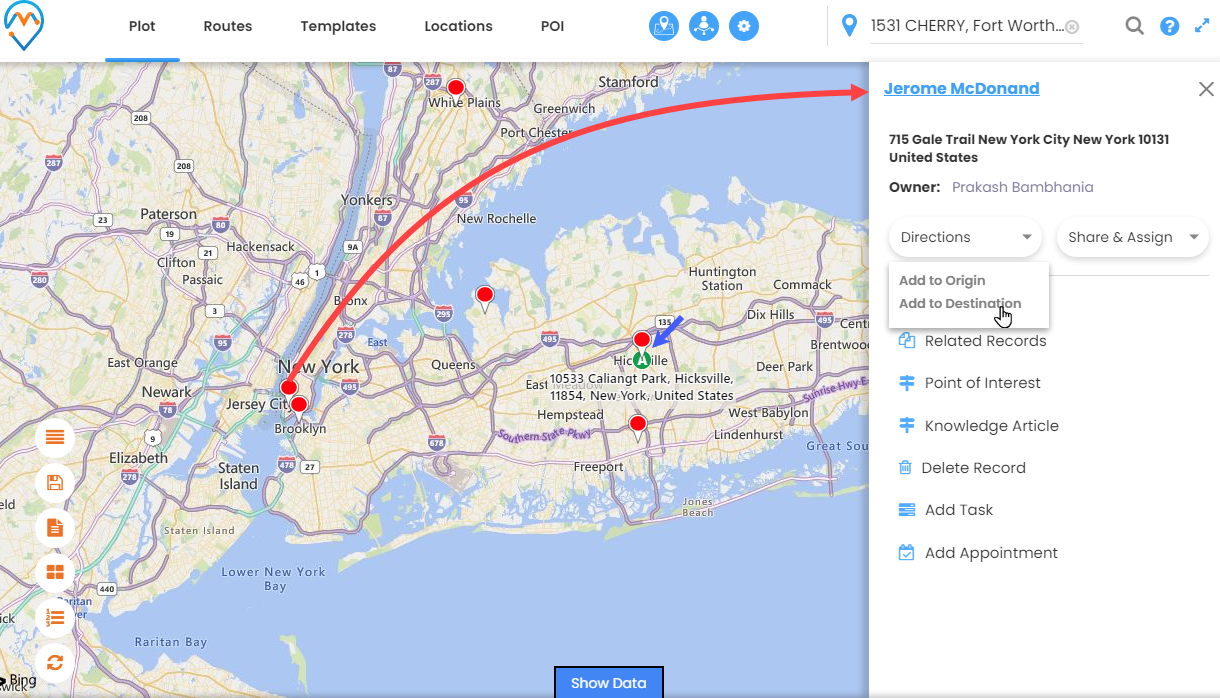
By clicking on the record (pushpin) that you want to add to the Route search, you will get the “detailed card” on the right side. You will find the options to perform some actions and activities from the detailed card.
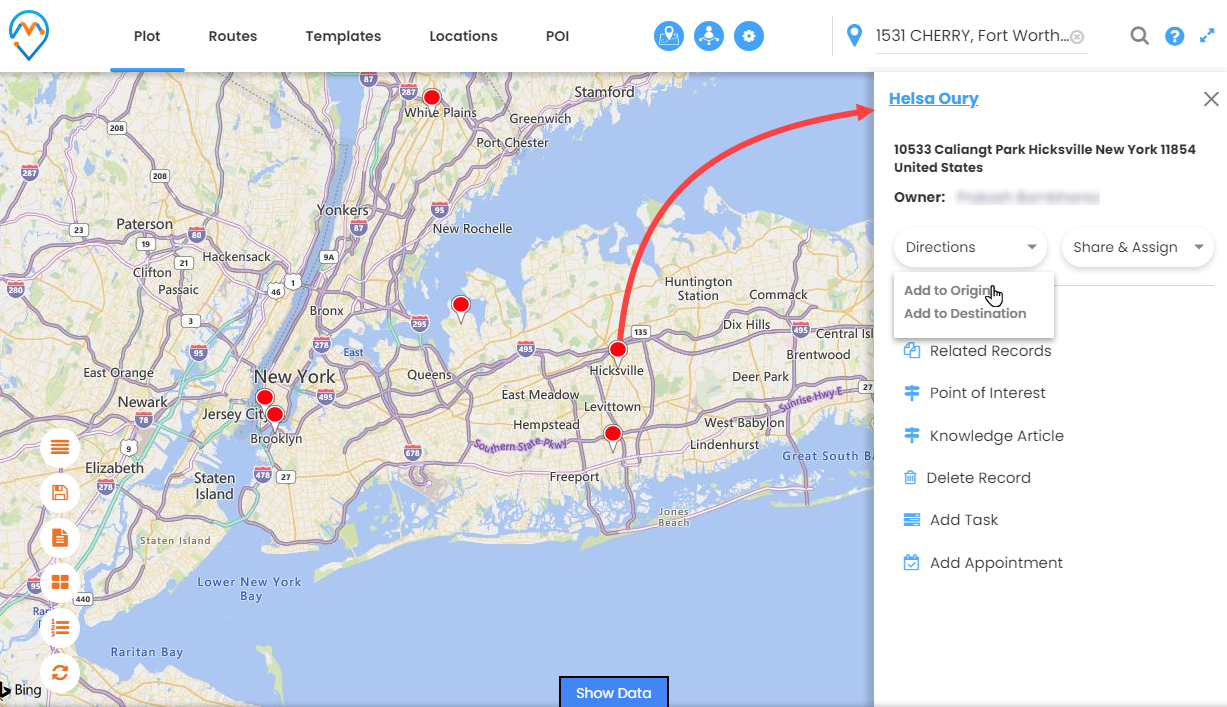
By clicking on the “Directions” dropdown, you will get the “Add To Origin” and “Add To Destination” options.
Click on the “Add To Origin” options from where to start your traveling (client visits). It will be displayed with the mark “A”, which means starting point.
Click on the “Add To Destination” option for another record to add to the Route.
Another record will be marked as “B”. Now, click on the “Routes” menu to get the direction between the added Routes.
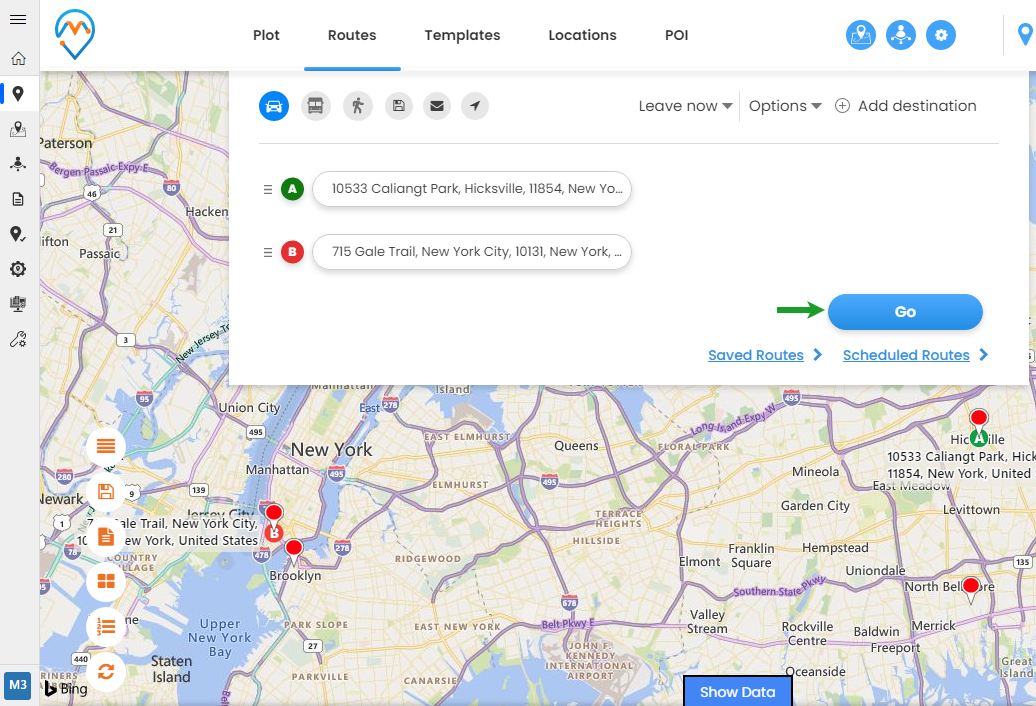
By clicking on the “Go” button, the direction will be set on the map between two records.
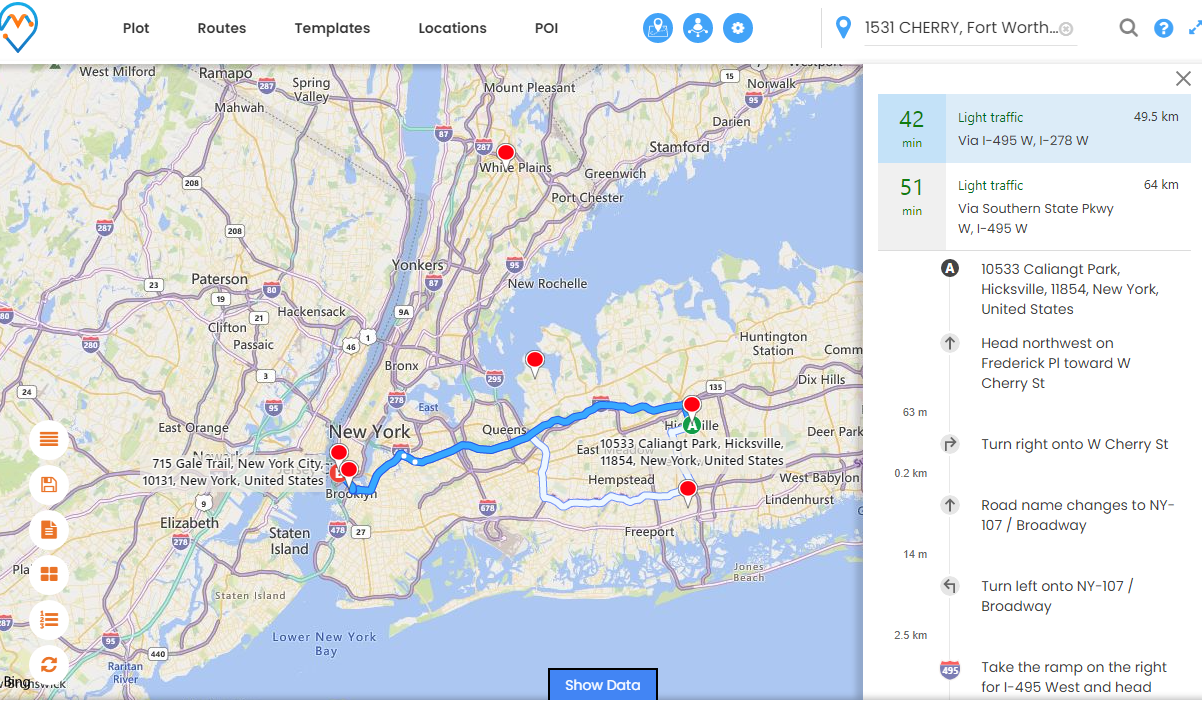
You will get the details of the direction with the traffic details on the right side.
In this way, Bianca can add the clients’ locations to the Routes and can get the direction between them.
You can also add more than two records to the Route search. Click on the Record. The details card of that record will open on the right side.
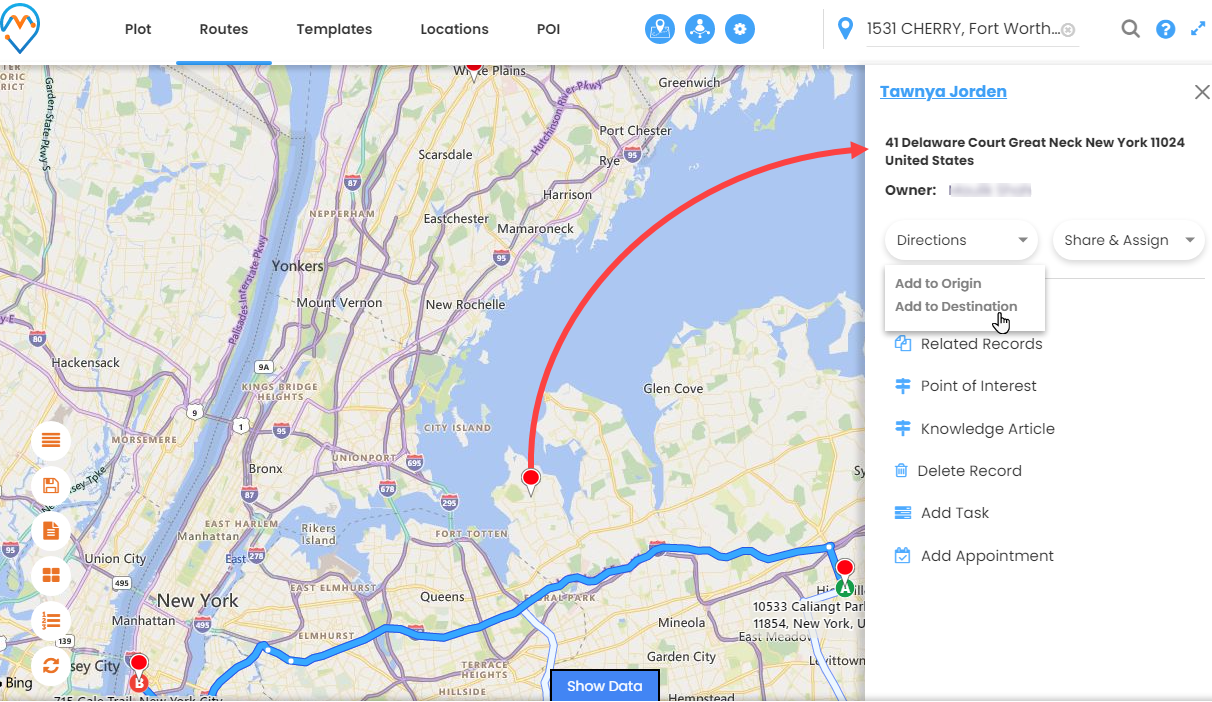
From the “Direction” dropdown, click on the “Add to Destination” option to add the 3rd record to the Route search and it will be marked as “C”.
You can see the selected record details under the “Routes” menu. You can also change the route orders by using mouse drag & drop.

By clicking on the “Go” the direction will be added on the map for the added routes. The direction will be added as per the SPF algorithm (Shortest Path First).
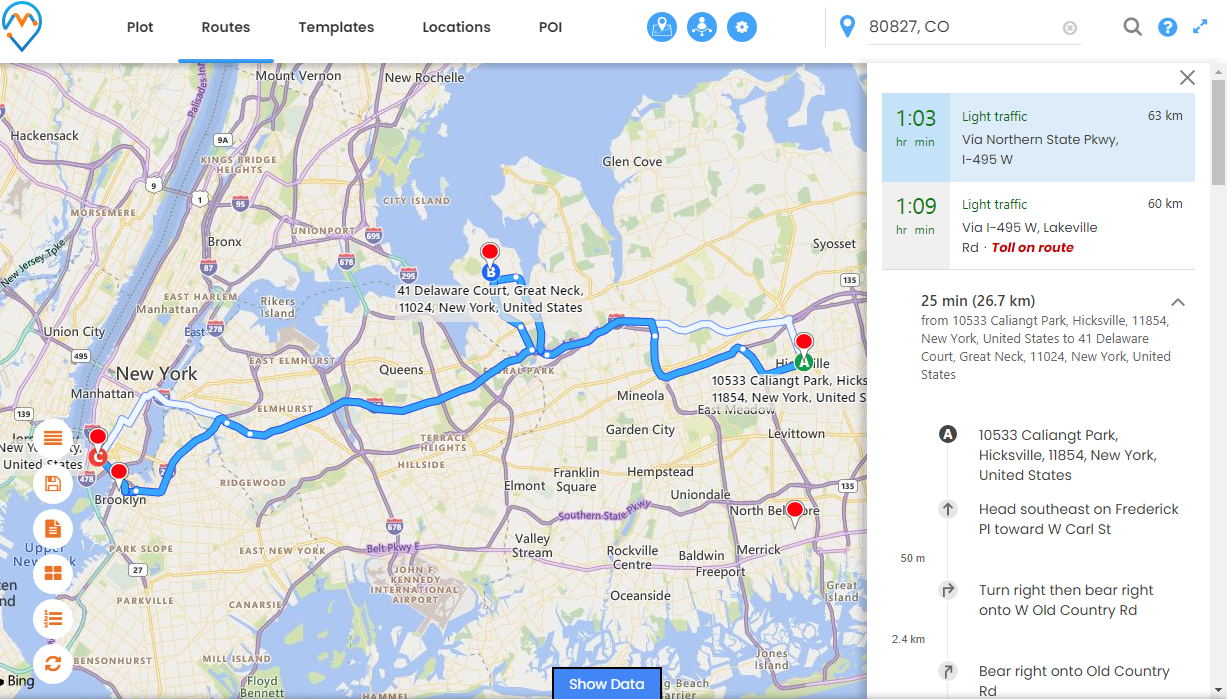
You will get the details of the direction with the traffic details on the right side.
In this way, Bianca can add the new client meeting in her route just on the go from the map itself.
3.3: From the Data Grid
You can also add the record to the Route from the “Data Grid”.
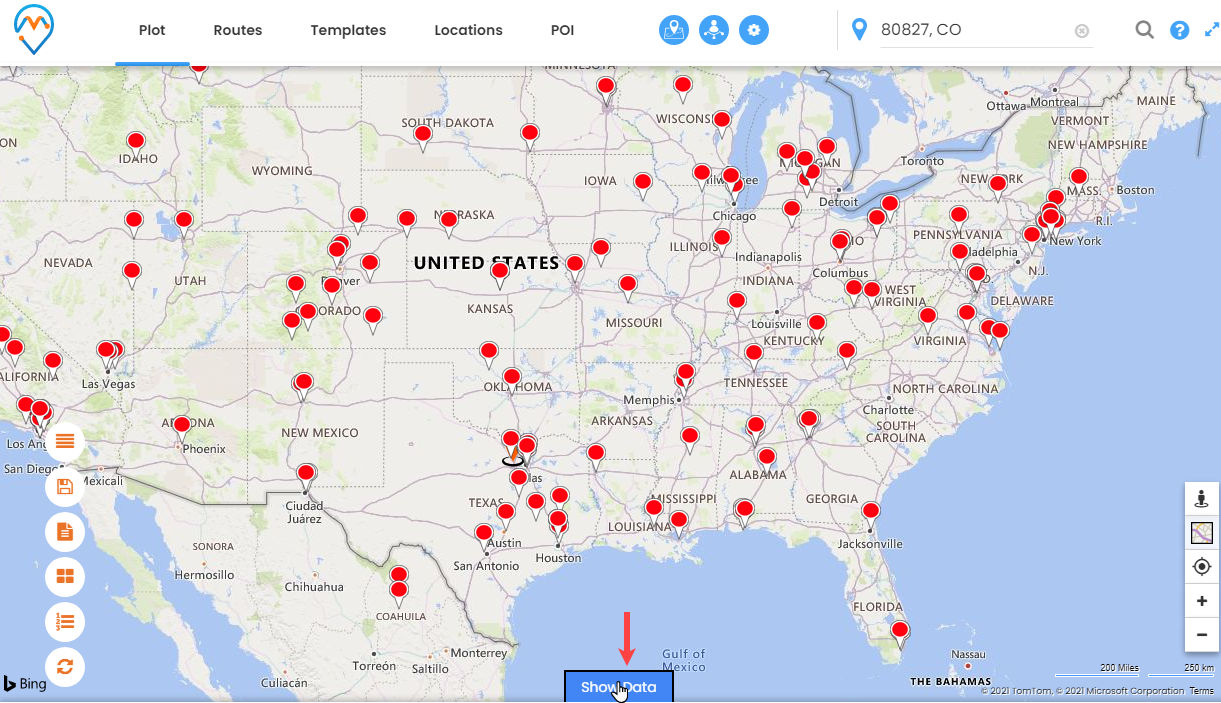
By clicking on the “Show Data”, you will get the details of the plotted entity records on the map in the grid view with other action options.
From the Grid view, you will get the column-wise details. So it will be quite easy to check and select the required records that you want to add to the Route. You will get the numerics of the selected records at the bottom.
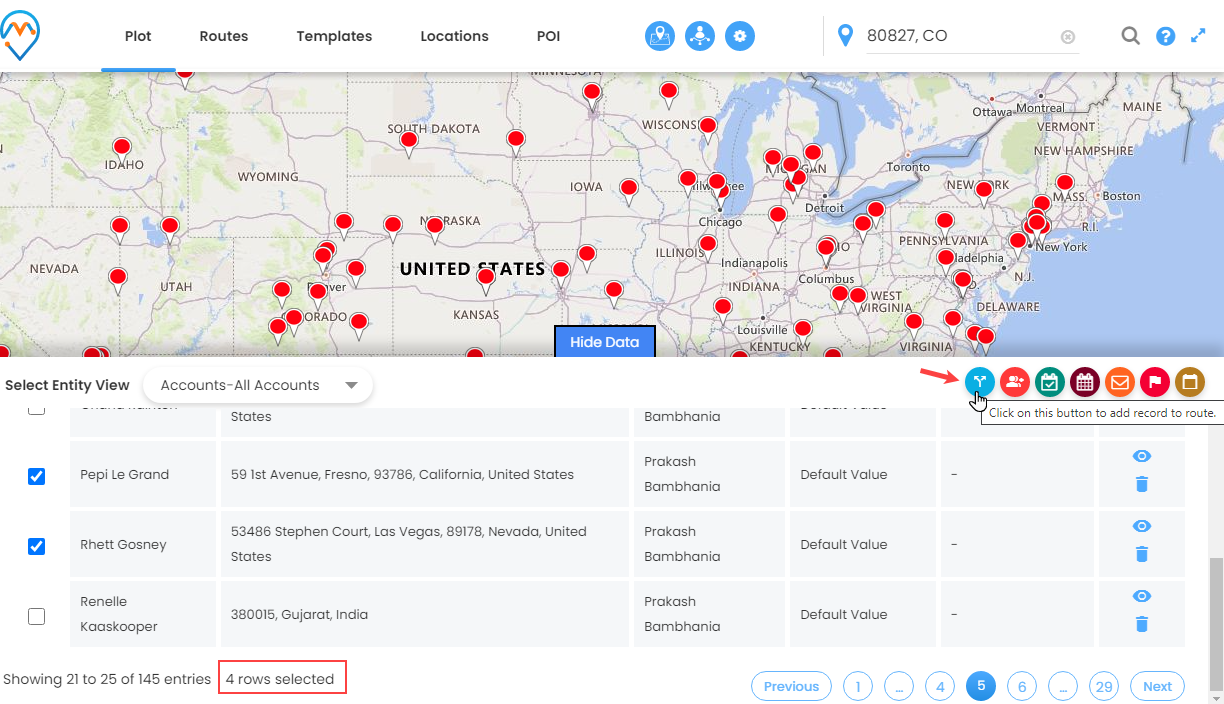
By clicking on the “Route” icon, the records will be added to the route. Click on the “Routes” menu and click on the “Go” button to add the direction between the added routes.
The direction will be set between the selected records as per the Bing map’s SPF(Shortest Path First) algorithm.
You will get the details of the direction with the traffic details on the right side.
So, Bianca, a sales executive can also add the records to the Route search from the Data Grid, and without asking the location, she reaches out to clients’ locations for the appointment or the meeting.
In this way, you can reach out to the customers by Route search options just on the go from anywhere.
AppJetty MappyField 365 is integrated with the Bing maps, so you can search the Routes and get the direction in just a few clicks for any fieldwork. MappyField 365 provides to manage the CRM Records on the map and visualize the geo-based records on the map, you can manage your sales activities, marketing campaigns & many other activities from the map itself.
If you want to know about any feature regarding AppJetty MappyField 365, feel free to reach out to us at [email protected] or you can just click on the “Contact Us”.
All product and company names are trademarks™, registered® or copyright© trademarks of their respective holders. Use of them does not imply any affiliation with or endorsement by them.


