

When a salesperson is on the field they need their software to support them and give them all the details quickly. That’s why having a collection of information about each record right in the app is a great way to do it. These tooltips are set up to appear only when you look for them.
The sales manager or DynamicsCRM user with administrator rights can configure the entity details in MappyField 365 to be displayed in the Entity Records (pushpin) details.
Once the DynamicsCRM records are plotted on the map, your team member will get the record details as you have configured in ‘Entity Mappings’.
MappyField 365 users will get the highlight of the records by hovering the mouse over the plotted record (pushpin) and by clicking on the record, you will get the details of the record in the detailed slider.
Tooltip shows quick information about the record when hovering the mouse cursor over the pushpin and Detail attributes appear in the detailed slider by clicking on the specific record.
Follow the below steps to configure the tooltip and detail attributes:
– Navigate to Entity Mappings
– Configure the details of the tooltip attributes and detail attributes
– Plot the entity records on the map
– Get the tooltip (popup) by moving the cursor on the pushpin
– Get the details of the records by clicking on the pushpin
Step-1: Navigate to “Entity Mappings”
Go to Entity Mappings to configure and setup the entity to be displayed on the map. Here the ‘Account’ entity is selected.
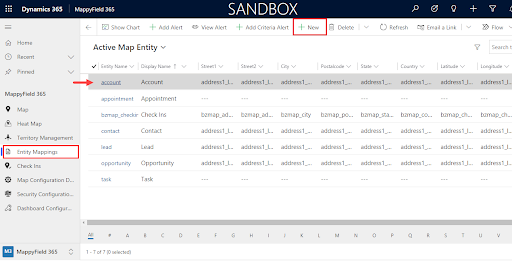
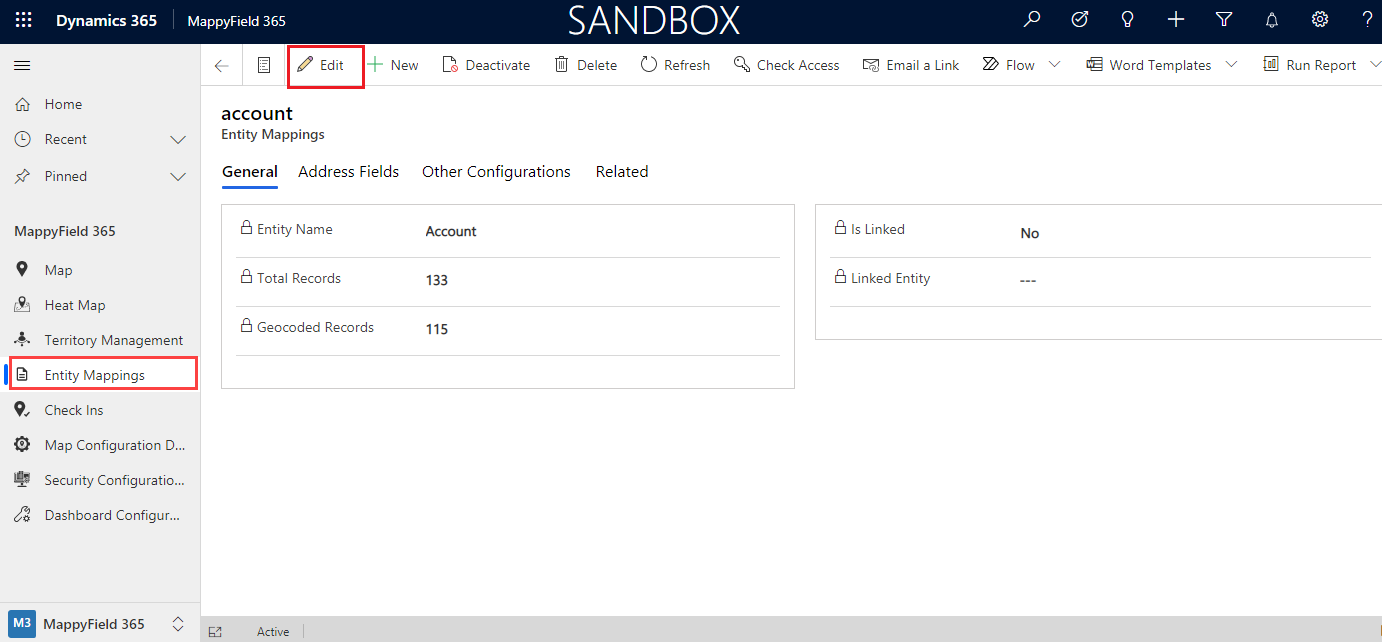
By clicking on the entity, you will navigate to the entity detail page. Here from the header, you will get different action buttons.
By clicking on the Edit button it will open the new tab which contains the entity map configuration for the selected entity.
Step-2: Entity To Map
From here you can configure the ‘Tooltip attributes’ and ‘Detail attributes’ for the slider.
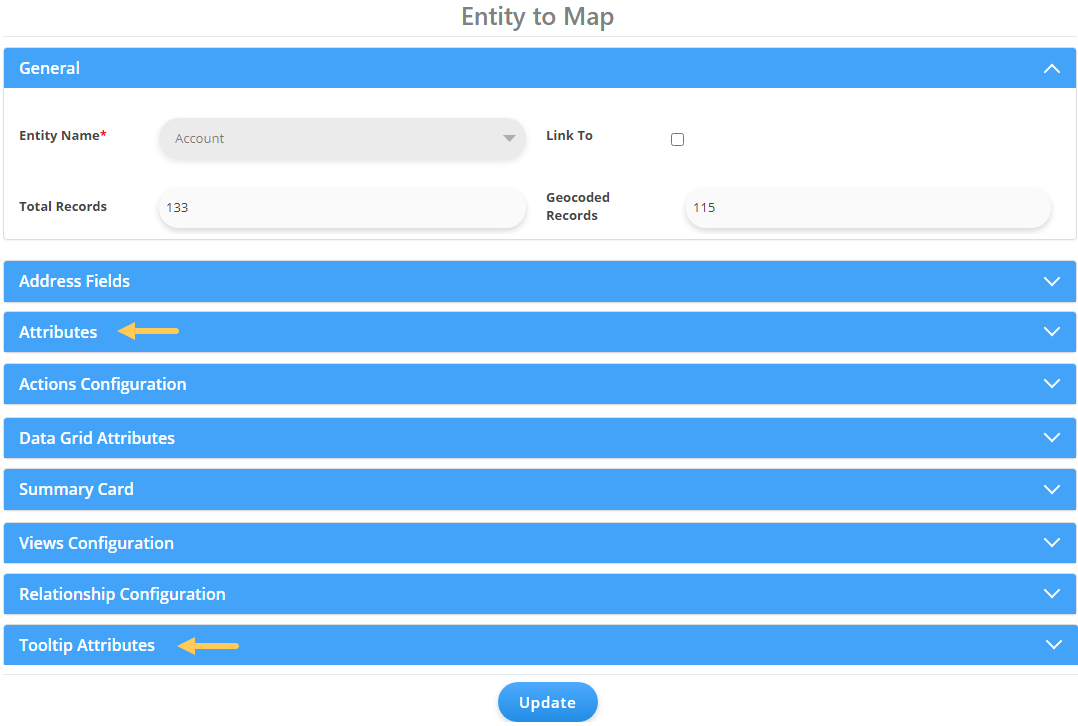
Step-2[A] Click on the ‘Tooltip attributes’ tab to set up tooltip data
Navigate to the ‘Tooltip Attributes’ tab. You can select up to 10 tooltip attributes to display in the tooltip while the mouse cursor moves over the record (any specific pushpin). You can also set up the ‘Display Name’ of the selected attributes that will display on the tooltip.
Select the Attributes and edit the Display Name.
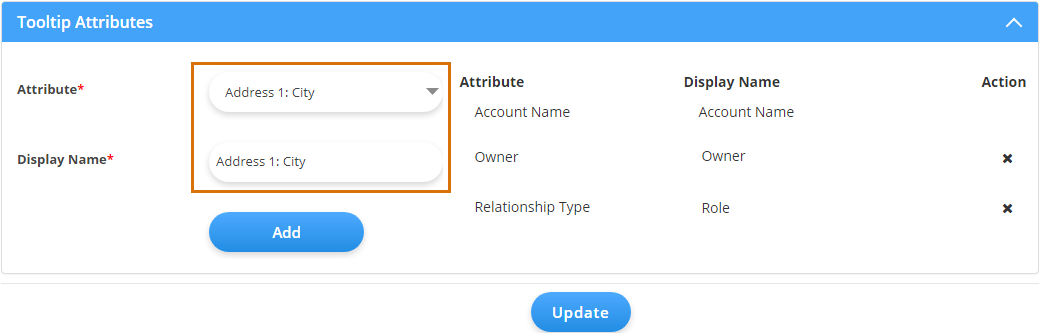
Click on the Add button to add the attribute to the list. You can remove, by clicking on the remove x icon from the Action column.
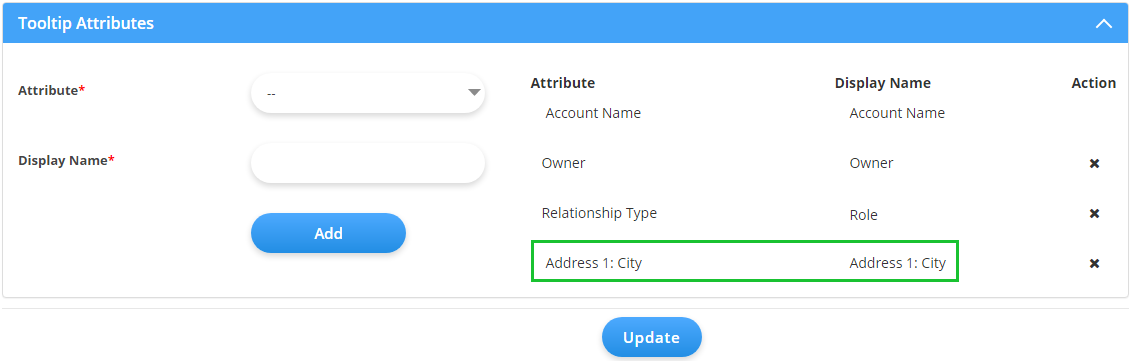
Once you configure the ‘Tooltip Attributes’, click on the Update button of the Entity To Map.
Step-2[B] Click on the ‘Attributes’ tab to set up for slider details
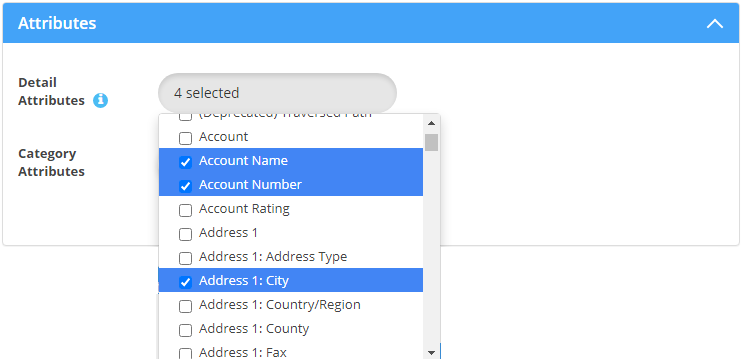
Navigate to the ‘Attributes tab’. Here you can select up to 10 Detail attributes to display while clicking on the record (any specific pushpin).
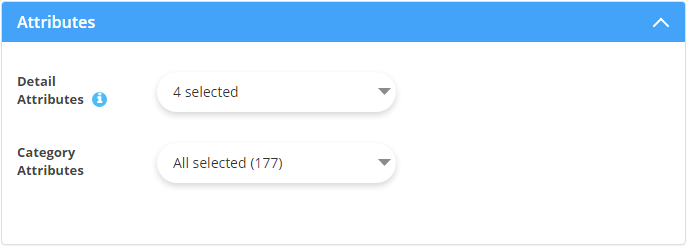
Select the Detail Attributes from the dropdown list.
Category Attributes are the ones that appear in the dropdown for the ‘category’ selection. You can select as many attributes as you want for category selection.
Once you configure the ‘Detail Attributes’, click on the Update button of the Entity To Map.
Similarly, you can configure the ‘Tooltip Attribute’ and ‘Detail Attribute’ for another entity.
Step-3: Plot the Entity Records
Navigate to the Map section. From the ‘Plot’ tab, select the ‘Entity’ and its ‘View’ to plot the records on the map.
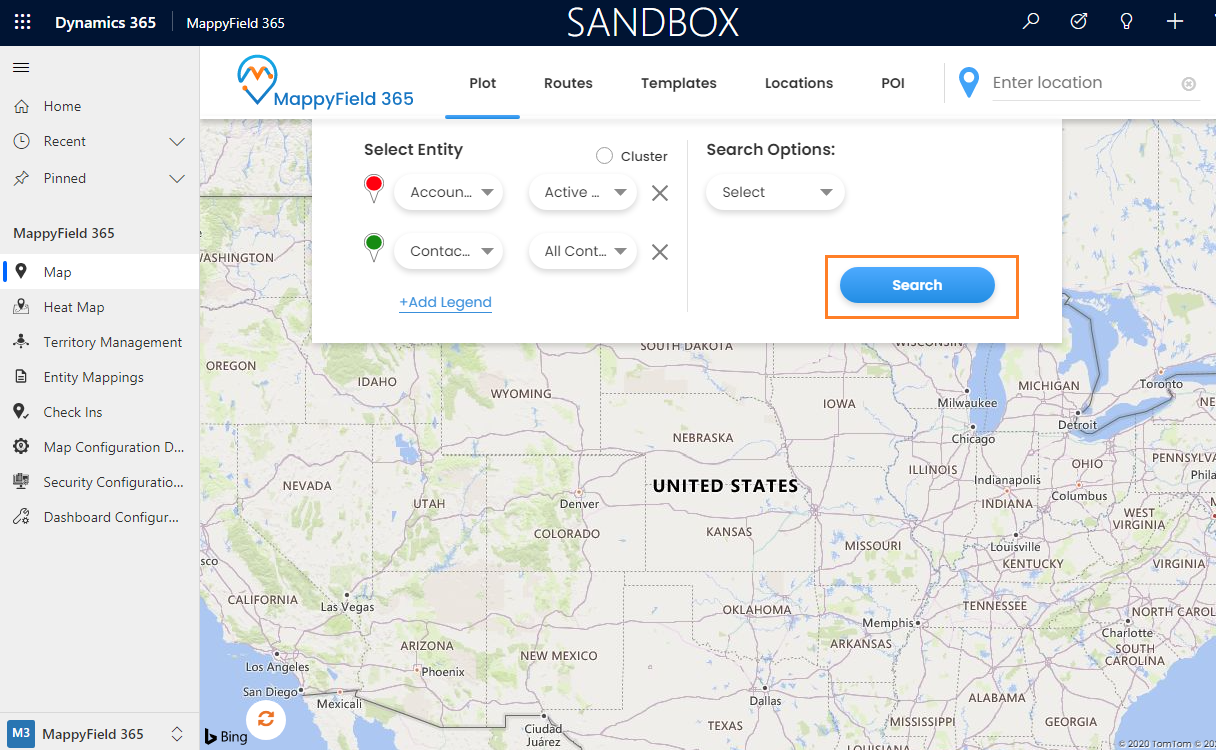
By clicking on the Search button, the entity records will be plotted on the map.
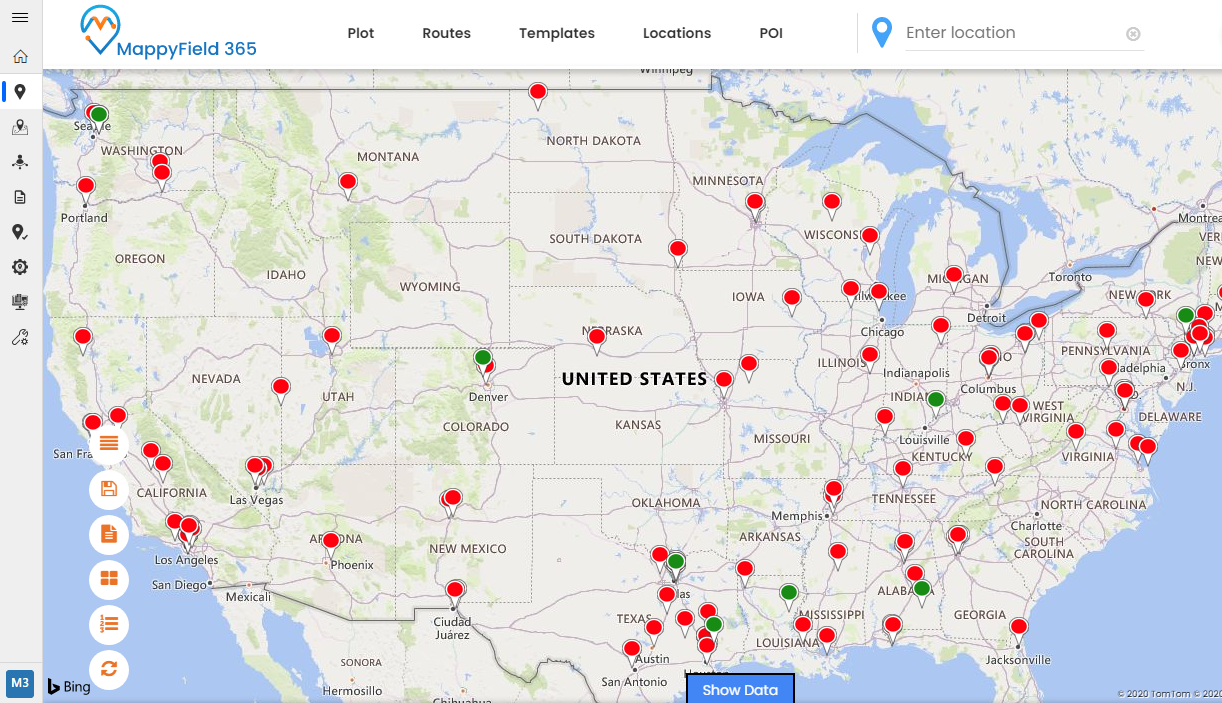
All the pushpins are the records of the entity.
Step-4: Visualize Tooltip and Detail attributes on the map
Visualize the Tooltip and Details attributes on the map.
Step-4[A]: Tooltip Attributes
Once the entity records are plotted on the map. you will get the ‘tooltip’ by hovering on any pushpin. You can see the information in the tooltip as per the ‘Entity Mapping → Tooltip Attributes’ configuration.
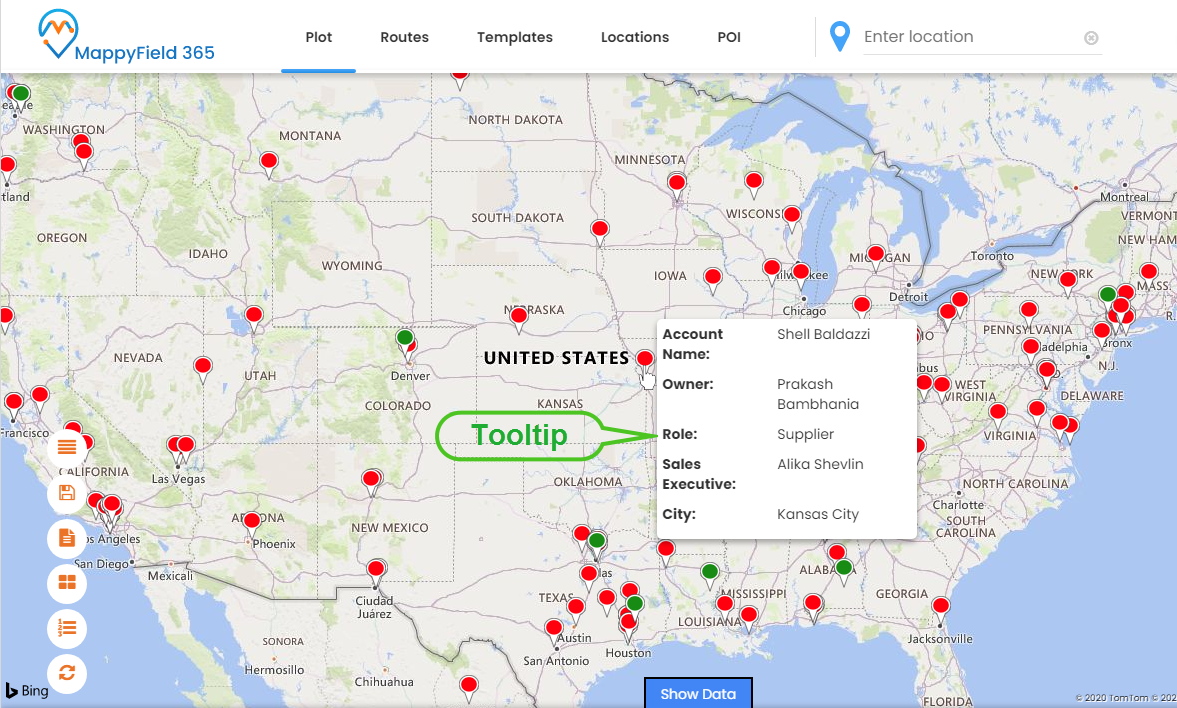
By moving the mouse cursor on the pushpin, you will get just a highlight of the records as a tooltip.
Step-4[B]: Detail Attributes
By clicking on any pushpin, the detailed slider will appear from the right side where you will get details related to that record as per the ‘Entity Mapping → Attributes’ configuration.
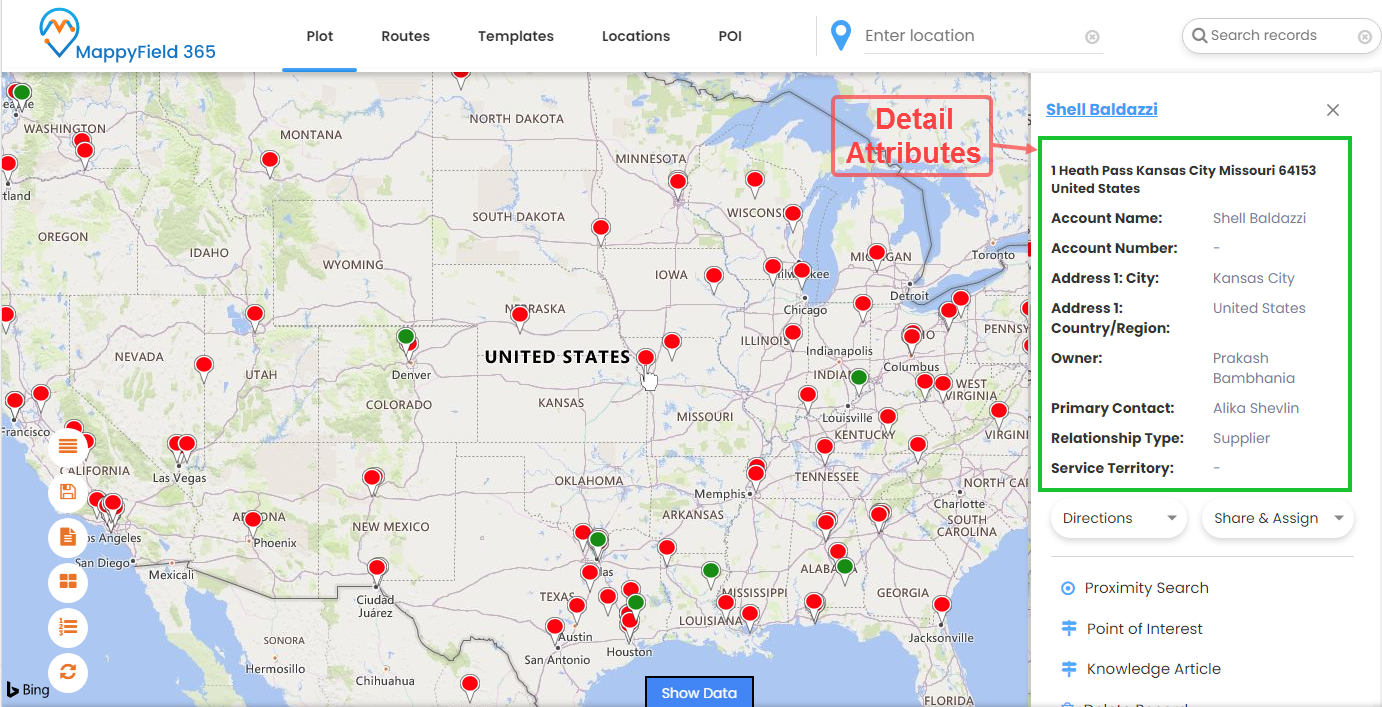
From the detailed slider, you can perform different actions for the selected record.
Being a sales manager with DynamcisCRM administrator rights, you can configure the Tooltip and Detail Attributes for any entity from the Entity Mappings and as per the configuration, you and your team will get information in the tooltip and the detailed slider.
Dynamics CRM Mapping tool helps to plot your CRM data on the map and manage your sales activities.
To take a closer look at how useful the tooltips are on the map, feel free to reach out to us at [email protected] or you can also tweet at us at @appjetty.


