

Staying on top of schedule is important for salespeople. They have to meet the clients they have appointments with while ensuring they don’t miss out on anything. MappyField 365 – A Dynamics CRM Mapping Tool makes it easy for them to plan schedules by allowing them to add multiple tasks and appointments quickly. With a few clicks, you and your sales team can create activities from a map using Dynamics CRM Map Integration.
Let’s see how to do that with MappyField 365.
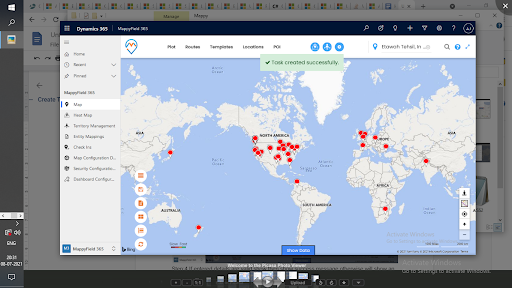
Step 1: Log in to the Dynamics 365 and navigate to MappyField 365.
Step 2: Click on the Map tab in the left corner.
Step 3: Plot the records on the map by selecting the entities.
Step 4: Right click on the pushpin to open the context menu.
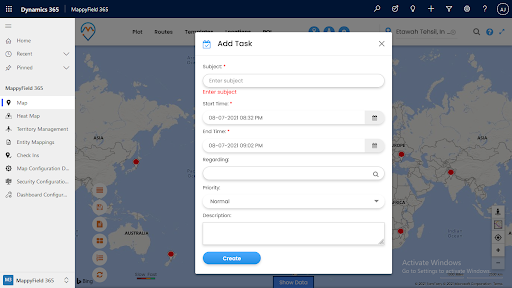
Step 5: Click on the Add Task or Add Appointment button from the available list.
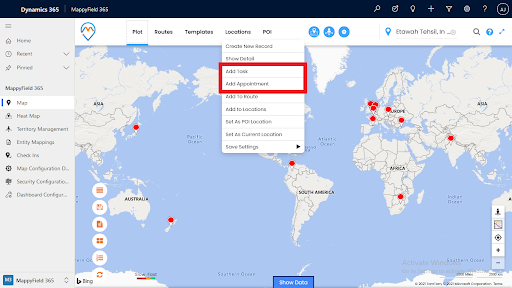
Note: You can also select any record on the map. Right click on the pushpin and you can add the task/appointment for that particular entity.
Create Task
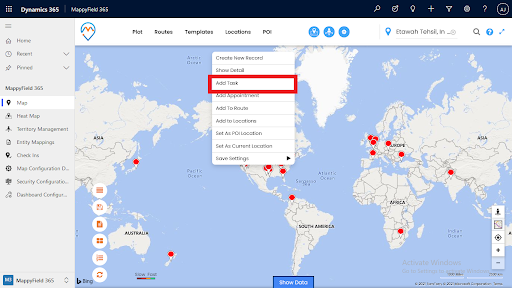
Step 1: To create a task, click on Add Task Button on the context menu.
Step 2: Enter valid details for the task such as subject, start date, end date, set the purpose or the person for whom you’re creating the task, select priority, and provide a brief description of the task.
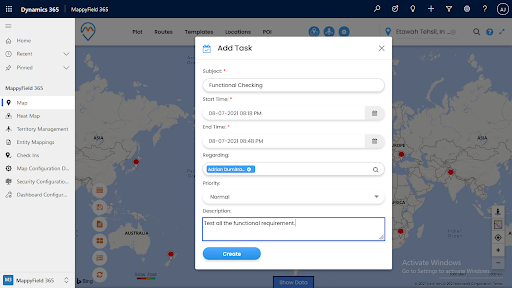
Step 3: After inserting the required details, click on the Create button to add a task for the selected record.
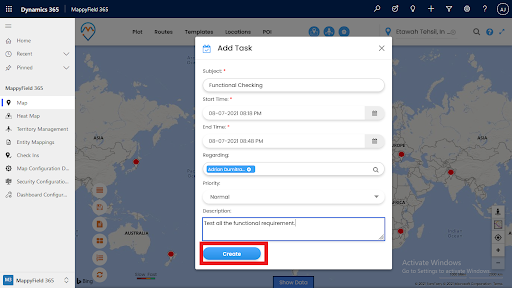
Step 4: By clicking on the Create button, the task details will be added for that record only if the details entered are valid.
If entered details are valid, it will show the success message.
If entered details are improper or missing, it will show a validation error.
Similarly, you can add an appointment by clicking on the “Add Appointment” button.
Add Appointment
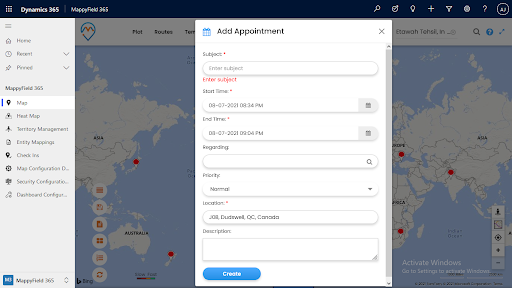
Step 1: To create an appointment, click on Add Appointment Button on the context menu.

Step 2: Enter the valid details to create the appointment. This includes subject, start date, end date, the person or purpose of the appointment, priority, location, and a brief description of the appointment.
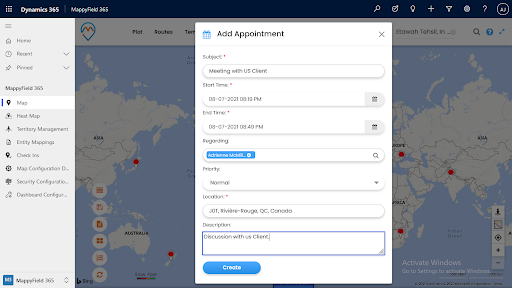
Step 3: After inserting all the details properly, click on the Create button.
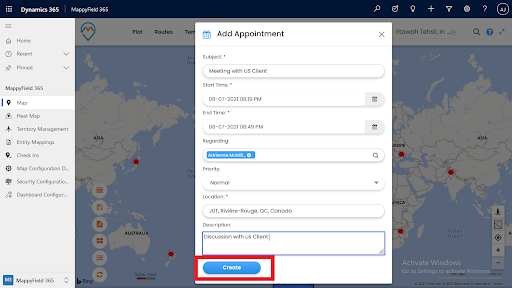
Step 4: The appointment is created. You can view it from the CRM side.
Note: The appointment will be successfully created only if the entered details are valid. If you see a success message on the screen, then the appointment is created.

If the details are invalid, it will show a validation error message.
You can view the added tasks and appointments by navigating to the entity records or details of that activity.
Hope this guide helps you in managing your tasks and appointments. It surely comes in handy for on-field reps as they can easily add tasks or appointments right from Dynamics mapping software.
All product and company names are trademarks™, registered® or copyright© trademarks of their respective holders. Use of them does not imply any affiliation with or endorsement by them.


