

Creating targeted marketing lists doesn’t have to be complicated. With Dynamics CRM map integration, you can simplify the process and reach customers more effectively. This tool helps you easily segment your audience based on location and other criteria.
You’ll save time and make sure your marketing efforts are focused. In this blog, we’ll guide you on how to create these lists using Mappyfield.
These steps will allow you to organize, assign, and engage your contacts in just a few clicks. Let’s dive in and make connecting with your customers much easier.
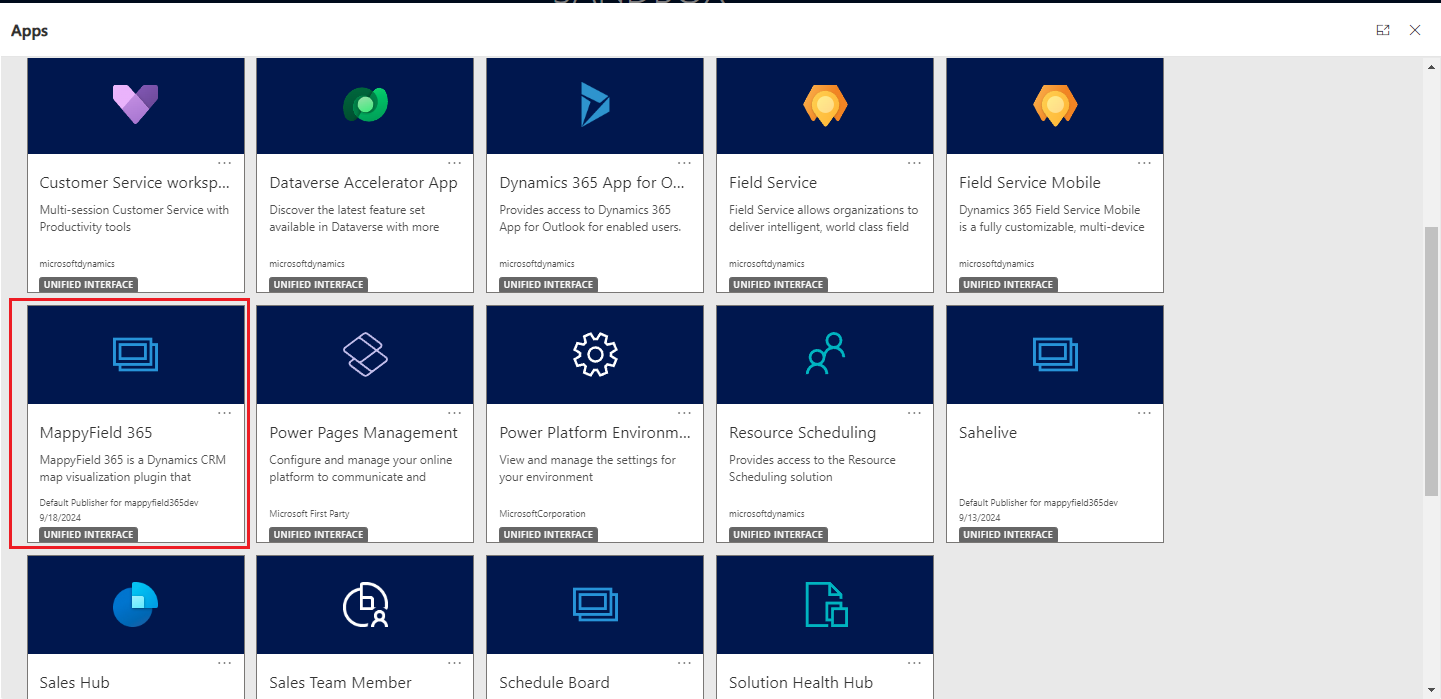
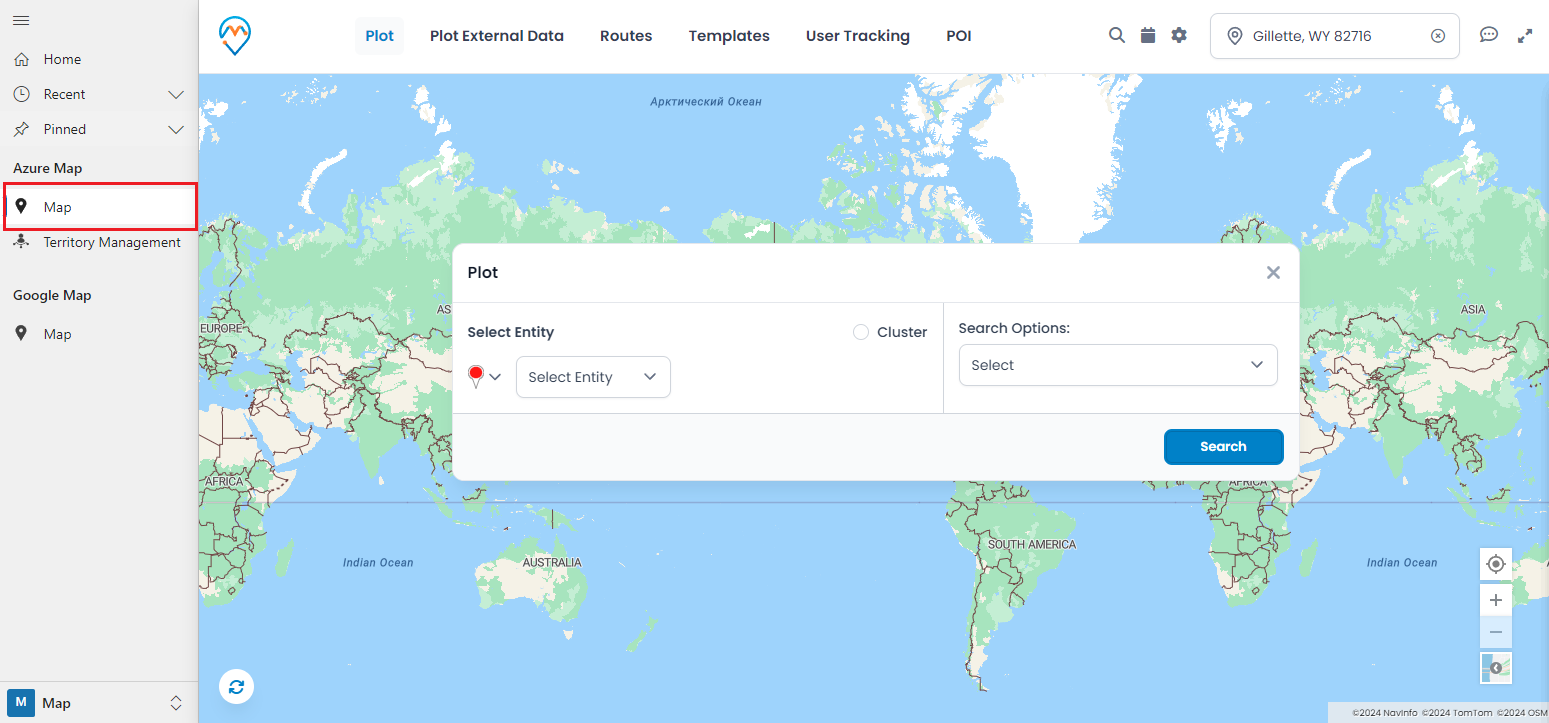
Step 1: Redirect to the “Map” page
After logging into Dynamics 365, click on “MappyField 365” from the Dynamics 365 apps dashboard.
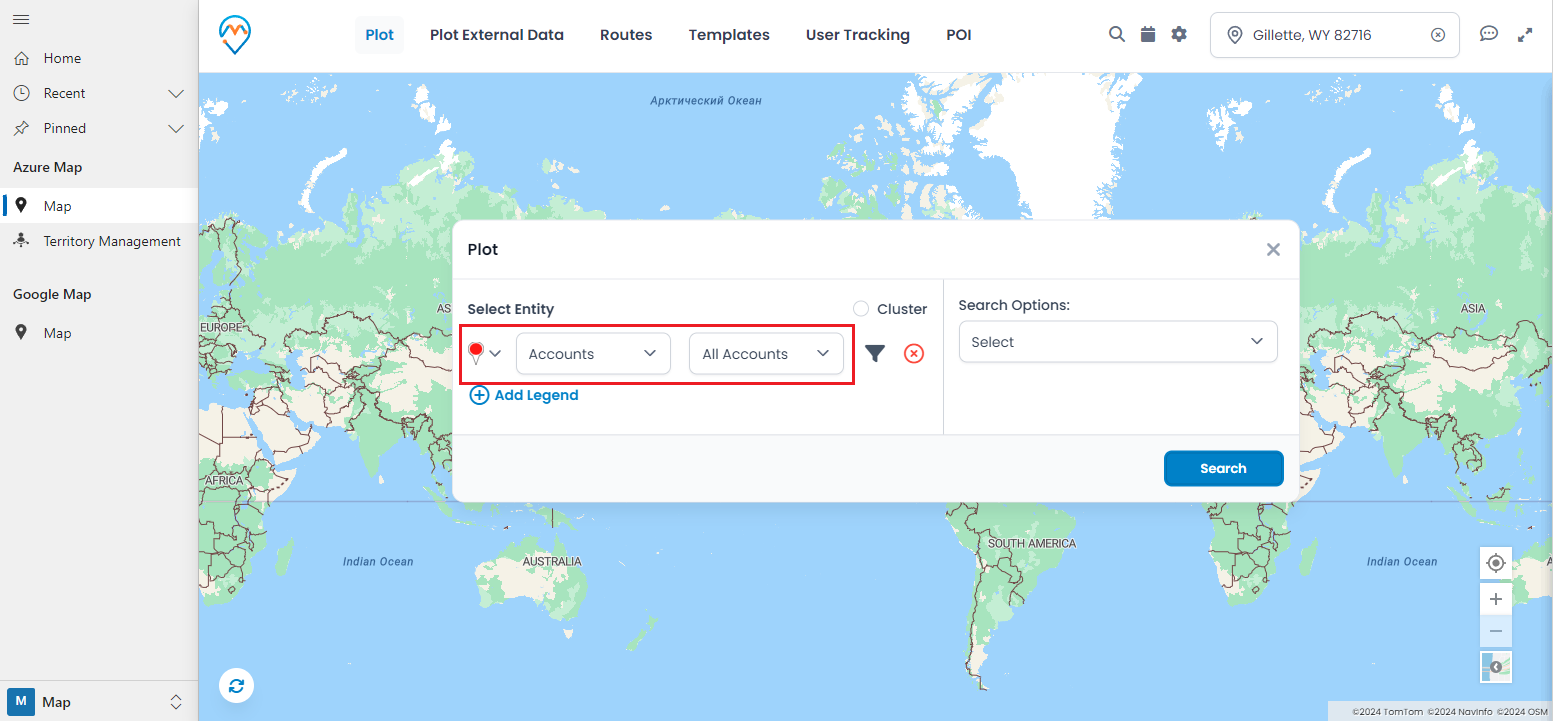
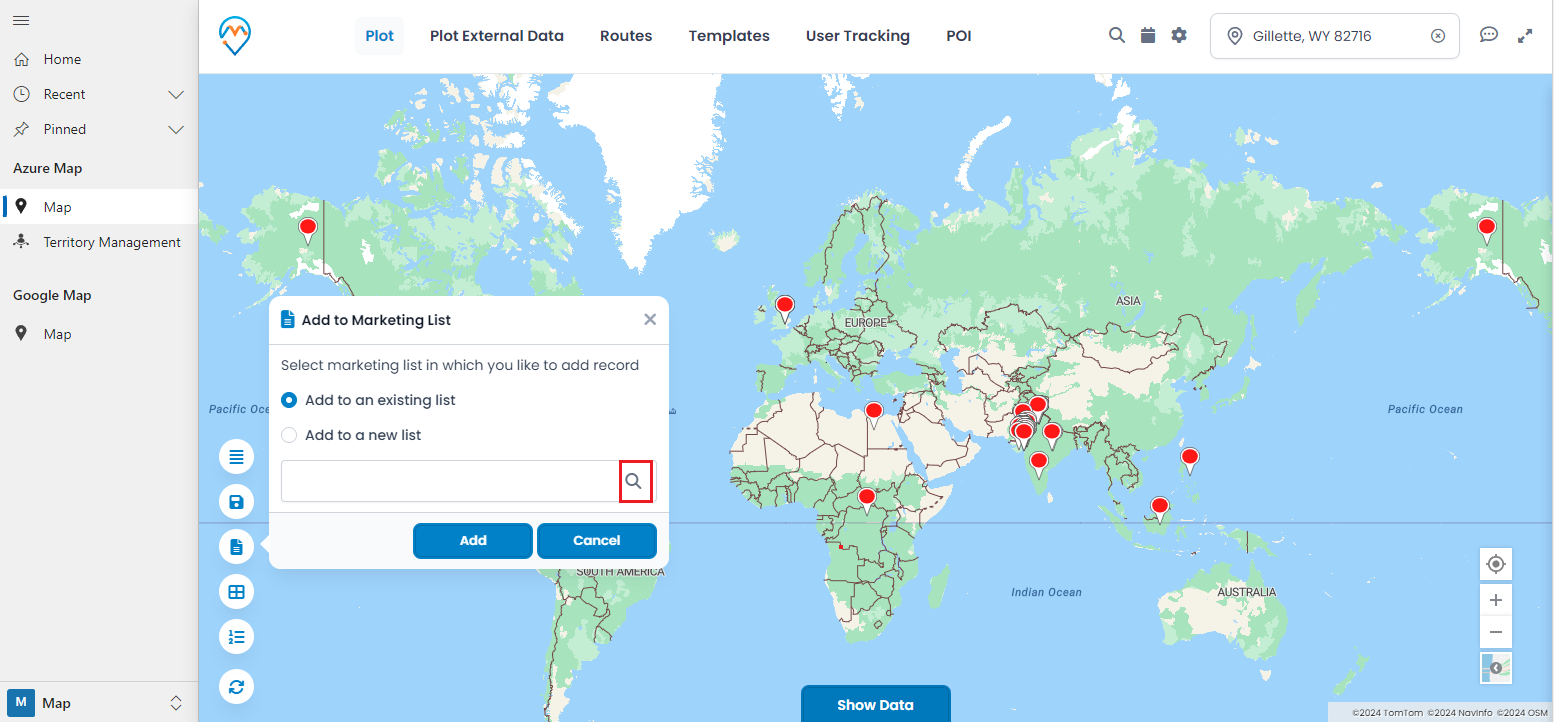
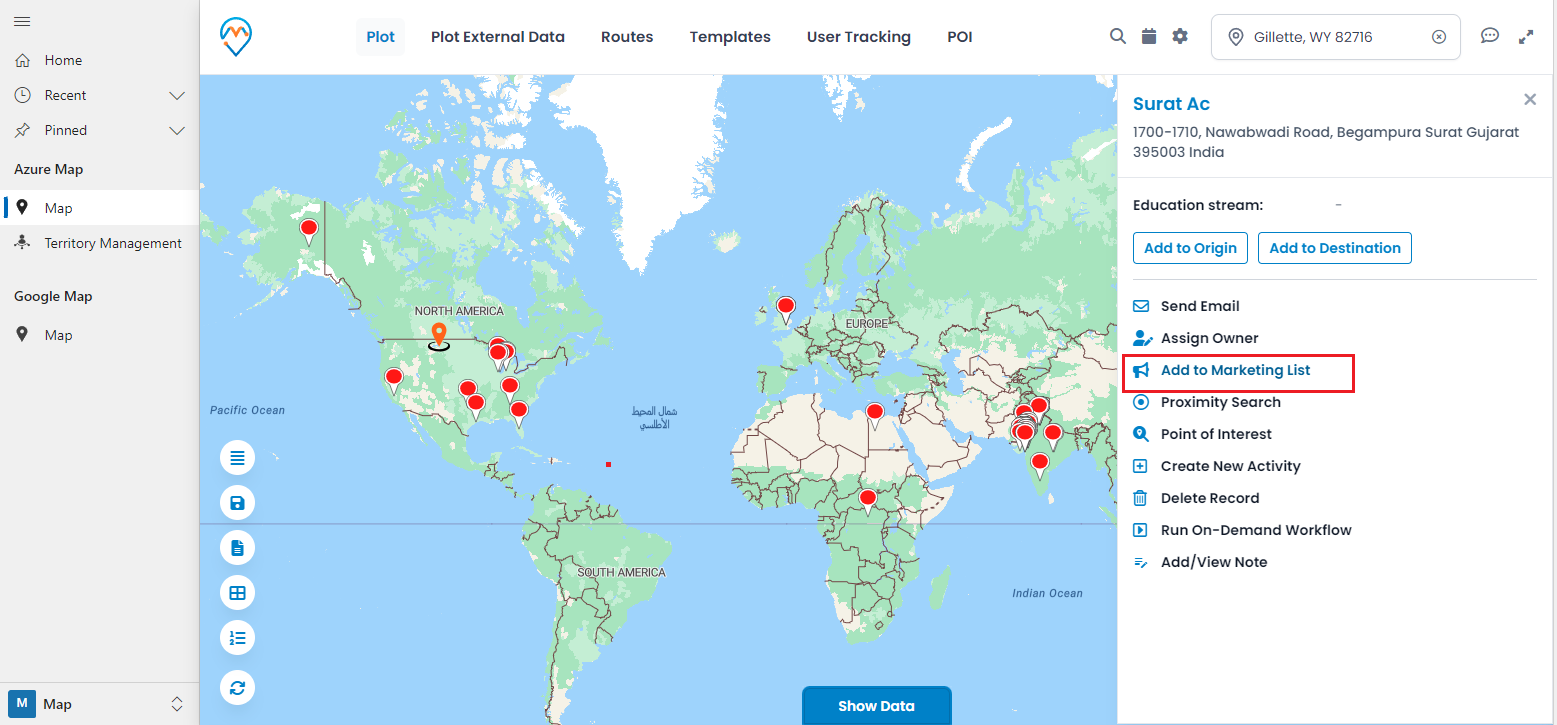
After mapping all the records, choose the ones you’d like to add, then click the “Add to Marketing List” button. Two options will appear: “Add to Existing List” and “Add to New List.”
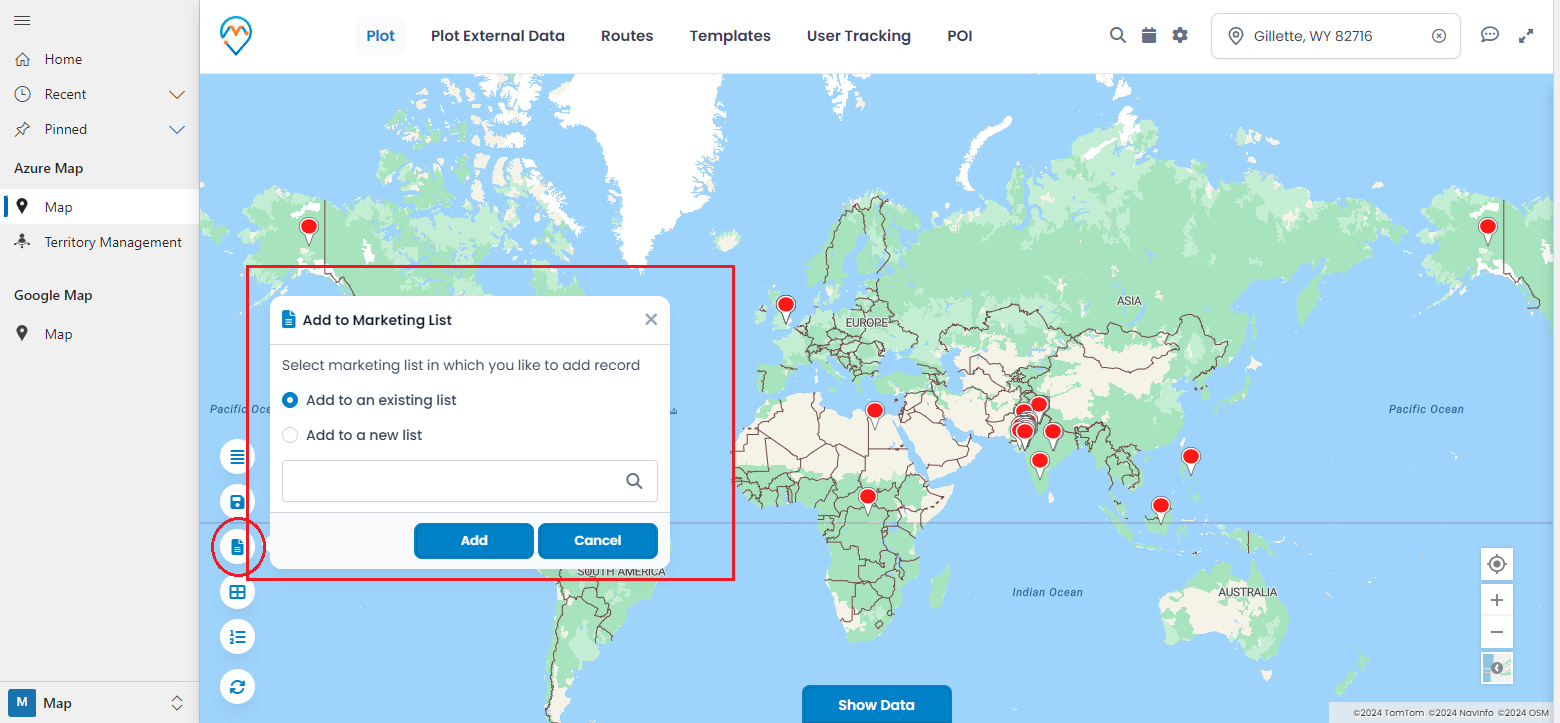
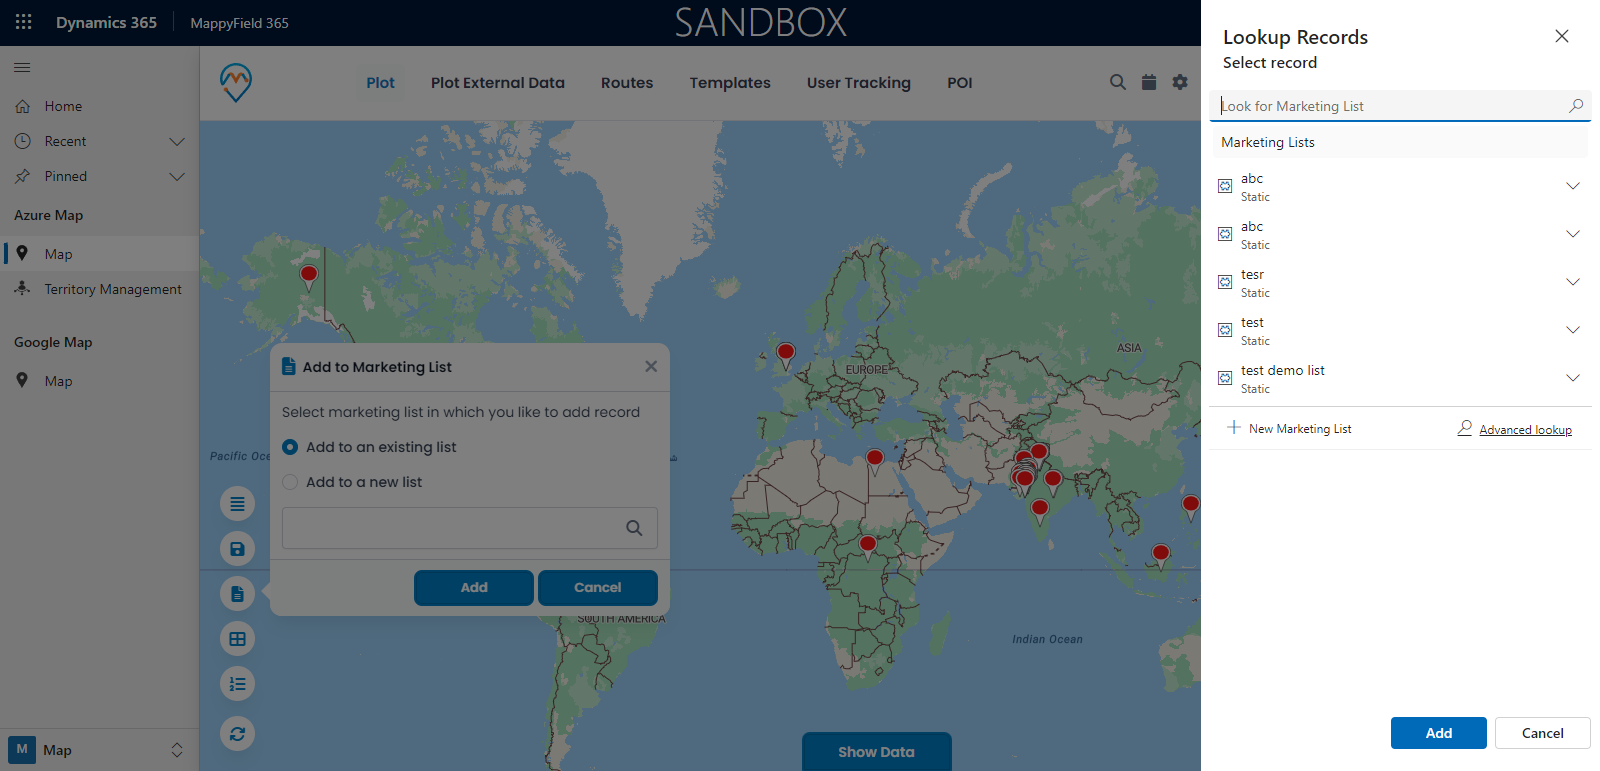
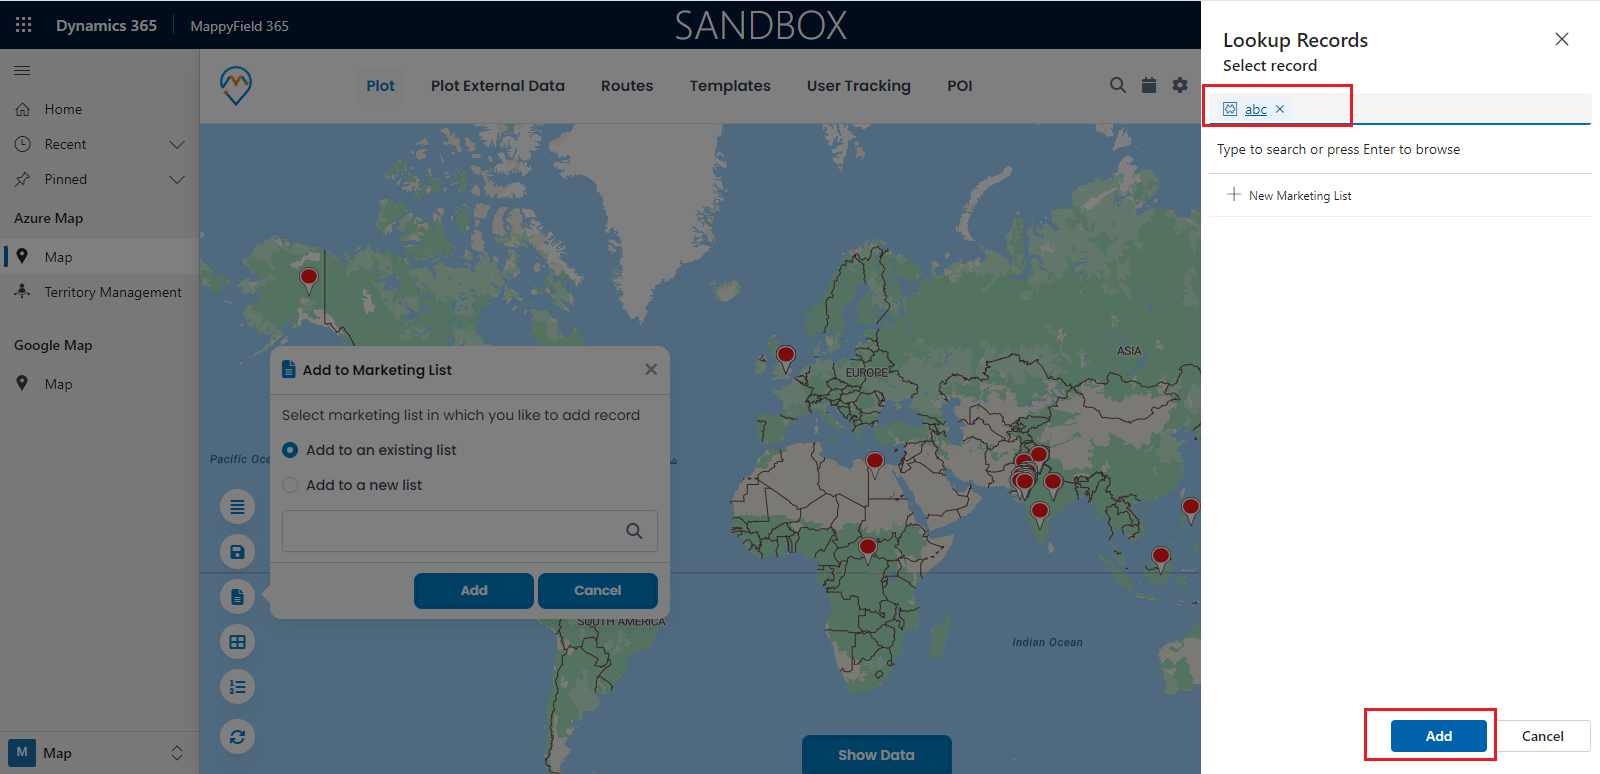
– Clicking the “Add to Existing List” search button will display all available marketing lists in Dynamics CRM.
– Select the desired marketing list, then click the “Add” button to save the records to that list.
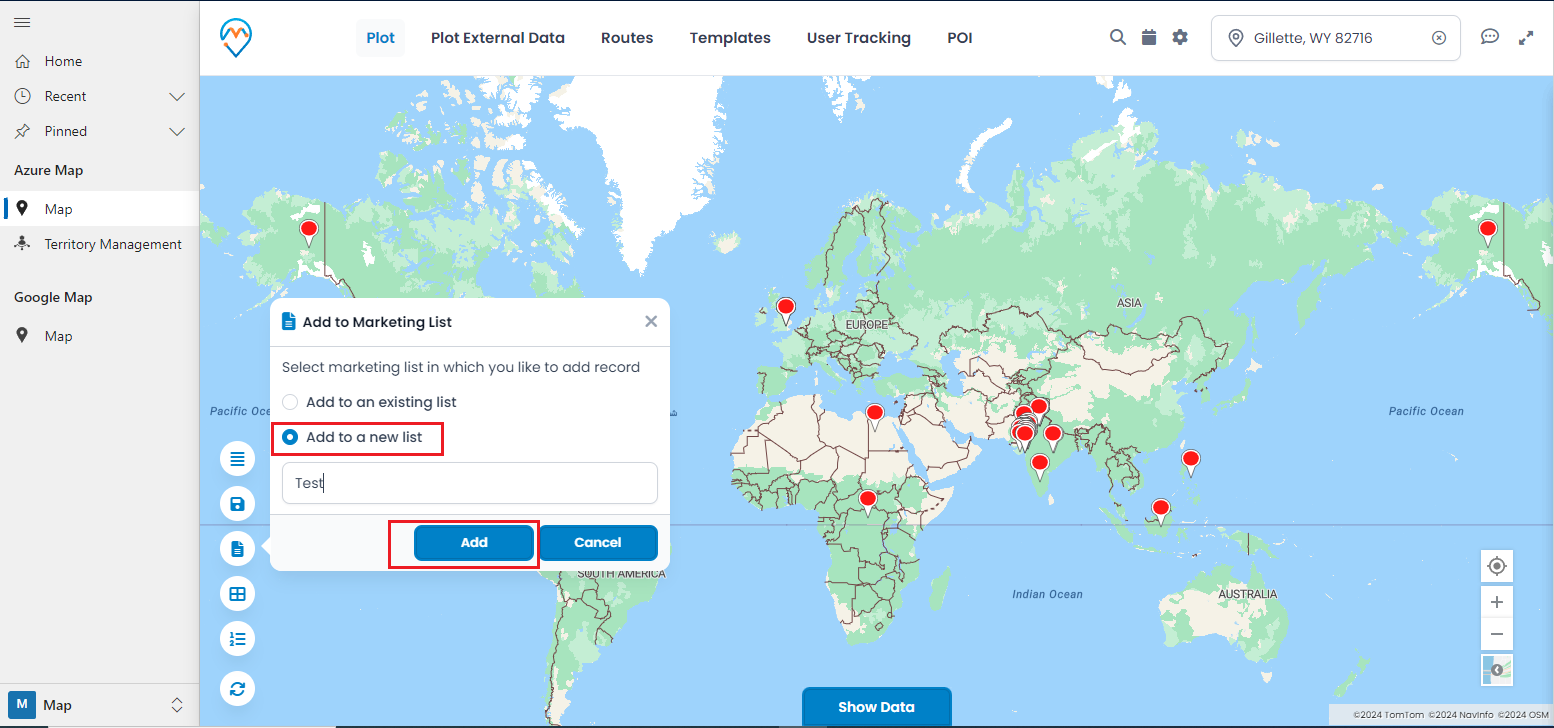
– Select the “Add to a new list” button. When you choose this option, you can enter a name for the list based on your preference. After entering the name, click the “Add” button to create a new marketing list and include records in it.
– Select any record or pin from the map.
– Hover over “Save & Assign,” then click on “Add to Marketing List.”
All product and company names are trademarks™, registered® or copyright© trademarks of their respective holders. Use of them does not imply any affiliation with or endorsement by them.


