

Previously, we wrote all about market research survey. What it is, why conduct such surveys, types of market research surveys, and more. In this blog, we are simply going to cover how to craft a market research survey using our Sugar CRM extension, Survey Rocket.
Step 1: Install the Survey Rocket into the SugarCRM.
Log-in as Administrator into SugarCRM.
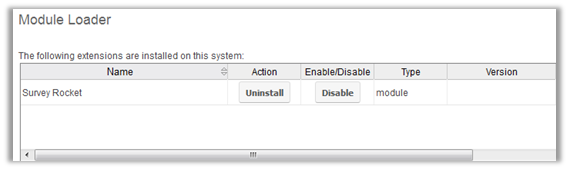
Navigate to the Administration page → Click on ‘Module Loader’ to install the package.

After a successful installation, you can see the Survey Rocket in the Installed plug-in list in the ‘Module Loader’ page.
Step 2: Activate the plugin
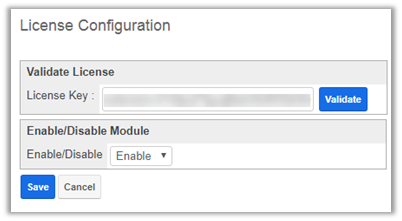
Enter the License activation key provided by AppJetty. Then click on Validate and then save the settings to activate the plugin.
Step 3: Create a Market Research Survey
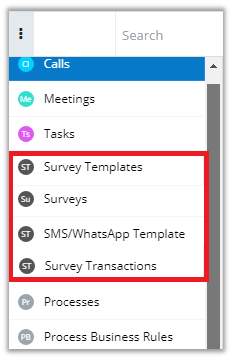
After activating the Survey Rocket plugin, you will get the Survey related options in the SugarCRM menu.
You can create a survey either by choosing a template from the Survey Templates option or create a survey from scratch from the Surveys page.
In this instance, we’ll show you how to create a survey from scratch.
Once you select the ‘surveys’ option, you will find the following options:
→ Details Page
→ Survey Welcome Page
→ Survey Pages
→ Thank You Page
→ Advanced Survey Configuration (Automatic Survey Reminders)
You will get the default content and design for Survey Welcome & Thank you pages, but you can customize as per your requirement.
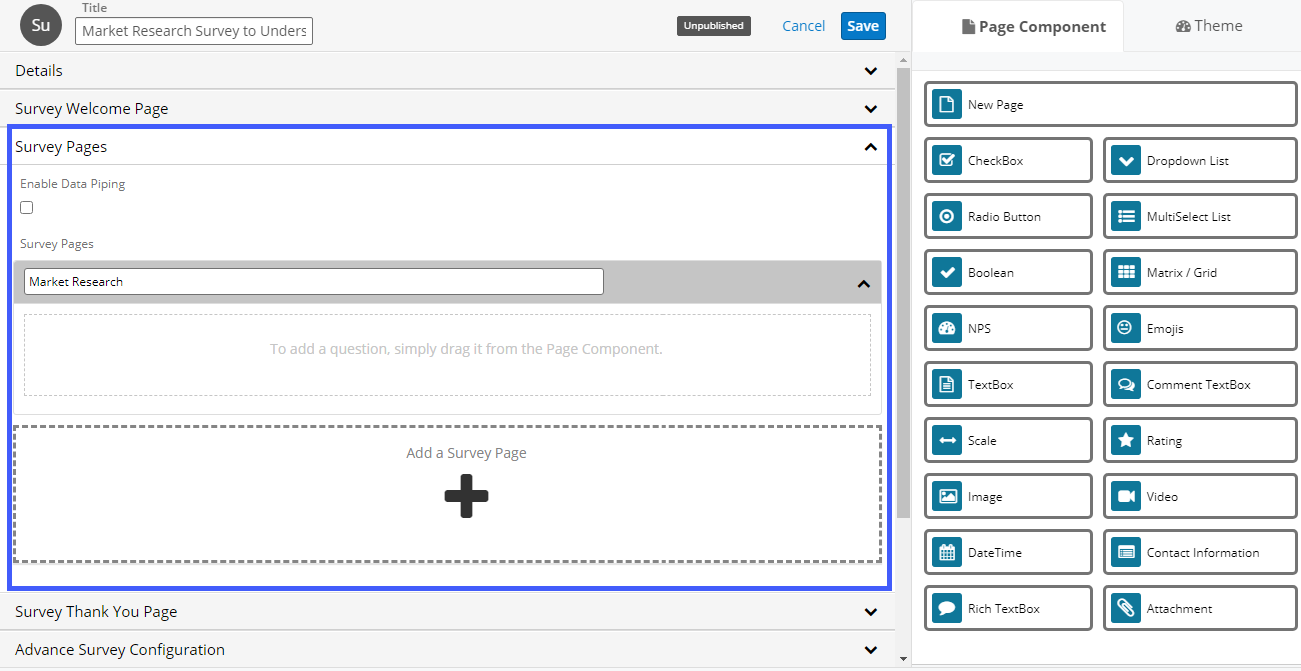
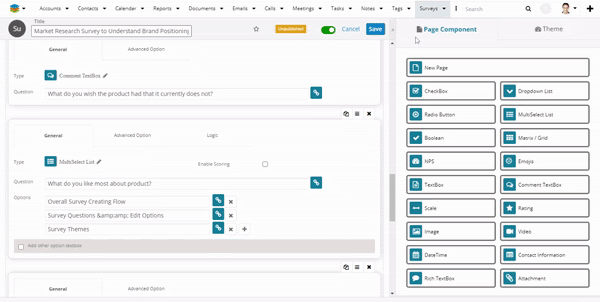
After making the changes in the welcome page, navigate to the Survey Pages to create a market research survey with different question types like dropdown list, rating, NPS, etc. with our drag and drop survey builder. Just pick the type of question, drag it to the survey pages section and drop it there.

Add the necessary data like the question, options, etc.
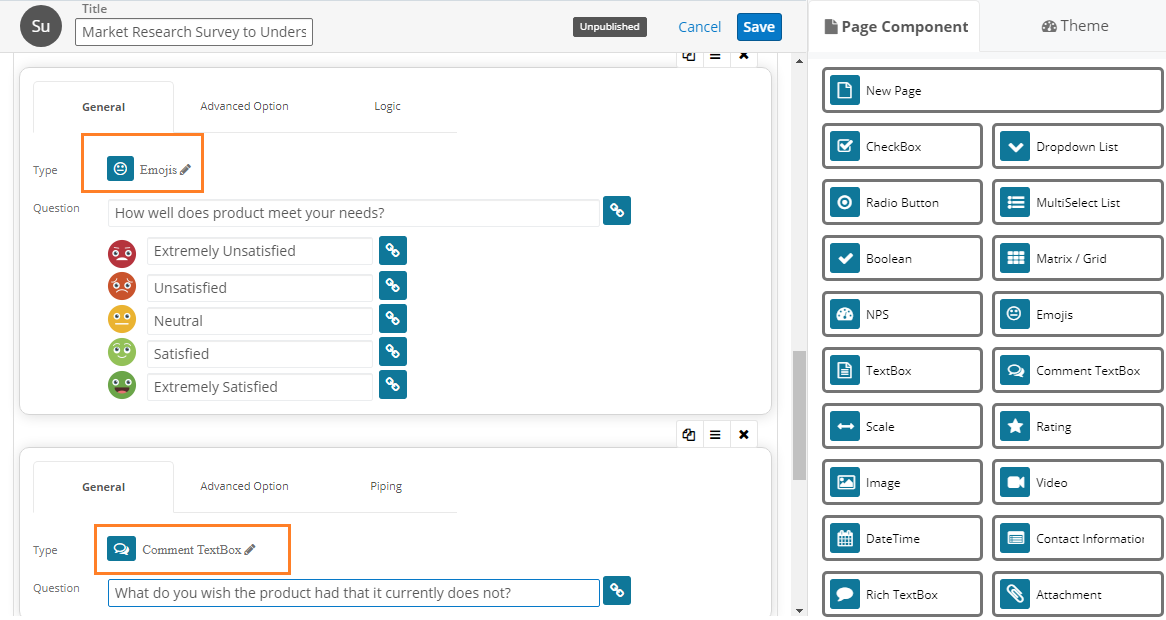
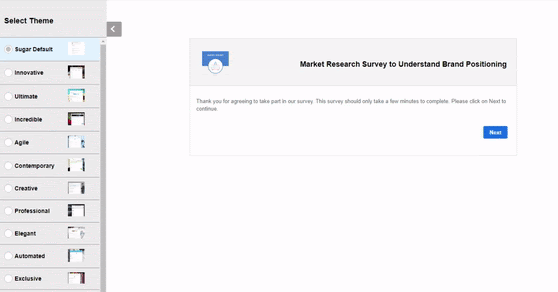
Once you are done adding questions, choose a relevant theme for the survey from the ‘Themes’ tab as shown in the GIF.
Now Save the Survey.
Step 4: Preview the Survey before Publishing
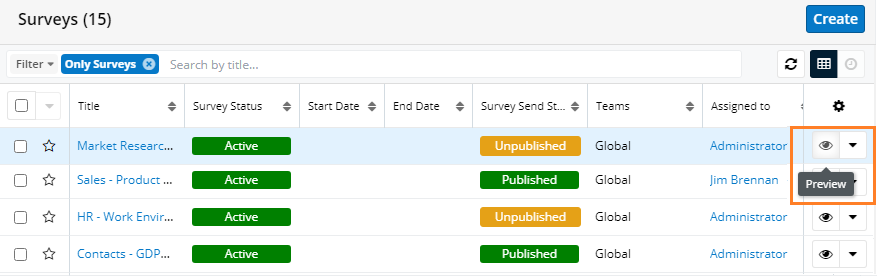
Here’s a quick preview of the Market Research Survey we created:
After previewing your survey, you can edit the Survey and change/update the questions, design, and add the starting and ending dates of the survey and other details from the Details section.
Survey Details page
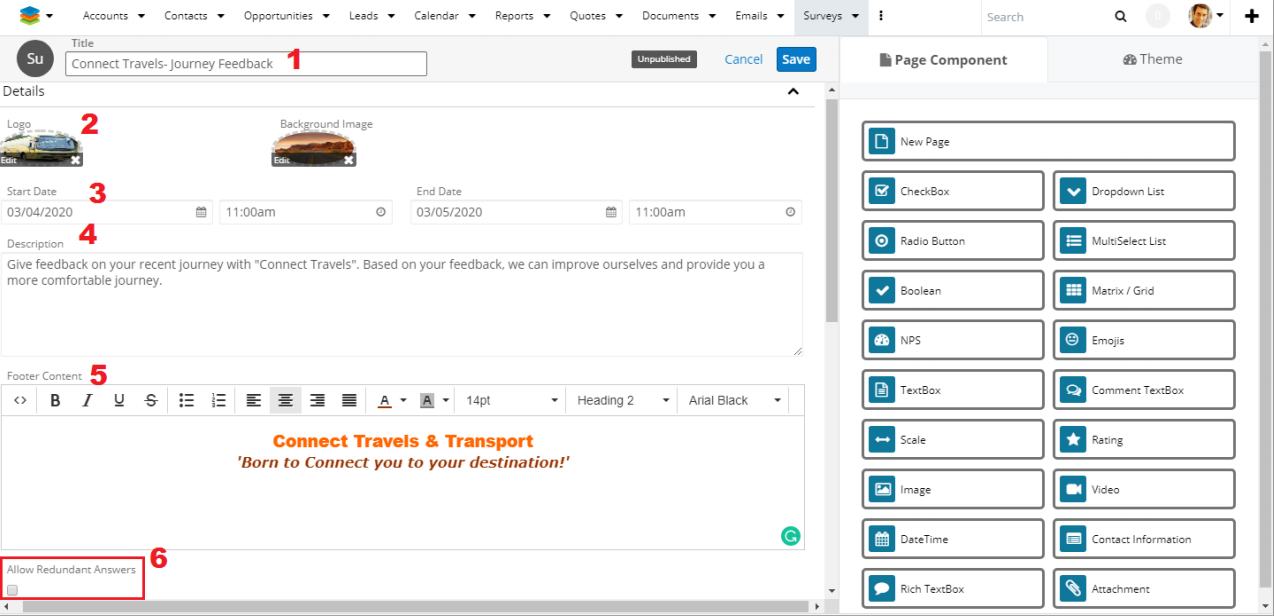
→ Add the survey title.
→ Upload a logo and set background image if any.
→ Insert the duration of the Survey, when you want to ‘Start’ and want to ‘End’ by inserting starting and ending date & time.
→ Add the description of the survey.
→ Insert Footer Content as per your business identity.
→ By ticking Allow Redundant Answer option, the customer can send in multiple responses from a single IP and the last submitted response will be stored as final.
Once you’ve edited the survey, save the changes, and publish it. You can get a shareable link to the survey and start sharing it with your customers.
In this way, you can craft a survey in a matter of minutes using Survey Rocket and then send it across without much hassle.
AppJetty has an all-inclusive and no investment partnership program for our tool, Survey Rocket. Affiliate with us through this program and expand your business. Interested? Learn more about the program from here.


